3D printer belt tension seems like a simple thing to deal with — you set the tension and then check it’s good now and then. If it gets really loose, then the teeth can slip and you’ll get some shifts in the print, ruining it, but its an easy fix. But, we hear you ask, how do you determine what the correct tension is? Well, here’s [Lost in Tech] with a video showing some measurement techniques and analysis of a typical 3D printer, (video, embedded below) using nothing more special than a set of luggage scales. A simple theory suggested was that a tighter belt tension would result in increased radial load on the stepper motor bearings, which in turn, due to friction, would result in an increase in temperature of the motor. After setting a few tension values on one of the belts, it was noted that tension values at the upper end of the range, resulted in a measured increased in temperature of two degrees celcius, and a large increase in noise. This can’t be good for the motor.
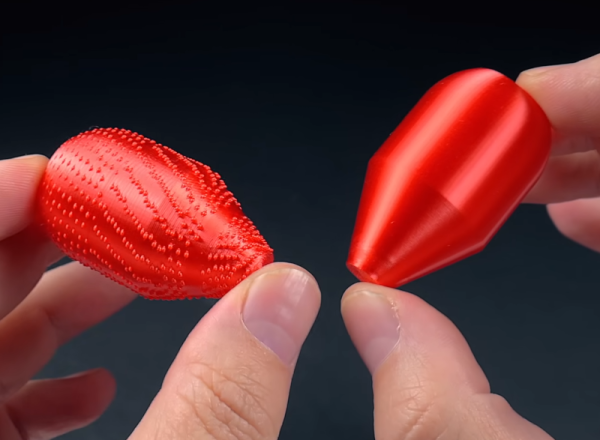
We’ve seen this funky dual disk polar printer already recently, but [Heinz Loepmeier] has been busy working on it, so here’s an update. The primary focus here is nozzleboss, a blender plugin which enables the surface textures of already sliced objects to be manipulated. The idea is to read in the gcode for the object, and convert it to an internal mesh representation that blender needs in order to function. From there the desired textures can be applied to the surfaces for subsequent stages to operate upon. One trick that nozzleboss can do is to create weight maps to tweak the extrusion flow rate or print velocity value according to the pixel value at the surface — such ‘velocity painting’ can produce some very subtle surface effects on previously featureless faces. Another trick is to use the same weight maps and simply map colours to blender text blocks which are injected into the gcode at export time. These gcode blocks can be used swap tool heads or extruders, enabling blending of multiple filament colours or types in the same object.
Some nice examples of such printing manipulation can be seen on [Heinz’s] instagram page for the project. So, going back to the hardware again, the first video embedded below shows the ‘dual disk polar printer’ fitted with a crazy five-extruders-into-one-nozzle mixing hotend setup, which should be capable of full CMYK colour mixing and some. The second video below shows an interesting by-product of the wide horizontal motion range of the machine, that the whole printing area can be shifted to a nozzle at the other end of the gantry. This enables a novel way to switch extruders, by just moving the whole bed and print under the nozzle of interest! One final observation — is that of the print surface — it does look rather like they’re printing direct onto a slab of marble, which I think is the first time we’ve seen that.
Interesting printer designs are being worked on a lot these days, here’s a really nice 5-axis prusa i3 hack, and if you want to stay in the cartesian world, but your desktop machine is just too small, then you can always supersize it.
When you want to fabricate something you either start with something and take away what you don’t want — subtractive manufacturing — or you start with nothing and add material, which is additive manufacturing that we usually call 3D printing. Popular Science recently took a look inside Vital Auto, the British lab that uses 3D printing for high-end concept cars from companies like Rolls-Royce, McLauren, Jaguar, and others. In the video below, [Anthony Barnicott], an engineer for Vital, says that the two technologies — additive and subtractive — work best when used together.
As you might expect, they are not using a $200 FDM printer. They have three Formlabs 3Ls that print with resin and five Formlab Fuse 1 selective laser sintering printers. While metal printers are still uncommon in hacker’s workshops, resin printers are now very affordable although your garage printer is probably a good bit smaller than the 3L’s 335x200x300 mm volume. For comparison, an LCD-based AnyCubic Photon X provides just 165x132x80 mm. Of course, you’re looking at about $11,000 for the dual-laser 3L versus about $240 for the Photon.
Vital started building the EP9 electric car concept for NIO, an electric car maker in China. You can imagine that modern manufacturing machines make it possible to create more sophisticated concept cars faster. How many times do you want to tweak a part that takes a machinist eight hours to produce? But if you can just let a machine run overnight and get the result in the morning, you are more likely to change and refine the part.
Vital Auto is an interesting look at how professional fabrication shops are using the same technologies we do, at least at the core. We’ve noted before how these same technologies are making homebrew projects look better than some commercial products not long ago. You can print big things if you break them up, of course. Or, break the bank and buy a really big printer.
It’s getting close to the time of year when we need to start carefully vetting projects here at Hackaday. After all, nobody likes to get punked by an early April Fool’s joke. But as silly as this outsized PC fan looks, it sure seems like a legit build, if a bit on the pointless side.
Then again, perhaps pointless is too harsh a word to use. This 500-mm fan is by [Angus] over at Maker’s Muse, and it represents a lot of design work to make it buildable, as well as workable and (mostly) safe. Using both CNC-cut MDF and printed parts, the fan is an embiggened replica of a normal-sized case fan. The fan’s frame had to be printed in four parts, which lock together with clever interlocking joints. Each of the nine blades locks into a central hub with sturdy-looking dovetails.
And sturdy is important, as the fan is powered by a 1,500 Watt brushless DC motor. With a 4:1 reduction thanks to a printed gear train, the fan spins at around 3,300 RPM, which makes a terrifying noise. There’s a little bit of “speed-wobble” evident, but [Angus] managed to survive testing. The fan, however, did not — the 3D-printed gears self-destructed after a full-speed test, but not before the fan did its best wind tunnel imitation. And the RGB LEDs looked great.
[Nathan] from Nathan Builds Robots on YouTube is no stranger to modding 3D printers, whether it’s a good idea or not, it’s just fun to find out sometimes. His latest escapade he calls the Double Ender (video, embedded below), where he not only doubles up the hotend, but the doubles up a few other bits too. The aim was to achieve dual material printing, with his specific goal to combine plain nylon and carbon fiber-loaded nylon in the same print, to get the best properties of both materials.
Taking a stock Ender 3 v2, [Nathan] first installs a dual Z axis kit, doubling up the Z axis screw and associated stepper motors. Likely this was needed to compensate for the additional weight of subsequent mods. Since the stock Ender mainboard has only one Z axis port, the less obvious solution was to just install a second mainboard! By leveraging the immense hackability of the Klipper printer firmware/software stack,he was able to get this weird configuration to work.
Next the main part of the build; the Phaetus Tai Chi dual hot end installation. For some reason, initially, it was decided to combine the stock bowden injector/extruder with a direct drive second unit, which we guess keeps the reciprocating weight down a bit and does let you directly compare bowden and direct drive print results on the same machine. Anyway, the first dual material prints came out pretty good after a few (quickly glossed over) fails, and did work well enough that dual-nylon printing could now be an option. After switching the build to a dual direct-drive setup, [Nathan] found it easier to get the machine to switch filaments more reliably, which makes sense when you think about the impact of all that extra filament in the bowden tube.
[Nathan] clearly has been burned (haven’t we all?) possibly literally, by the curious habit of some Chinese suppliers, of randomly assigning power supply polarity to red/black wire pairs. The solution, somewhat belt-and-braces, was to simply make up custom power cables with an embedded rectifier. Well, we guess that’s one less thing to worry about, but do look away when those PSU hacks are being shown!
One popular option when 3D printing is to have the printer draw a loop or two around the print before starting. This serves several purposes: it clears the print head for one thing. It also marks the area of the print bed in use and many people use it to adjust the leveling if necessary. However, the little scraps of plastic do add up. [Makers Mashup] decided to try something different and now uses what he dubs the landing strip and kisses method.
The landing strip turns out to be a piece of blue tape and the kiss in question is like the chocolate kind and does not involve pressing your lips against the nozzle. There’s a wizard that generates startup code for you that has the style of purge if you like.
Owning a 3D printer seems to progress through stages. You start printing simple shapes. Then you get serious about calibration and quality. Eventually, you move to trying to design and build practical things. To get practical, you often need to join parts together and that requires glue, fasteners, threaded inserts, and plastic welding. However, you can also make parts that fit together using friction and the springiness of plastic. For example, [Lucas Carolo] recently had a look at 3D printing snap-fit joints. These are commonly seen on the end of straps so that you can connect two ends together.
Of course, you can use them anywhere you need a secure connection. However, you might want to consider that since the jaws compress, there will be repeated stress on the part, so it might not be a good choice for items that you will frequently snap together. Also, brittle plastic such as PLA might not be the best choice of materials. There are several different kinds of joints. The cantilever version has a hook that bends into place and, as mentioned earlier, is common on luggage or backpack straps. The post offers tips on how to design a durable hook. In particular, the orientation of the hook during printing is critical because of the stress involved.
Another type of snap-fit joint is the kind you find on many snap electronic enclosures or things like pen caps. In these joints, a large bump (a boss) fits into a similar groove on the other part. The post has a little less information on these but does mention that you should form the bosses with a chamfer. If you want more details, the post links to a great guide and an enclosure tutorial that you should check out.