Carburetors have been largely phased out on most automobiles, but for a century they were the standard, and still are on many smaller engines. Armed with a high-speed camera and with the help of his father, [Smarter Every Day] investigates these devices by experimenting with a DIY see-through carburetor connected to a real engine.
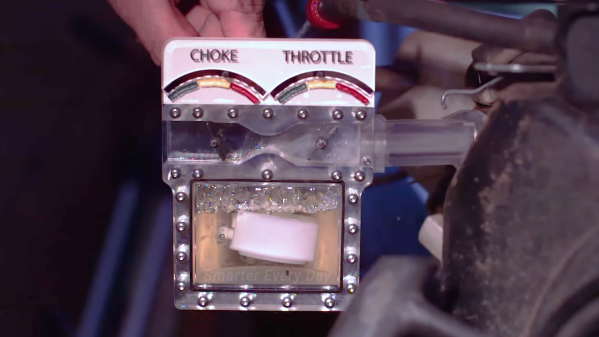
The purpose of a carburetor is to mix gasoline and oxygen to the correct ratio for combustion inside the engine. Gasoline flow from the tank to the bowl, from where gets sucked into the venturi. The choke valve adjusts the amount of air entering the carb, while the throttle controls the amount of air-fuel mixture entering the engine. It appears that the carburetor was made from a resin 3D printed body and manifold, with an acrylic cover and PLA throttle and choke valves. It was attached to a single-cylinder engine.
The high-speed footage is incredible, and clearly shows the operation of the carburetor and makes it incredibly easy to understand. If you’re interested, he also uploaded a second video with almost 80 minutes of detailed footage.
[Smarter Every Day]’s infectious curiosity has led to numerous fascinating projects, including a supersonic baseball canon and the backward bicycle.
Continue reading “See-Through Carburetor Gives A Clear Demonstration”