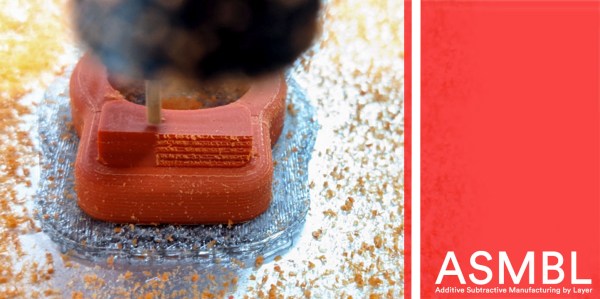
We might’ve thought that extrusion based 3D printers have hit their peak in performance capabilities. With the remaining process variables being tricky to model and control, there’s only so much we can expect on dimensional accuracy from extruded plastic processes. But what if we mixed machines, adding a second machining process to give the resulting part a machined quality finish? That’s exactly what the folks at E3D have been cooking up over the last few years: a toolchanging workflow that mixes milling and 3D printing into the same process to produce buttery smooth part finishes with tighter dimensional accuracy over merely 3D printing alone.
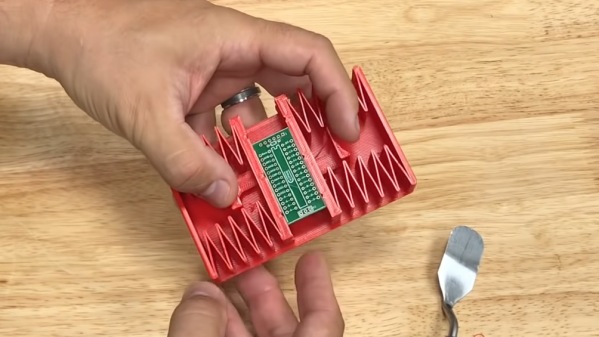
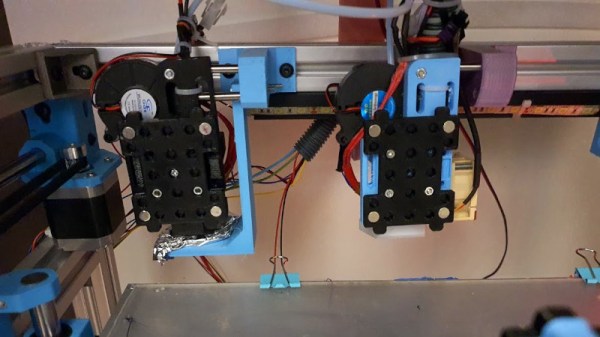
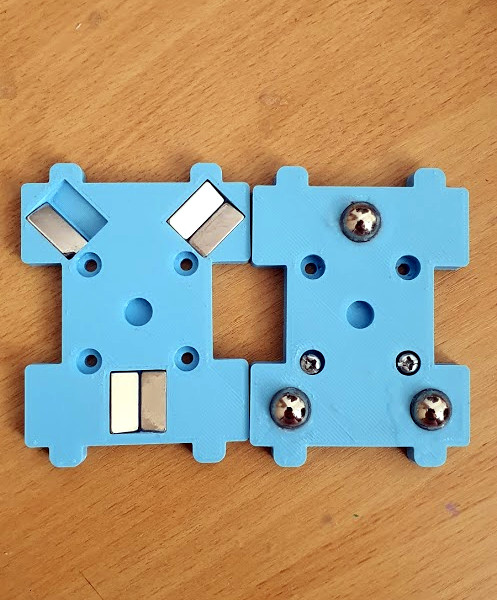
 Dubbed ASMBL (Additive/Subtractive Machining By Layer), the process is actually the merging of two complimentary processes combined into one workflow to produce a single part. Here, vanilla 3D printing does the work of producing the part’s overall shape. But at the end of every layer, an endmill enters the workspace and trims down the imperfections of the perimeter with a light finishing pass while local suction pulls away the debris. This concept of mixing og coarse and fine manufacturing processes to produce parts quickly is a re-imagining of a tried-and-true industrial process called near-net-shape manufacturing. However, unlike the industrial process, which happens across separate machines on a large manufacturing facility, E3D’s ASMBL takes place in a single machine that can change tools automatically. The result is that you can kick off a process and then wander back a few hours (and a few hundred tool changes) later to a finished part with machined tolerances.
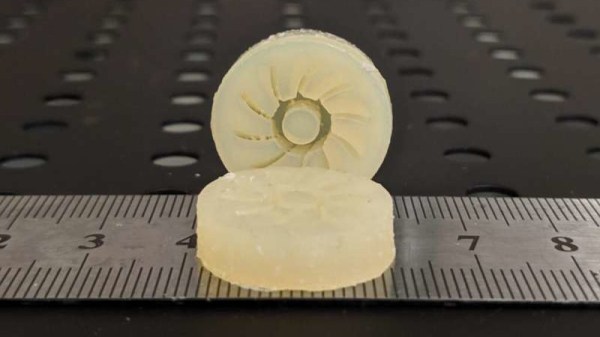
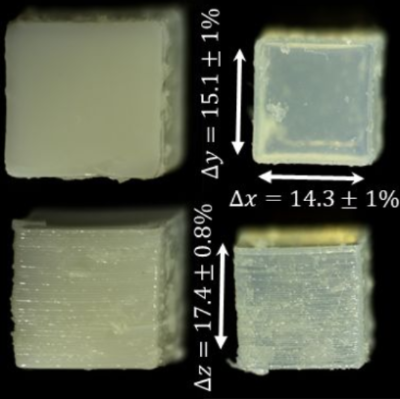
What are the benefits of such an odd complimentary concoction, you might ask? Well, for one, truly sharp outer corners, something that’s been evading 3D printer enthusiasts for years, are now possible. Layer lines on vertical surfaces all but disappear, and the dimensional tolerances of holes increases as the accuracy of the process is more tightly controlled (or cleaned up!) yielding parts that are more dimensionally accurate… in theory.
But there are certainly more avenues to explore with this mixed process setup, and that’s where you come in. ASMBL is still early in development, but E3D has taken generous steps to let you build on top of their work by posting their Fusion 360 CAM plugin, the bill-of-materials and model files for their milling tool, and even the STEP files for their toolchanging motion system online. Pushing for a future where 3d printers produce the finer details might just be a matter of participating.
It’s exciting to see the community of 3D printer designers continue to rethink the capabilities of its own infrastructure when folks start pushing the bounds beyond pushing plastic. From homebrew headchanging solutions that open opportunity by lowering the price point, to optical calibration software that makes machines smarter, to breakaway Sharpie-assisted support material, there’s no shortage of new ideas to play with in an ecosystem of mixed tools and processes.
Have a look at ASMBL at 2:29 in their preview after the break.
Continue reading “E3D Teaches Additive 3D-Printers How To Subtract”