“Hey, You Left The Peanut Out Of My Peanut M&Ms!”

Candy-sorting robots are in plentiful supplies on these pages, and with good reason — they’re a great test of the complete suite of hacker tools, from electronics to machine vision to mechatronics. So we see lots of sorters for Skittles, jelly beans, and occasionally even Reese’s Pieces, but it always seems that the M&M sorters are the most popular.

This M&M sorter has a twist, though — it finds the elusive and coveted peanutless candies lurking in most bags of Peanut M&Ms. To be honest, we’d never run into this manufacturing defect before; being chiefly devoted to the plain old original M&Ms, perhaps our sample size has just been too small. Regardless, [Harrison McIntyre] knows they’re there and wants them all to himself, hence his impressive build.

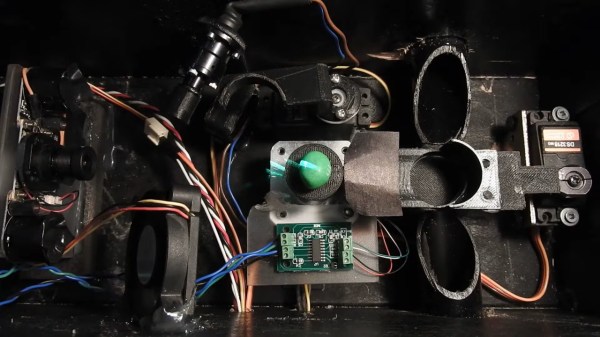
To detect the squib confections, he built a tiny 3D-scanner from a line laser, a turntable, and a Raspberry Pi camera. After scanning the surface to yields its volume, a servo sweeps the candy onto a scale, allowing the density to be calculated. Peanut-free candies will be somewhat denser than their leguminous counterparts, allowing another servo to move the candy to the proper exit chute. The video below shows you all the details, and more than you ever wanted to know about the population statistics of Peanut M&Ms.

We think this is pretty slick, and a nice departure from the sorters that primarily rely on color to sort candies. Of course, we still love those too — take your pick of quick and easy, compact and sleek, or a model of industrial design.

Continue reading ““Hey, You Left The Peanut Out Of My Peanut M&Ms!””

3D Print Your 3D Scanner

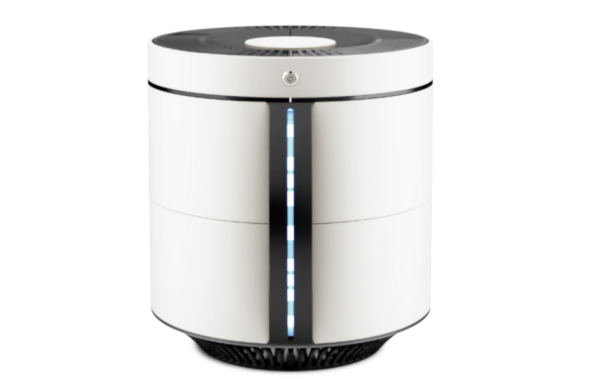
[QLRO] wanted a 3D scanner, but didn’t like any of the existing designs. Some were too complex. Some were simple but required you to do things by hand. That led to him designing his own that he calls AAScan. You can see the thing operating in the video below.

In general, you can move the camera around the object or you can move the object around while the camera stays fixed. This design chooses the latter. You’ll need a stepper motor with a driver board and an Arduino to make the turntable rotate. You also need a computer running Python and Meshroom. The phone also has to run Python and [QLRO] used QPython on an Android device.

Continue reading “3D Print Your 3D Scanner”

Building A 3D Scanner With A 3D Printer

Using a 3D printer to make high quality parts is a great way to improve the look and appeal of any project. If you want to replicate something exactly, though, you’ll need either a very good set of calipers and a lot of time or a 3D scanner. Using the 3D scanner and the 3D printer go along very well together, especially if you use your 3D printer to build your 3D scanner too.

This project comes to us from [Vojislav] who spent the past two years perfecting this 3D scanner. Using a vast array of 3D printed parts, this build looks professional on every level. It also boasts a Raspberry Pi Zero and a fleet of camera modules, not to mention its own LED lighting. [Vojislav] has provided the printer files and the software needed to run it on the project page. It all runs through command line and python code, but that shouldn’t be a big hurdle.

While there is no video of it in action, it seems like all the parts are there for a solid 3D scanner, provided you have access to a 3D printer that can churn out the parts you’ll need. If you need something larger, there are some other options available as well that really take your photogrammetry skills to the next level.

3D Scanner For Tiny Objects Uses Blu-Ray Parts

There’s plenty of different methods to build a 3D scanner, with photogrammetry being a particularly accessible way to do it. This involves taking a series of photos from different angles to build up the geometry of the model. If you want to do this with something small, instead of a camera, just substitute a microscope! [NoseLace’s] LadyBug does just that.

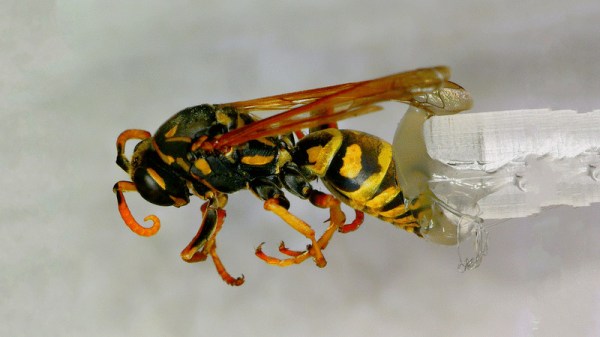
It’s a 3D scanner built in a very hacker fashion. The X-Y stage that moves the sample is from a KES-400a Blu-Ray drive, salvged from the original “fat” Playstation 3. The Z axis is then created using the linear stepper motor from the optical pickup of the same drive. A rotary stepper motor is added on to the Z-axis to allow the sample to be rotated. It’s all combined with a basic USB microscope to take the images, and a Raspberry Pi which handles running all the stepper motors with some add-on driver boards.

[NoseLace] uses the device to create 3D models of insects, but it would work just as well with other small objects. The benefit of this approach is that it creates both the 3D model and the requisite texture, too. There’s plenty of open-source tools available if you’d like to try it for yourself. Video after the break.

Continue reading “3D Scanner For Tiny Objects Uses Blu-Ray Parts”

For Better Photogrammetry, Just Add A Donut

If you don’t have access to a 3D scanner, you can get a lot done with photogrammetry. Basically, you take a bunch of pictures of an object from different angles, and then stitch them together with software to create a 3D model. For best results, you need consistent, diffuse lighting, an unchanging background, and a steady camera.

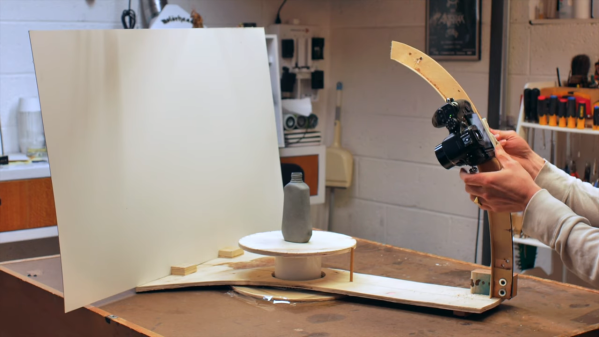
Industrial designer [Eric Strebel] recently made an Intro to Photogrammetry video wherein he circled an object taking photos with his bare hands. One commenter suggested a different method: build a donut-shaped turntable that circles the object, which sits on a stationary platform. Attach the camera to the donut, counterbalance the weight, and Bob’s your proverbial uncle. [Eric] thought it was a brilliant idea (because it is), and he built a proof of concept. This is that video.

[Eric] can move the camera up and down the arc of the boom to get all the Z-positions he wants. The platform has a mark every 10° and there’s a pointer in the platform to line them up against for consistent camera positioning. He was pleasantly surprised by the results, which we agree are outstanding.

We always learn a lot from [Eric]’s videos, and this one’s no exception. Case in point: he makes a cardboard mock-up by laying out the pieces, and uses that to make a pattern for the recycled plywood and melamine version. In the photogrammetry video, he covers spray paint techniques to make objects reflect as little light as possible so the details don’t get lost.

If you prefer to rotate your objects, get an Arduino out and automate the spin.

Continue reading “For Better Photogrammetry, Just Add A Donut”

This 3D Scanner Is Your Ticket To Photogrammetry

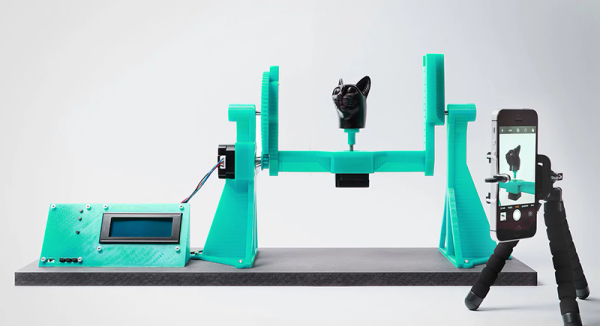
It seems 3D printers have been around for ages and still we don’t have a good solution for turning physical 3D objects into digital ones. Yes, 3D scanners exist, but the OpenScan is the best 3D scanner we’ve seen. It’s a 3D printed device meant to take pictures of an object that can then be used by photogrammetry software to construct a point cloud. From there, it’s just a matter of messing with meshes to create a 3D printed copy of anything you want.

The latest version of the scanner is an improvement over the previous version that kind of, sort of looked like the Machine from Contact. This was a gigantic hubless ring, with a smartphone attached to the rim. Put an object in the center, and the phone would rotate around the object in every axis, snapping pictures the entire time. Needless to say, a simpler design prevailed. That doesn’t mean the old version didn’t look awesome. The electronics are simply an Arduino clone, two stepper drivers, a character display for control and some headers for connections and power supplies. This is pretty normal stuff for the RepRap crew.

Running this machine is as simple as putting an object in the device and taking a few pictures. There is some support for remotely controlling some cameras, but everything is universal if you have a remote shutter release. This can be plugged into the electronics, and once everything is done you have a few dozen pictures of an object with optimal lighting conditions that can be thrown into your photogrammetry software of choice. (Ed note: at least one that doesn’t rely on the object remaining stationary with respect to the background to estimate camera position.)

3D Scanning Via DIY Photogrammetry

For those with 3D printers, taking a 3D model and spitting out a physical object is so routine as to be blasé. The reverse is something a little different. There are many ways to create a digital 3D model of a physical object, of varying complexity. [Eric Strebel] favors photogrammetry, and has shared a useful guide for those interested in using this technique.

In its most basic sense, photogrammetry refers to taking measurements from photographs. In the sense being discussed here, it more precisely refers to the method of creating a 3D model from a series of photographs of a physical object. By taking appropriate images of an object, and feeding them through the right software, it’s possible to create a digital representation of the object without requiring any special hardware other than a camera.

[Eric] shares several tips and tricks for getting good results. Surface preparation is key, with the aim being to create a flat finish to avoid reflections causing problems. A grey primer is first sprayed on the object, followed by a dusting of black spots, which helps the software identify the object’s contours. Camera settings are also important, with wide apertures used to create a shallow depth-of-field that helps the object stand out from the background.

With the proper object preparation and camera technique taken care of, the hard work is done. All that’s then required is to feed the photos through the relevant software. [Eric] favors Agisoft Metashape, though there are a variety of packages that offer this functionality.

We first reported on photogrammetry back in 2016. If cameras aren’t your thing, you can always give lasers a try. Video after the break.

Continue reading “3D Scanning Via DIY Photogrammetry”