Multipurpose ESP8266 Keychain

One of the best feature of the ESP8266 is its ability to self-host a web server, allowing for fairly complicated user interactions. The dEEbugger by [S-March] is a nifty little ESP8266 based device with a plethora of features in a small package.

The USB-powered device has a web user interface that enables it to be used as a low-bandwidth oscilloscope, I2C terminal, or UART terminal. As a scope, you may connect to it via your tablet and then use it as a remote voltage monitor. There is a peak detection feature which is a nice touch and gives the entire project a premium feel.

The serial terminal on an ESP8266 is not something new yet it is helpful in disconnecting the console window from the bench. The I2C terminal is where the device really shines as it can scan for connected devices on the connected bus. This Bus-Pirate like feature is useful for beginners as the software can scan the registers addresses of the devices as well.

[S-March] has made the schematic in PDF format as well as the entire code for the project available on GitHub so go right ahead and make it your own. We have had an ESP8266 based VT Terminal device in the past and merging the two would make for an excellent maker tool.

Thanks for the tip [René Arts]

Wireless Terminal Over ESP8266

From debug messages to the fundamental ‘hello world’, serial communication does it all over three little wires. Now imagine being able to cut the cord to your next microcontroller project and use your phone as a VT100 terminal. This was the premise of [Ondřej Hruška]’s Wireless Terminal Project where he took an ESP8266  and added an in-browser terminal emulator which can be accessed over WiFi. The final hardware uses an ESP-01 module mounted atop a breadboard adapter with a 3.3V LDO, protection circuitry for the pins and under-voltage disable.

The firmware is based on [SpriteTM]’s libesphttpd code which was modified to include the VT100 escape sequence parser. The parser, in turn, was coded as a state machine and compiled using Ragel which simplifies such projects greatly. When you access the tiny web server, the loaded webpage starts to communicate over web sockets to the ESP-01. Key-presses from the terminal are sent to the buffer and onto the parser and control logic. The characters are then passed to the hardware UART lines at 115200bps and if an escape sequence is detected, the corresponding action is executed instead.

[Ondřej Hruška] shares the code as well as a user manual in PDF for anyone who would like to try it out and help improve the project. With a little inspiration on learning about state machines, you could extend the project to your own use case as well.

Thanks for the tip [Marco Saarloos]

Son Of Sonoff

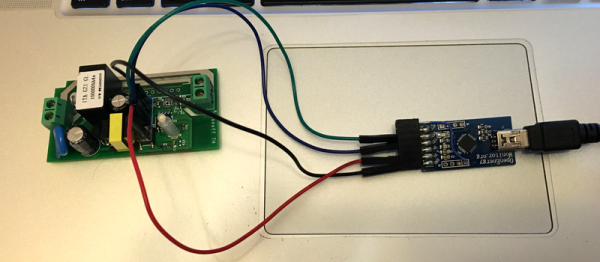
We’ve covered the Sonoff a few times–a very inexpensive box with an ESP8266, a power supply, and an AC relay along with a way to tap into a power cord. Very inexpensive means $5 or $6. The supplied software will work with several systems (including, recently, Alexa). But what self-respecting hacker wants to run the stock firmware on something with an ESP8266 inside?

[Tzapu] certainly didn’t. But he also knew he didn’t want to start from scratch every time he wanted to deploy a switch. So he built SonoffBoilerplate and put the code on GitHub. The code manages taking configuration (including network settings) using a web-portal, can update itself over the air, and integrates with Blynk and MQTT. If you don’t like that code base, there are other choices including one that has a failsafe reconfiguration mode.

Continue reading “Son Of Sonoff”

The Connected Calculator With ESP8266

Calculator hacks have been around for a while now and we have seen the most action around the Texas Instruments TI-83 and TI-84. When [johnkimdinh] found a way to add an ESP8266 to a scientific calculator (machine translation) and this time around it’s a Kenko FX-82M calculator which appears eerily similar to the Casio FX-82M.

In his video, [johnkimdinh] demonstrates his hack which has a web interface for transmitting numbers to the calculator. This is accomplished by accessing the keypad using the ESP8266 GPIOs and it is essentially the equivalent of typing remotely. The rest of the circuit remains intact so bit more work and the other functions should be available remotely as well.

Perhaps this hack is best suited as a dedicated display for outputting measurements and other data which requires some type of post-processing to be human readable. If the next iteration delivers the ability to read from the display we’ll really be getting somewhere. We envision such calculators being used as the future of education where the connectivity is used to retrieve an array of real time parameters for assignments. Add a few sensors into the mix and it could be the next big thing for STEM.

In the past, we have had calculators brought to life to do vector and matrix math and ESP8266s connected to TI-84 calculators. After all, everyone has calculators, they simply must be hacked!

Continue reading “The Connected Calculator With ESP8266”

How Many Watts Are You Using?

One of the best smart home hacks is implementing an energy monitor of some kind. It’s easy enough to say that you’re trying to save energy, but without the cold hard data, it’s just talk. Plus, it’s easy and a great way to build up something DIY that the whole family can use.

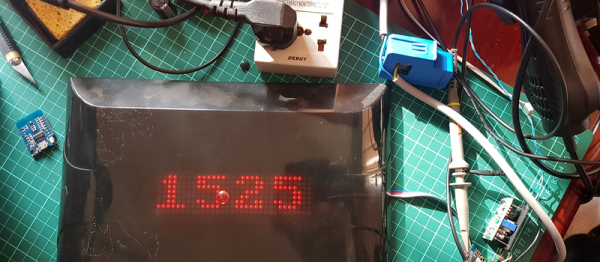
[Bogdan] built up a simple whole-apartment power monitor from scratch over the weekend, and he’s been nice enough to walk us through the whole procedure, starting with picking up a split-core CT sensor and ending up with a finished project.

The brains of his project are an ESP8266 module, which means that he needed to adapt the CT sensor to put out a voltage that lies within the chip’s ADC range of 0 V to 3.3 V. If you’re undertaking an energy monitor project, it’s as easy as picking the right burden resistor value and then shifting the ground-centered voltage up by 1.6 V or so. We say it’s easy, but it’s nice to have a worked example and some scope shots. The microcontroller reads the ADC frequently, does a little math, and you’re done. Continue reading “How Many Watts Are You Using?”

Simple Scanner Finds The Best WiFi Signal

Want to know which way to point your WiFi antenna to get the best signal? It’s a guessing game for most of us, but a quick build of a scanning WiFi antenna using mostly off-the-shelf components could point you in the right direction.

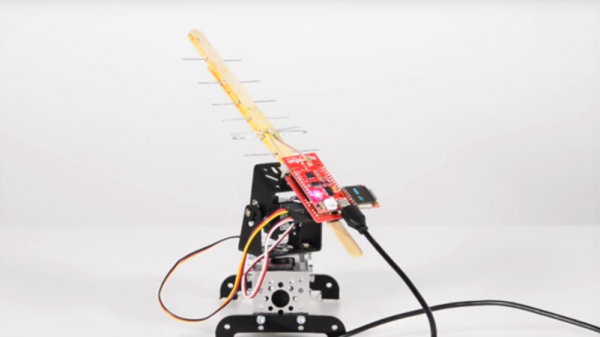
With saturation WiFi coverage in most places these days, optimizing your signal might seem like a pointless exercise. And indeed it seems [shawnhymel] built this more for fun than for practical reasons. Still, we can see applications where a scanning Yagi-Uda antenna would come in handy. The build started with a “WiFi divining rod” [shawnhymel] created from a simple homebrew Yagi-Uda and an ESP8266 to display the received signal strength indication (RSSI) from a specific access point. Tired of manually moving the popsicle stick and paperclip antenna, he built a two-axis scanner to swing the antenna through a complete hemisphere.

The RSSI for each point is recorded, and when the scan is complete, the antenna swings back to the strongest point. Given the antenna’s less-than-perfect directionality — [shawnhymel] traded narrow beam width for gain — we imagine the “strongest point” is somewhat subjective, but with a better antenna this could be a handy tool for site surveys, automated radio direction finding, or just mapping the RF environment of your neighborhood.

Yagi-Uda antennas and WiFi are no strangers to each other, whether it be a WiFi sniper rifle or another recycling bin Yagi.  Of course this scanner isn’t limited to WiFi. Maybe scanning a lightweight Yagi for the 2-meter band would be a great way to lock onto the local Ham repeater.

Continue reading “Simple Scanner Finds The Best WiFi Signal”

A Smart Switch Board For The ESP8266

With a plethora of IoT projects and inexpensive commercial smart light fittings and mains switches appearing, you might be forgiven for thinking that another offering in this crowded marketplace would be superfluous. But there is always room for improvement in any field, and in this particular one [Xose Pérez] has done just that with his Espurna board.

This board is a very well executed ESP8266 mains relay, with an on-board mains power supply and power monitoring. It was designed with his Espurna (“Spark” in Catalan) custom firmware in mind, which offers support for Alexa, Domoticz, Home Assistant and anything that supports MQTT or HTTP REST APIs.

Best of all, it’s a piece of open source hardware, so you can download everything you need from his GitHub repository to create your own. For the ultimate in convenience you can even order the PCB ready-made from OSH Park.

As a demonstration of the Espurna board in a real application, he’s produced a smart socket project neatly enclosed in a wall-wart style box with an inbuilt Euro style plug and socket.

We’ve featured [Xose]’s work several times before here at Hackaday, he’s something of an IoT wizard. Most recently there was his work with Alexa and the ESP8266, but before that was his MQTT LED array for his laundry monitor.