Schematic-o-matic

Tricked-Out Breadboard Automatically Draws Schematics Of Whatever You Build

When it comes to electronic design, breadboarding a circuit is the fun part — the creative juices flow, parts come and go, jumpers build into a tangled mess, but it’s all worth it when the circuit finally comes to life. Then comes the “What have I done?” phase, where you’ve got to backtrack through the circuit to document exactly how you built it. If only there was a better way.

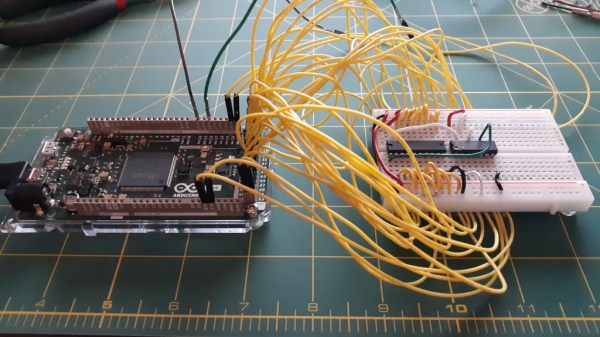
Thanks to [Nick Bild], there is, in the form of the “Schematic-o-matic”, which aims to automate the breadboard documentation process. The trick is using a breadboard where each bus bar is connected to an IO pin on an Arduino Due. A program runs through each point on the breadboard, running a continuity test to see if there’s a jumper connecting them. A Python program then uses the connection list, along with some basic information about where components are plugged into the board, to generate a KiCad schematic.

[Nick] admits the schematics are crude at this point, and that it’s a bit inconvenient to remove some components, like ICs, from the breadboard first to prevent false readings. But this seems like one of those things where getting 80% of the work done automatically and worrying about the rest later is a big win. Plus, we can see a path forward to automatic IC probing, and even measurement of passive components too. But even as it is, it’s a great tool.

Continue reading “Tricked-Out Breadboard Automatically Draws Schematics Of Whatever You Build”

Arduino Serial Vs SerialUSB

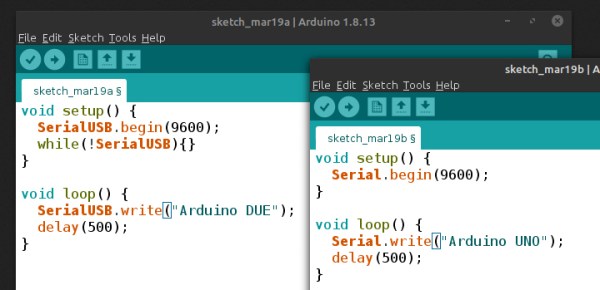
[Andrew] wonders why the SerialUSB() function on the Cortex M3-based Arduino Due is so much faster than Serial() on the Uno or Nano, and shares his observations in this short video. He sets up an experiment with a simple sketch on both boards and uses Wireshark to evaluate the results.

Data is sent in the USB packets in groups of four characters on the ATmega-based boards, but the entire string is put in a packet on the Due board. If you look under the hood, the answer is hiding in plain sight. While the Arduino family of boards connect to your computer using a USB virtual serial port, the ATmega ones have an actual serial connection on-board. For instance, on the Nano there is an FT232RL between the USB connector and the microprocessor (on an Arduino Uno board, a small ATMEGA8U2 is used instead of an FTDI chip, but the concept is the same). On the Arduino Due, the USB connects directly to the SAM3X8E processor.

This concept doesn’t apply only to Arduino boards, of course. On any serial connection between two computers, when a virtual USB device is used on both sides of the link (no actual serial signals involved), the serial baud rate is a fictional thing — data transfer speeds depends on USB alone. We are curious why the packets contain four characters in [Andrew]’s ATmega Wireshark captures — why not 1, 2, or 10? Is this something that can be controlled by the programmer, or is it fixed by the protocol and/or the FTDI chip? If you have the answer, let us know in the comments below. Continue reading “Arduino Serial Vs SerialUSB”

MIDI Slide Whistle Shows The Value Of A Proper Fipple

We pride ourselves on knowing the proper terms for everyday things: aglet, glabella, borborygmi, ampersands. But we have to confess to never having heard of a “fipple” before finding this interesting MIDI-controlled slide whistle, where we learned that the mouthpiece of a penny whistle or a recorder is known as a fipple. The more you know.

This lesson comes to us by way of a Twitter post by [The Mixed SIgnal], which showed off the finished mechanism in a short video and not much else. We couldn’t leave that alone, so we reached out for more information and were happy to find that [The Mixed SIgnal] quickly posted a build log on Hackaday.io as well as the build video below.

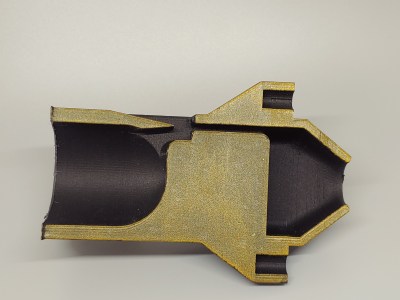
The slide whistle is a homebrew version of the kind we’ve all probably annoyed our parents with at one time or another, with a 3D-printed fipple (!) and piston, both of which go into a PVC tube. Air is supplied to the pipe with a small centrifugal blower, while a 3D-printed rack and pinion gear of unusual proportions moves the piston back and forth. An Arduino Due with a CNC shield controls the single stepper motor. The crude glissandos of this primitive wind instrument honestly are a little on the quiet side, especially given the racket the stepper and rack and pinion make when queuing up a new note. Perhaps it needs more fipple.

While the humble author is new to fipple-isms, luckily the Hackaday editors see all and know that there two epic hacks featuring fipples to create bottle organs. These are far from the first weirdest instruments we’ve seen — a modulin, a Wubatron, and the Drum-Typeulator all fit that bill well. But we like what [The Mixed Signal] has done here, and we’re looking forward to more.

Continue reading “MIDI Slide Whistle Shows The Value Of A Proper Fipple”

Arduino Plays NES Games

Watching the advancement of technology is interesting enough by looking at improved specifications for various components as the years go by. But clock speeds, memory size, and power consumption are all fairly intangible compared to actual implementation of modern technology when compared to days of yore. For example, this $40 microcontroller can do what a video game console was able to do in the 80s for a tenth of the (inflation adjusted) price.

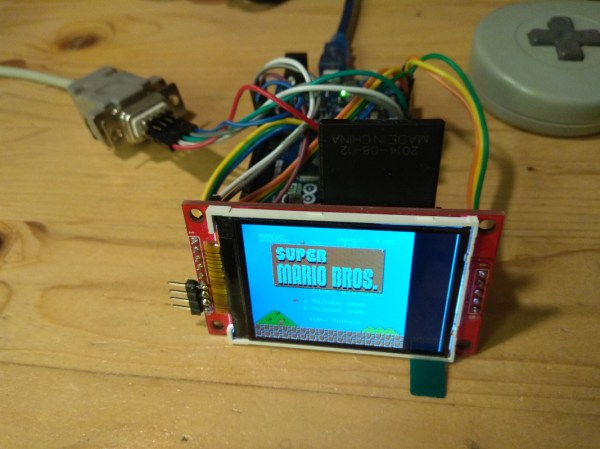
The NESDUE is an emulator for NES games which runs completely on an Arduino Due. The Arduino does have some limitations that have to be worked around to get the Nintendo to work, though. For one, it needs to be overclocked to be playable and it also needs a workaround to get past the memory limit of 96 kB of RAM. From there, a small screen is wired up along with a controller (from a Super Nintendo) and the gaming can begin.

This is an impressive feat for an Arduino platform to accomplish, especially with the amount of memory tweaking that has to happen. This might be the most advanced gaming system available that runs everything on an Arduino, right up there with the Arduinocade which can provide an arcade-like experience straight from the Arduino as well.

Continue reading “Arduino Plays NES Games”

Launching A Custom Kerbal Panel

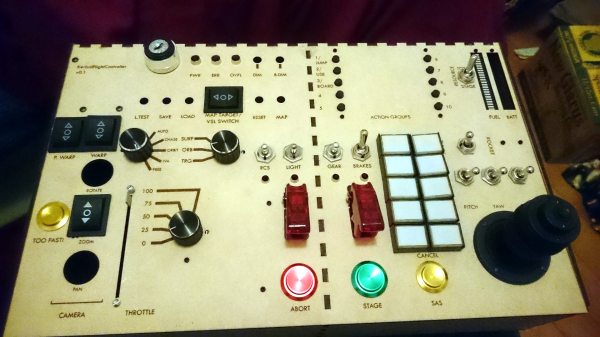
[Matthew Peverill] is a busy PhD student who loves to make time for a little Kerbal Space Program. He was tired of using such pedestrian controls as a keyboard and mouse for such important work, and wanted something a little more like they have down in Houston.

For this project, he’s focusing on the inputs more than anything else. The intent is not to play solely from this control panel, but to strike a balance between fun inputs and accurate control without screwing up favorite game play modes. It’s based on an Arduino Due, and uses some custom I²C multiplexer boards to wrangle all the various inputs.

We love the look of this panel, especially the appropriately Futura-fonted labels and all the toggle switches. Matthew took inspiration and guidance for this project from a couple of sources, so he’s definitely following in the Hackaday spirit of standing on the shoulders of giants. He’s moved through two prototypes and is working out the bugs before making the next one. The final version will be made of backlit transparent acrylic, and you know we can’t wait to see that.

What, you don’t have access to a laser cutter? Just build a control panel into an old Heathkit trainer or something.

Simple Ultrasound Machine Shows The Skeleton Lurking Inside Us All

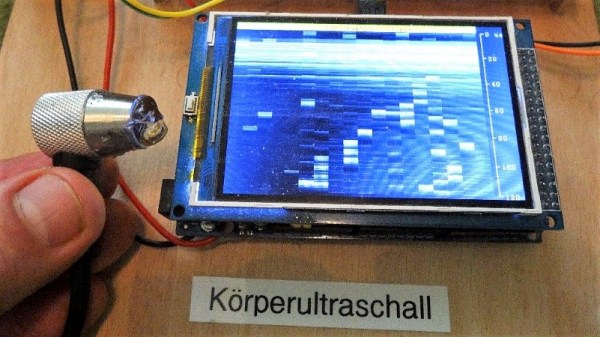
That first glimpse of a child in the womb as a black and white image on a screen is a thrilling moment for any parent-to-be, made possible by several hundred thousand dollars worth of precision medical instrumentation. This ultrasound machine cobbled together from eBay parts and modules is not that machine by a long shot, but it’s still a very cool project that actually gives a peek inside the skin.

The ultrasound transducer used by [stoppi71] in this build has an unusual source: a commercial paint-thickness meter. Cue the jokes about watching paint dry, but coatings measurement is serious stuff. Even so, the meter in question only ran about $40 on eBay, and provided the perfect transducer for the build. The sender needs a 100V pulse at about 5 MHz, so [stoppi71] had some fun with a boost converter and a 74121 Schmitt-trigger one-shot driving a MOSFET to switch the high voltage. On the receive side, the faint echo is sent through a three-stage amp using AD811 op amps before going through an LM7171 op amp acting as a rectifier and peak detector. Echos are sent to an Arduino Due for display on a 320×480 LCD. The resolution isn’t great, but the video below shows that it’s enough to see reflections from the skin of [stoppi71]’s forearm and from the bones within.

[stoppi71] says that he was inspired to tackle this build by Murgen, an open-source ultrasound project. That project got further refined and entered into the “Best Product” category in the 2018 Hackaday Prize. We like that because focusing on turning projects into products is what this year’s Hackaday Prize is all about.

Continue reading “Simple Ultrasound Machine Shows The Skeleton Lurking Inside Us All”

Best Product Entry: Telescope Control With RDuinoScope

The Hackaday Prize is more than just giving tens of thousands of dollars to hardware hackers. It’s also about funding the next batch of Open Source hardware products. Alongside The Hackaday Prize — the contest where we’re funding hardware that will change the world, — we’re also giving away $30,000 to the project that will best become a product. It’s almost like we’re funding hardware startups here.

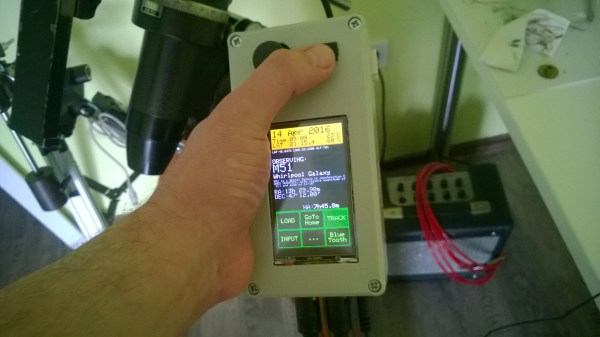
[Dessislav Gouzgounov] wanted to build a small piece of hardware — a GoTo for his telescope. This handheld controller would allow him to use software to align the telescope with whatever celestial body he’s checking out.

Many GoTos simply interface with a laptop, but [Dessislav] built a standalone system centered around an Arduino Due and 240×400 touch screen, with GPS, RTC, and Bluetooth under the hood. It works on both hemispheres and contains a database of 250 celestial objects, features different speeds for time-delayed tracking of celestial, lunar, and solar phenomena, and it can work with any stepper-equipped telescope.

We covered [Dessislav]’s previous version of the RDuinoScope, but he’s improved the project considerably with over 2,400 lines of code including a new menu system and added a star atlas showing the location of the sky at which the telescope is currently pointed, among other improvements. The project is open source and you can learn more about it on [Dessislav]’s project page or check out his code on GitHub.

Continue reading “Best Product Entry: Telescope Control With RDuinoScope”