Short Length Of Wire Turns STM32 Microcontroller Into Good-enough Wireless UART Blaster

Hackaday regular [befinitiv] wrote into the tip line to let us know about a hack you might enjoy, wireless UART output from a bare STM32 microcontroller. Desiring the full printf debugging experience, but constrained both by available space and expense, [befinitiv] was inspired to improvise by a similar hack that used the STM32 to send Morse code over standard FM frequencies.

In this case, [befinitiv]’s solution is both more useful and slightly more legal, as the software uses the 27 MHz ISM band to blast out ASK modulated serial data through a simple wire antenna attached to one of the microcontroller’s pins. The broadcast can then be picked up by an RTL-SDR receiver and interpreted back into a stream of data by GNU Radio.

The software for the STM32 and the GNU Radio Companion graph are both available on Bitbucket. The blog post goes into some detail explaining how the transmitter works and what all the GNU Radio components are doing to claw the serial data back from the ether.

[cover image cc by-sa licensed by Adam Greig, randomskk on Flickr]

A New Kid On The Mini ARM Block

The breadboard microcontroller experimenter has a host of platforms to work with that can be had in the familiar DIP format. Old-school people can still find classic 8-bit platforms, the Ardunisti have their ATMegas, and PIC lovers have a pile of chips to choose from. But ARM experimenters? Out of luck, because as we have previously reported, popular past devices such as the LPC810 in a DIP8 package are now out of production.

News comes from China though of a tiny ARM Cortex M0 for pennies that may not be in a DIP8, but is in almost the next best thing. The Synwit SWM050 can be had in a TSOP8, which though it’s not quite as friendly as its larger SOIC8 cousin, is still easily solderable onto a DIP8 adaptor for breadboard use. Spec-wise it’s 5 V tolerant, has an 8 kB FLASH and 1 kB of RAM, 6 GPIOs, and can clock away at a not incosequential 36 MHz.

We have [Sjaak] to thank for the discovery of this device, and for doing a lot of work including getting some die shots taken to dig up and make sense of the Chinese documentation, and to provide some dev tools should anyone want to play with it.  There’s even a small breakout board for the experimenter unwilling to design their own.

Earlier this year we marked the passing of the DIP8 version of the LPC810 microcontroller, and for those mourning it we made an important point. It’s now normal to use one of the vast array of single board computers instead of a bare microcontroller, you might wish to ask yourself why you would do so.

Thanks [Ziew] for the tip.

Free ARM Cores For Xilinx FPGAs

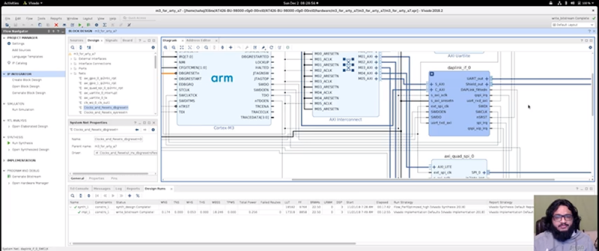
In a surprising move, ARM has made two Cortex-M cores available for FPGA development at no cost.

In the over three decades since [Sophie Wilson] created the first ARM processor design for the Acorn Archimedes home computer, the architecture has been managed commercially such that it has become one of the most widely adopted on the planet. From tiny embedded microcontrollers in domestic appliances to super-powerful 64-bit multi-core behemoths in high-end mobile phones, it’s certain you’ll own quite a few ARM processors even if you don’t realise it. Yet none of those processors will have been made by ARM, instead the Cambridge-based company will have licenced the intellectual property of their cores to another semiconductor company who will manufacture the device around it to their specification. ARM core licences cost telephone-number sums, so unless you are a well-financed semiconductor company, until now you probably need not apply.

You will still have to shell out the dough to get your hands on a core for powerful chips like those smartphone behemoths, but if your tastes are more modest and run only to a Cortex M1 or M3 you might be in luck. For developers on Xilinx FPGAs they have extended the offer of those two processor cores at zero cost through their DesignStart Programme.

It’s free-as-in-beer rather than something that will please open-source enthusiasts, But it’s certainly a fascinating development for experimenters who want to take ARM for a spin on their own gate array. Speculation is swirling that this is a response to RISC-V, but we suspect it may be more of a partial lifting of the skirts to entice newbie developers such as students or postgraduates. If you arrive in the world of work already used to working with ARM IP at the FPGA level then you are more likely to be on their side of the fence when those telephone-number deals come up.

Thanks [Rik] for the tip!

Seeed Air602 WiFi dev board.

Tiny WiFi-Enabled ARM MCU For Tiny Projects

Ever since the ESP8266 WiFi-enabled microcontroller came on the scene, it seemed like suddenly everyone came up with WiFi-enabled projects. But the ESP8266 is not the only game in town! Reader [PuceBaboon] notified us of a new product released by Seeed Studios: the imaginatively called Air602 WiFi Development Board.

The core of this board is the tiny WinnerMicro W600 MCU, which integrates a 32-bit ARM Cortex M3 CPU, along with dual UARTs, I2C, SPI and I2S interfaces, as well as a real-time clock (RTC). Add to this hardware crypto, seven I/O pins (five broken out on the development board) and you have a very capable WiFi-enabled MCU which can be programmed using the usual ARM development tools (e.g. Keil) using the provided SDK.

The W600 module can be bought by itself, in all its diminutive 12 mm x 10 mm glory, for a mere $1.90 as of time of writing – without antenna – as noted in [PuceBaboon]’s thoughts on this MCU and the development board.

A Better Battery Arduino

We’ve seen [Johan]’s AA-battery-sized Arduino/battery crossover before, but soon (we hope!) there will be a new version with more MIPS in the same unique form factor! The original Aarduino adhered to classic Arduino part choices and was designed to run as the third “cell” in a 3 cell battery holder to relay temperature readings via a HopeRF RFM69CW. But as [Johan] noticed, it turns out that ARM development tools are cheap now. In some cases very cheap and very open source. So why not update an outstanding design to something with a little more horsepower?

The Aarduino Zero uses the same big PTH battery terminals and follows the same pattern as the original design; the user sticks it in a battery holder for power and it uses an RFM69CW for wireless communication. But now the core is an STM32L052, a neat low power Cortex-M0+ with a little EEPROM onboard. [Johan] has also added a medium size serial flash to facilitate offline data logging or OTA firmware update. Plus there’s a slick new test fixture to go along with it all.

So how do you get one? Well… that’s the rub. It looks like when this was originally posted at the end of 2017 [Johan] was planning to launch a Crowd Supply campaign that hasn’t quite materialized yet. Until that launches the software sources for the Zero are available, and there are always the sources from the original Aarduino to check out.

Fallout Watch Build Triumphs In Adverse Conditions

Is it a badge? Is it a watch? Well, it’s [Sarif’s] take on a wrist-mounted computer from the Fallout series, so you’re free to choose your own designation! We think the Brotherhood of Steel would be proud to have this piece of kit.

[Sarif] commenced the build after first getting their feet wet with the pipman, a watch inspired by Metro 2033 and Steins;;gate as much as Bethesda’s popular post-apocalyptic RPG. It features all the fruit – GPS, compass, a TV-B-Gone – and perhaps the coolest feature, long-since-deprecated bubble LED displays and flippy switches for that Altair-esque charm.

The build log is full of details, from the components used and the debugging battles involved in the journey. [Sarif] learned about using transistors, burning up a few along the way – some say setting the lab on fire is the quickest way to learn important lessons, anyway. On top of that, there were some software niggles but in the end, the watchputer made it to DEFCON 26 anyway!

Builds like this that start from limited experience and go deep into the trials and tribulations involved are an excellent way to learn about what goes into the average DIY electronics project, particularly when talking about embedded systems. And if you’re keen to check out the work of [Sarif’s] contemporaries, we’ve got a collection of all the awesome badges from DEFCON 26. Enjoy!

Greasing Robot Hands: Variable Friction Makes Robo-Mitts More Like Our Own

Unless you are in the fields of robotics or prosthetics, you likely take for granted the fine motor skills our hands have. Picking up and using a pen is no small feat for a robot which doesn’t have a dedicated pen-grabbing apparatus. Holding a mobile phone with the same gripper is equally daunting, not to mention moving that phone around once it has been grasped. Part of the wonder of our hands is the shape and texture which allows pens and phones to slide around at one moment, and hold fast the next moment. Yale’s Grab Lab has built a gripper which starts to solve that problem by changing the friction of the manipulators.

A spring-loaded set of slats with a low-friction surface allow a held object to move freely, but when more pressure is exerted by the robot, the slats retract and a high-friction surface contacts the object. This is similar to our fingers with their round surfaces. When we brush our hands over something lightly, they graze the surface but when we hold tight, our soft flesh meets the surface of the object and we can hold tightly. The Grab Lab is doing a great job demonstrating the solution and taking steps to more capable robots. All hail Skynet.

We have no shortage of gripper designs to choose from, including pneumatic silicone and one that conforms to an object’s surface, similar to our hands.

Continue reading “Greasing Robot Hands: Variable Friction Makes Robo-Mitts More Like Our Own”