Resizable ARM Dev Board; Just Take Some Off The Top

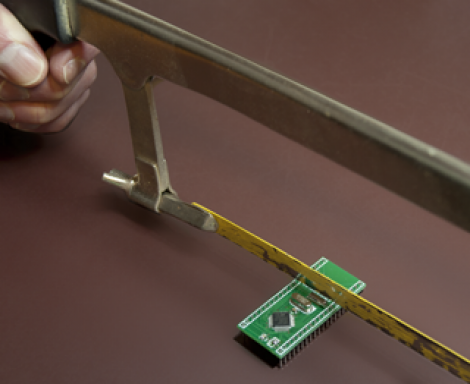
[Bob Alexander’s] most recent project is a hack saw resizable ARM breakout board. He wanted to start using more ARM microcontrollers in his projects and went for a breadboard friendly design. It uses a 40-pin dip package, but if you need the horsepower but not the I/O you can literally cut it down to size. We might recommend grabbing some tin snips, which can cut through a PCB like butter, but to each his own.

The board is based around an STM32 chip. You’ll find a crystal oscillator for the system clock, and a clock crystal if you need it. On the other side of the chip he included a footprint for a voltage regulator. This setup provides a remarkable range of input voltages, accepting from 2 to 3.6 volts without the regulator, and up to 16 volts if the regulator is present. He designed a package footprint that can be easily bridged if there’s no SMD part there. Just make sure you insulate that pad if you are using one with a conductor on the bottom. He explains this in detail in his writeup.

You’ll need a programmer to work with the board. He uses an STM32 Discovery Board for this but there are quite a few other options out there too.

Brute Force A Password Protected PDF Using The BeagleBone

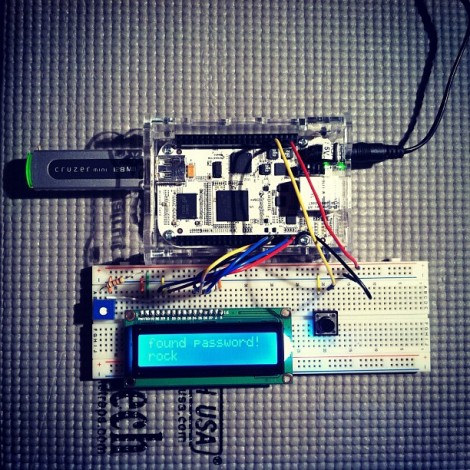
The biggest benefit to using the BeagleBone is it’s 700 MHz ARM processor. If you’re just messing around with basic I/O that power is going unused, but [Nuno Alves] is taking advantage of its power. He built a PDF password cracker based on the $85 development board.

We recently saw how easy it is to perform basic I/O using the BeagleBone. Those techniques are in play here, used to drive a character LCD and sample a button input from the breadboard circuit. [Nuno] even published separate posts for each of these peripheral features.

The password protected PDF file is passed to the device on a thumb drive. Since the BeagleBone is running embedded Linux you don’t need to mess around with figuring out how to read from the device. A click of the button starts the process. Currently the code just uses a brute force attack which can test more than 6000 four-character passwords per second.  This is quite slow for any password more than four or five characters long, but [Nuno] does mention the possibility of running several ARM processors in parallel, or using a dictionary (or rainbow table) to speed things up. Either way it’s an interesting project to try on the hardware. You can see his video demo of the device after the break.

Continue reading “Brute Force A Password Protected PDF Using The BeagleBone”

Twiddling An LED Using The BeagleBone’s Embedded Linux

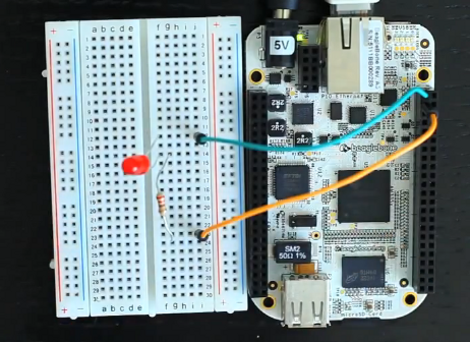
If you comfortable working with 8-bit microcontrollers, the thought of moving to a hardware platform running embedded Linux may be a bit daunting. After all, there’s a lot going on between you and the chips on a board like the BeagleBone seen above. But [Matt Richardson] shows how easy it can be to get at the pins on this device. He put together a primer on hardware control from the embedded shell.

You will remember that the BeagleBone is the newest generation of the BeagleBoard. The ARM processor and other goodies make it a powerful tool, and those already familiar with Linux will be able to get up and running in no time. Just connect the board to your network and SSH into it to get started. [Matt] outlines this setup process in the clip after the break. He then hits the reference manual to find the pinout of the female headers on either side of the board. Each available I/O pin is mapped to the /sys directory and can easily be controlled by echoing your commands to the appropriate files. But [Matt] went a step further than that, writing his own Python library that implements Arduino-style syntax like the digitalWrite() function.

This example should give you enough of a shove to start porting your own libraries over for use with the device. Don’t forget to document your projects and tip us off about them. Continue reading “Twiddling An LED Using The BeagleBone’s Embedded Linux”

Robotic Doodle Clock

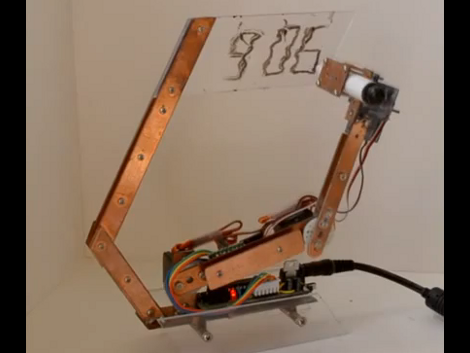
This clock has a robotic twist to it. It will show you the time by drawing it in dry-erase marker. There’s a bit of play in the arm joints and some loose motor precision which results in a wavy font that prompted [Ekaggrat] to name his project the Doodle Clock.

The shape and building material used here really make the timepiece look great. We think if the arm holding the acrylic writing surface had been at right angles this would not look nearly as pleasing. The video after the break shows the bot in action, at first flexing its wrist to switch back and forth between marker and eraser. From there it starts to draw the time, tracing the segments of each digit multiple times to achieve a readable number. The entire thing is driven by an Arduino compatible board mounted on the base of the clock.

This reminds us of that felt-tipped Turing Machine. A variation on that would also make a really nice clock display.

Continue reading “Robotic Doodle Clock”

Raspberry Pi Runs XBMC; Reliably Decodes 1080p

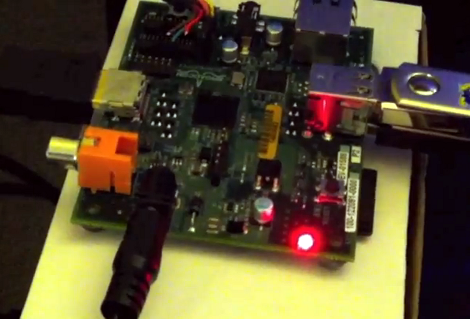
This is the Raspberry Pi board, an ARM based GNU-Linux computer. We’ve heard a little bit about it, but it recently garnered our attention when the machine was shown running XBMC at 1080p. That’s a lot of decoding to be done with the small package, and it’s taken care of at the hardware level.

Regular readers will know we’re fans of the XBMC project and have been looking for a small form factor that can be stuck on the back of a television. We had hoped it would be the BeagleBaord but that never really came to fruition. But this really looks like it has potential, and with a price tag of $35 (that’s for the larger 256MB RAM option) it’s a no-brainer.

Now there’s still a lot of rumors out there. We came across one thread that speculated the device will not decode video formats other than h.264 very well since it uses hardware decoding for that codec only. We’ll reserve judgement until there’s more reliable info. But you can dig through this forum thread where the XMBC dev who’s been working with the hardware is participating in the discussion.

Don’t forget to peek at the demo clip after the break too.

Continue reading “Raspberry Pi Runs XBMC; Reliably Decodes 1080p”

[Scot] Whips Up Breakout Board For His ARM Breakout Board

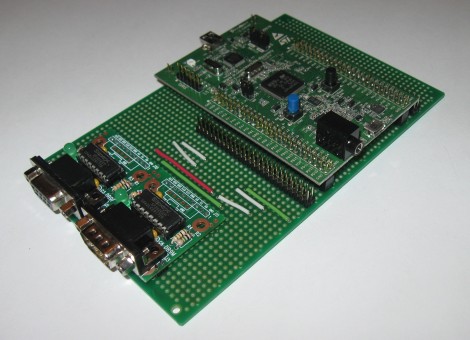
[Scot Kornak] got his hands on the new STM32 Discovery Board. He got his as a free giveaway, but at only $18 he probably would have picked one up anyway. His one complaint about the device is that he dual pin-headers which break out the ARM processor’s pins are not the most convenient for hooking up external components. He decided to make his own breakout board which would give him a more robust solution for the components he uses all the time.

The protoboard that he chose as a base is quite interesting. It’s made for interfacing DIL pin headers just like the ones on the STM32F4 Discovery board. Each row of the dual header is carried down the board perpendicular to those headers. [Scot] cut the traces underneath the STM32 board to isolate the right and left sides. He then added RS232 hardware to one side, while including another pair of DIL headers to break out the rest of the unused pins.

This is all he’s got so far, but there’s plenty of room on the base board to add more as the need arises.

Pyxis 3 Hits Beta; Rebranded As Gadgetos

The beta version of Pyxis 3 is now available. Skewworks continues to develop the ARM operating system, and with the transition to version 3 they’ve given it a new name: Gadgetos. One big difference from Pyxis 2 is that the new kernal is closed source. But they’ve taken steps to ensure that the OS is still hardware independent. This is done by reworking the kernel to allow driver loading at run time from an SD card.

The user interface has also changed a bit. Gadgetos relies entirely on a context-based menu system. The minimum input hardware requires a touchscreen LCD and one tactile button. By holding that button, a menu pops up in the center of the screen. This menu is different based on where it is called (this is where context comes in). If you’re at the desktop screen, you get options to load programs, etc. If you pull up the menu while running an application you’ll see the options available for that app. To see more about the new navigation system check out the video after the break.

Continue reading “Pyxis 3 Hits Beta; Rebranded As Gadgetos”