Template For Building STM32F0-Discovery Project In GCC

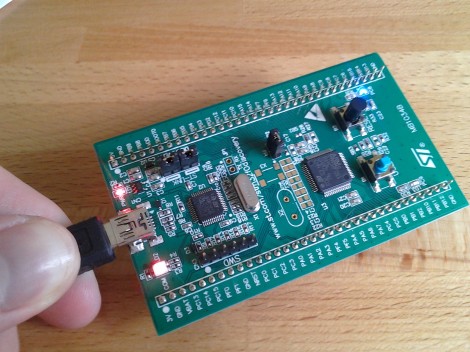
Yep, that blue light is blinking and I made it happen. I’ve been hard at work since I got my free STM32F0-Discovery board in the mail. Most recently I put together a starting template for building STM32F05x project on Linux. You’ll still need to install your own tool chain (I’m using the Code Sourcery G++: Lite Edition), but this makes it a snap to compile your projects with support for STM’s peripheral libraries.

As for programming, you may remember that I added support for writing to RAM in the stlink project. I’ve wasted spent a ton of time trying to get support for writing to Flash into that project. It’s just less of a hassle to use stlink than it is to work with OpenOCD. But I’ve really hit a wall getting the flash loader code to work. If you want to check out what I’ve done so far in that area I committed a very messy branch (see the commits for what code changes I’ve made).

In the mean time you can use OpenOCD to write images compiled with the template to your device. I included the ‘make program’ option in the Makefile to do this from command line. If you need help compiling OpenOCD check the readme in the template repository.

The First Step To Running IPhone Apps In Linux

[Christina] has been working on a project she calls Magenta to put Darwin/BSD on top of Linux. What does that mean? Well, hopefully it’s the first step towards running iPhone/iPad apps on a Linux machine.

Before you get too excited, there are a few caveats; Magenta only works on ARMv7 platforms, none of the fancy iOS frameworks are included, and it’s currently impossible to run iOS apps with this build. Think of this project as a very, very early version of Wine. If you’d like to take Magenta for a spin, [Christina] put the source up here.

Although [Christina]’s project is entirely useless for anyone wanting Siri on their Android phone, it’s possible to add all those fancy iOS frameworks to Magenta and create an open source OS able to run iPhone apps.

We really have to admire [Christina]’s work on this. It’s an amazingly impressive project, and her final goal of recreating the iOS stack would be a boon to the jailbreaking scene. Cue the sound of millions of iPhone clones marching out of China…

via [OleRazzleDazzle] on the reddits

Video Review: STM32F0-Discovery Board

The STM32 Discovery boards are nothing new, we’ve looked at them several times. But the newest sibling in the line might be just the thing to make the leap from your steadfast 8-bit projects. We got our hands on it and recorded a video review.

The STM32F0-Discovery gives you a programmer and ARM Cortex-M0 chip all on one convenient board. The top portion is the ST-Link V2 programmer, and includes jumpers and a programming header which let it easily program off-board chips.

The included microcontroller is an STM32F051R8T6 which includes 64kb of program memory and 8kb of RAM. Coming in at $1.80-3.77 in single units and in a hand-solderable LQFP package this raises an eyebrow for our future projects. It has an 8 MHz internal oscillator with 6x PLL which means you can run at 48 MHz without an external crystal (check out [Kenneth Finnegan’s] PLL primer if you don’t know what this is).

The only thing holding us back is the development environment. ST provides everything you need if you’re on Windows, but we want a Linux friendly solution. We know other Discovery boards have worked under Linux thanks to this project. This uses the same ST-LINK V2 so it should work as well. If you want one of your own head over the ST page to see if they’re still giving away samples. There should be a button labeled “Register for your FREE KIT”.

CalTech’s Manipulator-arm Equipped Robot

[Justin] wrote in to tell us about the rover which his CalTech team has entered in NASA’s Exploration Robo-Ops Competition. Their time to shine is later this week, but you can see some of the test footage after the break.

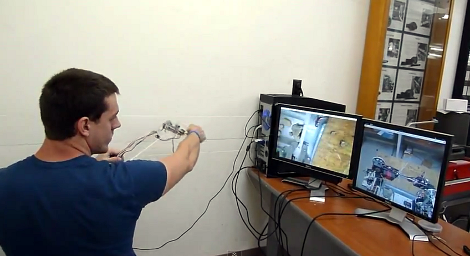
The operator pictured above is using a controller which is a scale model of the manipulator arm, with two cameras giving feedback. One of those monitors shows a feed from the arm itself, providing a view of the gripper. The other feed is a wide shot of the working area from the body of the robot. The arm has six degrees of freedom actuated by servo motors. The controller is a replica of the arm laser cut from acrylic. At each joint there’s a potentiometer whose value is used to establish the position of the frame.

At first we thought that this would be more fatiguing and less convenient than using a gaming controller. But as we look at the dexterity of the arm it becomes obvious that joysticks and buttons would just make things more difficult.

Continue reading “CalTech’s Manipulator-arm Equipped Robot”

A Sample Player You Can Slip In Your Pocket

This portable sample player packs quite a punch. [Lee] wanted a nice portable way to take his samples with him, but refused to water-down the features just because it is portable. He set of goal of playing between 3-8 simultaneous notes from a large assortment of stored samples.

Sample space was the first design consideration, and it’s hard to beat the price per megabyte of an SD card. After some calculations he concluded that it is possible to pull these samples off the card quickly enough to achieve his simultaneous note goal at CD quality frequencies, but only if there is little or no latency when reading from the card. This means [Lee] needed a fast processor so he chose the LPC1769 which is an ARM Cortex-M3 processor which can run at 120 MHz.

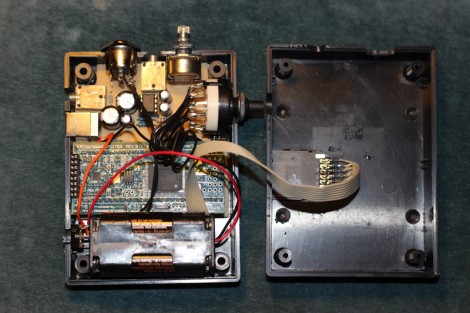
The project box includes room for a volume knob to control the output from the in-build headphone amplifier. There’s also a rotary encoder for selecting sample sets. But we’re a bit confused on this part as the device is MIDI controlled. [Lee] is the creator of the electronic Moolodeon, which itself has MIDI out and will be used as a controller for this project.

Retrotechtacular: Introducing The Brand New Acorn Risc Machine

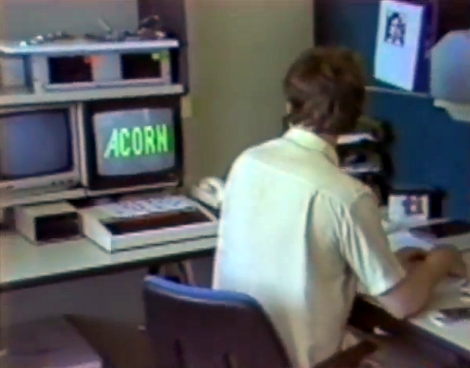
Get ready to be swept off your feet by this Acorn Risc Machine promotional video from the Mid-1980’s (also embedded after the jump). We’re sure most have put it together by now, but for those slower readers, this is the introduction of ARM processors.

The video has a bit of everything. There’s a deadpan narration with just a bit of British accent around the edges. But that’s spiced up considerably by the up-beat synthesizer track playing in the background. You’ll see plenty of programmers in short-sleeve dress shirts, and we challenge you to count the number of mustaches that make it on camera. But jest aside, it’s fun to think of how the advent of this chip affected the world.

This post is just the second installment of our Retrotechtacular series (here’s the inaugural post). We haven’t seen any old movies come in from readers yet. What are you waiting for? Digitize that footage because we want to see it! Of course it doesn’t have to be your own movies, so anything you come across that covers decades-old tech is fair game.

Continue reading “Retrotechtacular: Introducing The Brand New Acorn Risc Machine”

Emulating ARM On An 8-pin AVR

Falling on the heels of some fabulous ‘lets see what we can emulate on an AVR’ builds we’ve seen, [Dimitri] emulated an ARM Cortex-M0 on an 8-pin ATtiny85.

The emulator is written entirely in AVR assembly. Unfortunately, the instruction set of ATtinys don’t have a multiply instruction, so that had to emulated in a separate piece of code. Even with this addition, the emulator is very small; the core is just over 1300 instructions and small enough to fit on the Flash of the very small ‘tiny85.

Unlike the ATMega running Linux we saw last month, [Dimitri] won’t be doing anything crazy like making the tiniest and worst Linux computer ever. The Cortex-M0 doesn’t have a MMU, so Linux is out of the question. [Dimitri] could go with μCLinux, with the addition of a I2C EEPROM and RAM, but don’t expect a speed demon for an emulated ARM running at 200kHz.

[Dimitri] put all the code up on his webpage, and the installation is just running ‘make.’  It looks easy enough to get up and running very quickly, so we’re sure some bored hardware guru will come up with something interesting to do with this code.