Driving more than a handful of LEDs from a microcontroller is often a feat that takes tedious wiring, tricking the processor, or a lot of extra external hardware. Charlieplexing is perhaps the most notorious of these methods, and checks two of those three boxes. This library for the Teensy 4.0 checks all three, but it can also drive a truly staggering 32,000 LEDs at one time.
The TriantaduoWS2811 library is able to drive 32 channels of LEDs from a Teensy 4.0 using only three pins and minimal processor resources. It uses the FlexIO and DMA subsystems of the i.MX RT1062, the particular ARM processor on the Teensy, to drive four external shift registers. Together, the system is able to achieve 30 frames per second on with 1,000 LEDs per channel, for a total of 32,000 LEDs. Whoah.
[Ward] aka [wramsdell] wondered what one would do with all of the horsepower of a Teensy microcontroller when he first saw its specifications, and was able to build this project to take advantage of its features. What’s surprising, though, is that it doesn’t use nearly everything the processor is capable of, so you can do other tasks at the same time as driving that giant LED display.
It’s amazing to see how much technology is packed into even the “simple” devices that we take for granted in modern life. Case in point, the third party Xbox controller that [wrongbaud] recently decided to tear into. Not knowing what to expect when he cracked open its crimson red case, inside he found an ARM Cortex microcontroller and a perfect excuse to play around with Serial Wire Debug (SWD).
Though even figuring out that much took a bit of work. As is depressingly common, all the interesting components on the controller’s PCB were locked away behind a black epoxy blob. He had no idea what chip was powering the controller, much less that debugging protocols it might support. But after poking around the board with his multimeter, he eventually found a few test points sitting at 3.3 V which he thought was likely some kind of a programming header. After observing that pulling the line labelled “RES” low reset the controller, he was fairly sure he’d stumbled upon a functional JTAG or SWD connection.
As [wrongbaud] explains in his detailed blog post, SWD is something of a JTAG successor that’s commonly used by ARM hardware. Using just two wires (data and clock), SWD provides hardware debugging capabilities on pin constrained platforms. It allows you to step through instructions, read and write to memory, even dump the firmware and flash something new.
For the rest of the post, [wrongbaud] walks the reader through working with an SWD target. From compiling the latest version of OpenOCD and wiring an FTDI adapter to the port, all the way to navigating through the firmware and unlocking the chip so you can upload your own code.
To prove he’s completely conquered the microcontroller, he ends the post by modifying the USB descriptor strings in the firmware to change what it says when the controller is plugged into the computer. From here, it won’t take much more to get some controller macros like rapid fire implemented; a topic we imagine he’ll be covering in the future.
Learning through play is effective for humans of all ages, and since 2016 [slantconcepts] has been designing STEM kits that help teach kids to build their future overlords. They are launching version 3 of their LittleArm robotic arm, and the progression from version 1 is an interesting study in simplification and parts count reduction without sacrificing functionality.
In all of the LittleArm versions the main mechanical components are 3D printed, and driven by 3 servos for motion plus one additional servo to run the gripper. These kits are specifically intended to be built and disassembled repeatedly, and classrooms are a great place for small screws to easily disappear, so reducing the number of screws was a big goal for v3. The gripper/forearm shows the most dramatic improvement from the previous versions, being simplified from 8 separate components to a single 3D printed part by using a compliant mechanism — that squiggly pattern that allows the gripper to flex into place. The gripper tips also feature a simple “cutout” that allow it more easily grasp horizontal objects.
An Arduino Nano based expansion board is used to control the arm, with a HC-06 Bluetooth module to allow it to be controlled via a smart phone app. Various sensors can also be added to expand the kit’s capabilities. Unfortunately the mechanical design is not open source, but it can still be a source of inspiration for your own design projects.
They say that in order to understand recursion, you must first understand recursion. Once you master that concept, you might decide that it’s time to write your own compiler that can compile itself as a fun side project. According to [Warren] aka [DoctorWkt], who documented every step of writing this C compiler from scratch, a true compiler will be able to do that.
Some of the goals for the project included self-compiling, focusing on a real hardware platform, practicality, and simplicity. [Warren] outlines a lot of the theory of compilers as well, including all the lexical, grammar, and semantic analysis and then the final translation into assembly language, but really focuses on making this compiler one for practical use rather than just a theoretical implementation. He focuses on Intel x86-64 and 32-bit ARM platforms too, which are widely available.
This project is a long read and very thoroughly documented at around 100,000 words, so if you’ve ever been interested in compilers this is a great place to start. There are a lot of other great compiler tools floating around too, like the Compiler Explorer which shows you generated code as you write in a higher level language.
We’re surrounded by ARM processors, which enjoy a commanding foothold in the consumer market, especially with portable electronics. However, Arm Holdings has never focused its business model on manufacturing chips, instead licensing its CPUs to others who make the physical devices. There is a bit of a tightrope to walk, though, because vendors want to differentiate themselves while Arm wants to keep products as similar as possible to allow for portability and reuse of things like libraries and toolchains. So it was a little surprising when Arm announced recently that for the first time, they would allow vendors to develop custom instructions. At least on the Armv8-M architecture.
We imagine designs like RISC-V are encroaching on Arm’s market share and this is a response to that. Although it is big news, it isn’t necessarily as big as you might think since Arm has allowed other means to do similar things via special coprocessor instructions and memory-mapped accelerators. If you are willing to put in some contact information, they have a full white paper available with a pretty sparse example. The example shows a population count function hand-optimized into 12 Arm instructions. Then it shows a single custom instruction that would do the same job. However, they don’t show the implementation nor do they offer any timing data about speed increases.
Sometimes it seems like Arduino is everywhere. However, with a new glut of IoT processors, it must be quite a task to keep the Arduino core on all of them. Writing on the Arduino blog, [Martino Facchin], Arduino’s chief of firmware development, talks about the problem they faced supporting two new boards from Nordic.
The boards, the Nano 33 BLE and Nano 33 BLE Sense are based on an ARM Cortex M4 CPU from Nordic. The obvious answer, of course, is to port the Arduino core over from scratch. However, the team didn’t want to spend the time for just a couple of boards. They considered using the Nordic libraries to interact with the hardware, but since that is closed source, it didn’t really fit with Arduino’s sensitivities. However, in the end, they took a third approach which could be a very interesting development: they ported the Arduino core to the Mbed OS. There’s even an example of loading a sketch on top of Mbed available from [Jan Jongboom].
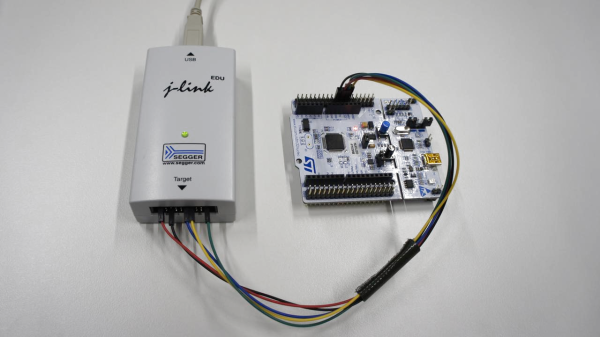
When a processor has a fault it can leave what looks to be precious little in the way of cause and effect. Debug-by-print-statement works surprisingly well in simple cases, but where in a desktop environment you would drop into a debugger to solve trickier problems this can be an onerous task on an embedded system. [Ross Schlaikjer]’s excellent blog post walks through setting up one of our favorite Open Hardware debug probes and shows us that with the right tooling in place, unexpected faults aren’t quite so impenetrable. Continue reading “Debug Superpowers Bring An STM32 Back From The Dead”→