Oscilloscope Doubles As A Serial Terminal

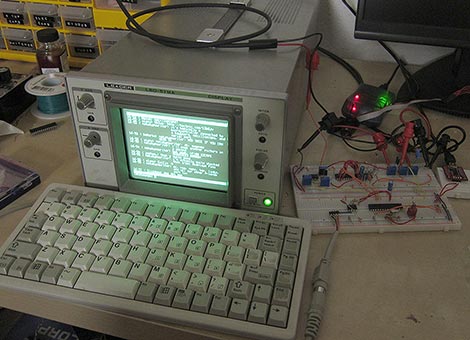
PC-based USB oscilloscopes are fast becoming all the rage. [Matt Sarnoff’s] Terminalscope takes the reverse approach, adapting an oscilloscope into a full serial terminal. You may have seen something similar before in the Dutchtronix/SparkFun O-Clock, but [Matt’s] project goes one further by adding a PS/2 keyboard port for full bidirectional serial communication, and with much sharper display resolution to boot.

The mostly VT-100 compatible Terminalscope is built around two AVR microcontrollers: an ATmega328P runs full-tilt to generate the video signal and handle serial I/O, while an ATtiny45 handles keyboard input to avoid interrupting the ’328’s duties. Rather than vector trace each character, a raster-scanning approach is used: the beam follows a fixed X/Y path (like a television), while modulating the Z input (beam intensity) to form an image. The device can be connected to a PC via serial port or USB-to-TTY adapter, or directly to another microcontroller to debug serial output.

We recently showed an oscilloscope being used as a multichannel digital logic display. The Terminalscope provides yet another use for this essential bench tool and could nicely round out a “poor man’s” testing setup. The schematic and full source code are available for download.

Teletype Machine From An Electric Typewriter

This project, by an unknown hacker, patches into an electric typewriter and uses it as a Teletype. An AVR ATmega168 microcontroller patches into the key matrix of the typewriter which allows it to artificially type. Now, data can be sent over a serial connection to the AVR for output on the typewriter.

We’re not quite sure what this is going to be used for.  We’ve seen hacks like this for Twitter reading in the past but he makes no mention of that type of use. Personally, we’d like to have this just to “print” out the occasional letter. Typewriters are so rarely used these days it would be a bit peculiar to get a letter that has the dimpled impressions associated with slamming a die into a piece of paper.

‘tiny’ Power Supply Monitor

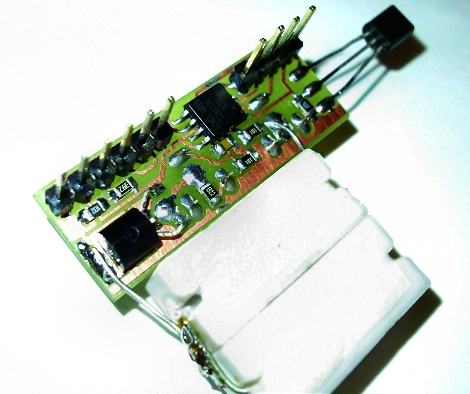
[Manekinen] built a power supply monitor based around an AVR ATtiny13. Voltage and amperage are displayed on a 16×2 LCD character display (we’re not sure what the third number is… samples per second?). This is no small feat considering that the tiny13 is an 8-pin chip. He makes it happen by using the pins for both LCD control and ADC input. To make this happen the HD44780 compliant display is used in 4-bit mode. Check out the video after the break and hit up the non-translated page if you want to download the source code and PCB artwork. A note of warning, he’s using the RESET pin for I/O which means once you burn the fuses you’ll need a programmer that has High Voltage Serial Programming capabilities if you want to reprogram the chip. Continue reading “‘tiny’ Power Supply Monitor”

Repurposing A Click Wheel

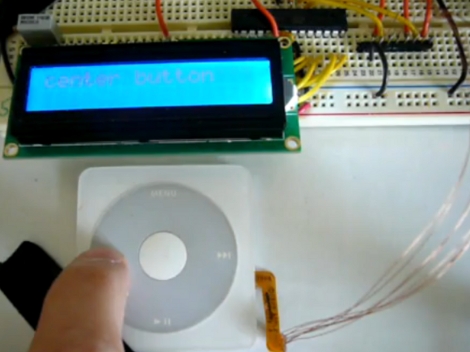
We think the click wheel is the biggest contributor to the success of the original iPods. The devices were a brick with a monochrome screen but the user interface was slick and easy to use. [Jason] decided he wanted to add a click wheel to his own project. After using a logic analyzer he discovered that it doesn’t implement a common protocol such as I2C, perhaps a deliberate move by Apple to keep the controller under wraps? He managed to get past this hurdle, as seen in the video after the break, by bit-banging the data in from the click wheel and then reverse engineering the protocol.

It’s connected to an AVR ATtiny88 with feedback shown on a character LCD screen. We’re glad that [Jason] tipped us off about this, but he doesn’t have any code available yet. We love to dive into the source so the sooner he gets it up the better! We’ve got an old 3rd generation with a bad board that is begging to have the wheel ripped out of it, not to mention the dirt-cheap replacements available on ebay. Continue reading “Repurposing A Click Wheel”

Nanotouch: A Tiny AVR Media Thing

[youtube=http://www.youtube.com/watch?v=qLOQOTa4-aY]

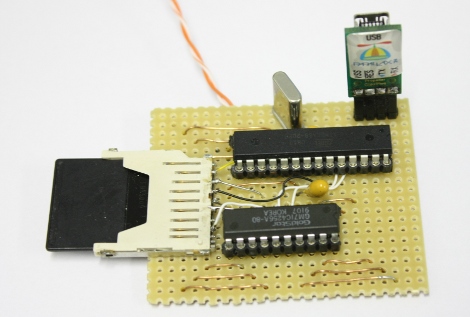
[Rossum] is at it again. This time, he has created a super tiny media device to get us drooling. You might recall him from the 8-bit device we showed you before. The Nanotouch is roughly the dimensions of a 96×64 OLED screen(slightly larger than a quarter), with about 1/3 to 1/2 of an inch of stuff packed behind it.  The screen itself is mounted atop 4 buttons. This allows you to depress the screen edges for navigation.  He does mention that this design needs a little work to prolong the life of the screen, but we really like the intuitive way of navigating.  At its heart is an ATmega32u4.

We thought his last version was fantastic, but this one has us enamored. He states he’ll publish schematics and code, as he did before. We just didn’t want to wait to share.

[thanks Joakim]

Arduino Programmer For Arduino

[youtube=http://www.youtube.com/watch?v=M-sFQNIXde8]

Wow, that title is flamebait… but give us a chance to explain. [George] wrote some code for the Arduino that allows it to program another Arduino. You may be thinking to yourself “this has already been done”. In a way it has, with the AVR ISP programming shield. But once the code has been uploaded to the Arduino, you don’t need a computer to program the next chip. This concept turns an Arduino into an in-the-field programmer. Right now his code only programs the ATmega328 and it’s a little buggy, but the concept is solid. A fully functioning independent programmer is easy to image; [George] has laid the ground work, the AVR ISP programming firmware has proven this can work with several different chips, and if your AVR has an ATmega328 there should be plenty of room to store the code you plan to flash to the target microprocessors. It’s up to you to put all the pieces together.

More AVR Tetris

[Ben] built an AVR based Tetris game that uses a TV as the display. He linked his project in a comment from the AVR Tetris project featured last week. His work taps the power of his own tvText library to handle the composite video out. Using a TV takes all of the hardware work out of the equation, leaving just the composite jack and a few buttons to connect to the ATmega168 and its 20MHz clock. We’ve embedded the game play video after the break. It’s black and white but also clean and crisp.

[Ben] didn’t include music with his build but another commenter, [Eric], has started to work on that. We can’t help but think that they both should have tipped us off sooner about their projects.

Continue reading “More AVR Tetris”