Reliving A Bitmapped Past With A Veritable Hoard Of Bitmap Fonts

The fonts seen with old computer systems such as those from Apple and Commodore, as well as Microsoft Windows 3.1 and older, form an integral part of our interaction with these systems. These days such bitmap fonts are a rarity, with scalable vector-based fonts having taken their place on modern-day systems. This unfortunately also means that these fonts are at major risk of being lost to the sands of time. This is where [Rob Hagemans] seeks to maintain an archive of such bitmap fonts, ranging from Acorn to MSX to Windows.

Many of these fonts are extracted from character ROMs, with a preview of some of these fonts available via the Monobit viewer. The fonts themselves are made available in YAFF format, which is a text-based format that can be converted back to a binary format using the Monobit tool. If you ever wanted to use one of these old bitmap fonts in a project, this would seem to offer a treasure trove of options. The hoard of bitmap fonts might be the perfect fit for your next graphic LCD project.

(Via [SuperIlu] on Mastodon)

Modifying Old Fonts In The Name Of Baseball

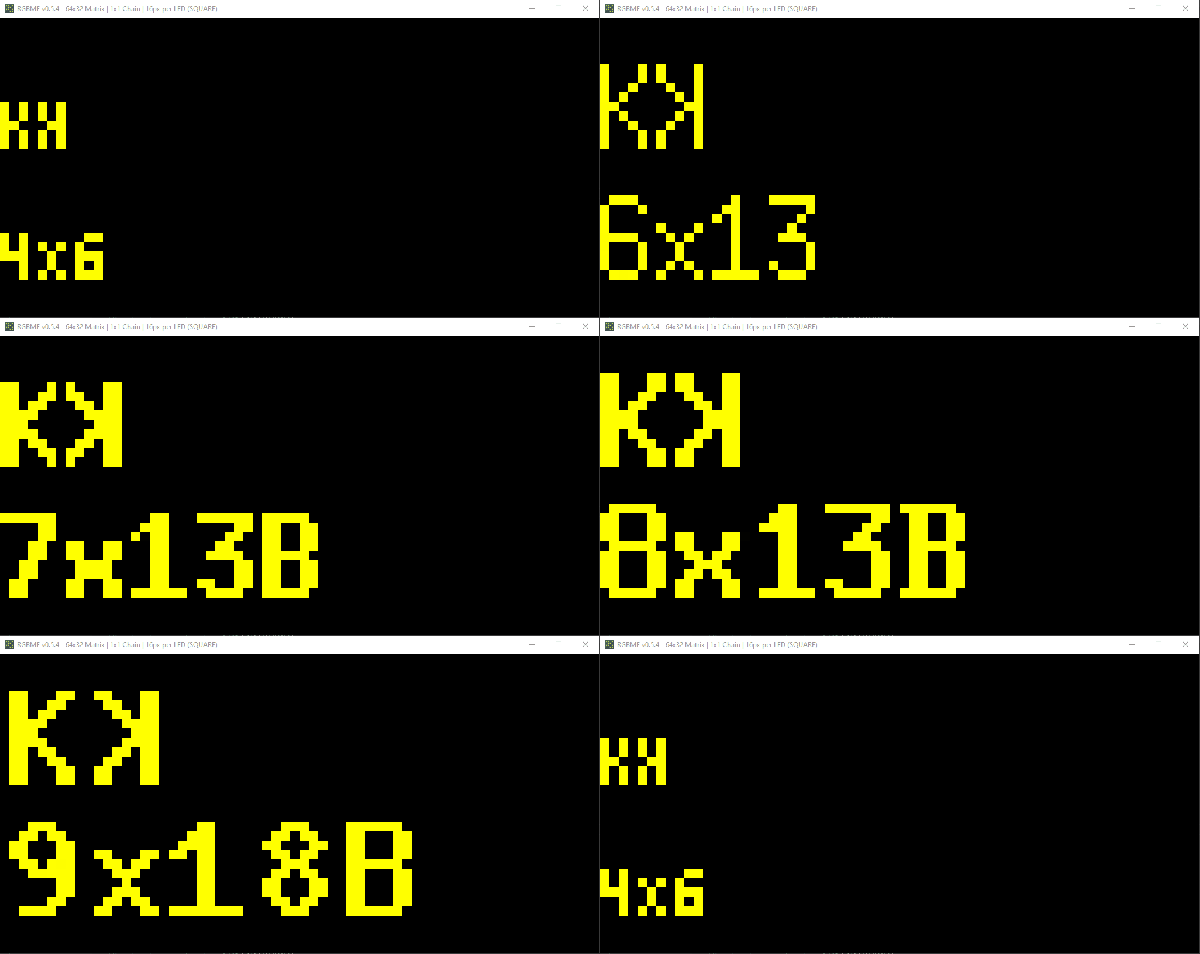
Baseball is in full swing again, and having recently accepted a position with Major League Baseball, [Ty Porter] is warming up with a big contribution to the MLB LED Scoreboard project — modifying 20-some old fonts to support baseball’s ‘ꓘ’ character that indicates a special strikeout with a called third strike (meaning the batter didn’t take a swing).

The problem is that Major League Baseball-the-entity recently deprecated the original data source for the scoreboard project. This called for a huge refactor of the codebase, including previously-patched fonts which were now showing either the font’s default no-character character, or nothing at all.

Fortunately, BDF font files are fairly human-readable and make reference to bitmap, which is an actual bitmap in hex. [Ty] settled on Unicode A4D8 (ꓘ), a character from the Tibeto-Burman language Lisu that certainly looks good enough to this baseball fan. Then it became a matter of mirroring the bitmap for ‘K’. [Ty] tried a few things like reversing the nibbles and looking up each one in a table, but that also mirrors the padding, which is bad news.

Then he tried not reversing the nibbles and just looked them up in a table, but this approach dropped and added bits unintentionally. Finally, he tried reversing the order, looking up the reversed nibble, and shifting each byte until there was no padding. This worked for most of the 20 fonts [Ty] patched. The others fell in line with some manual work.

Not much of a baseball fan? You’re almost guaranteed to like this one, especially if you hate mayo.

Creating An Image Format For Embedded Hardware

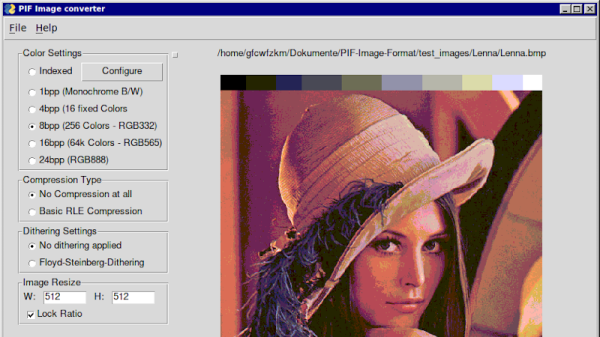
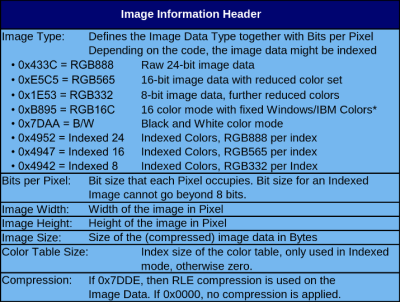
Whether its one of those ubiquitous little OLED displays or a proper LCD panel, once you’ve got something a bit more capable than the classic 16×2 character LCD wired up to your microcontroller, there’s an excellent chance you’ll want to start displaying some proper images. Generally speaking that means you’ll be working with bitmap files, but as you might expect when pushing a decades-old file format into an application it was never intended for, things can get a little messy. Which is why [gfcwfzkm] has created the Portable Image File (PIF) format.

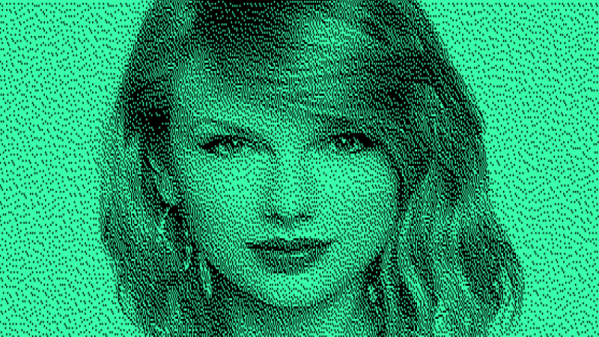
This low-overhead image format is designed specifically for microcontrollers, and can be decoded on devices with at least 60 bytes of free RAM. Images stored with PIF not only require fewer computational resources to process, but equally important, take up less space on flash. The format supports both color and monochrome images, and the GitHub repo even includes a graphical Python 3.10 tool that lets you convert your images to either .pif files or a .h header file for embedding directly into your C code.

[gfcwfzkm] has provided some source code to show you how to get the PIF library up and running, but as of the time of this writing, there isn’t any example code for using PIF within the Arduino environment. That’s no big deal for the old hands in the audience, but we’re interested in seeing how the community can make use of this file format once it’s available in a bit more beginner-friendly package. It’s one of the final unchecked items on the todo list though, so it shouldn’t be long now.

Of course nothing is wrong with using bitmaps to display images in your microcontroller projects, and there’s a certain advantage to fiddling around with the well-known image format. But if a new file type is all it takes to speed up access times and cram a few more images onto the chip, we’re definitely ready to upgrade.

Displaying Bitmaps On The Apple II

The Apple II was the popular darling that truly kicked off the ascention of the company that would later bring you darlings such as the iMac, iPod, and iPhone. The brainchild of the legendary Steve Wozniak, it was a low-cost home computer that made use of some interesting compromises to create video output with the bare minimum components. This can make it difficult if you want to output full-bitmap graphics on the Apple II – but it is certainly possible.

[cybernesto] set about completing this task, and released VBMP on GitHub. Programmed in assembly, it builds upon the work of democoder Arnaud Cocquière to display bitmap images on the vintage 6502-powered machine. Capable of displaying monochrome images in 560 x 192 or sixteen colors in 140 x 192, it loads slowly but does get the job done.

We’ve seen similar development underway elsewhere, too – on this vintage satellite tracker project. [Keplermatic] reports that their code runs at a similar speed to the VBMP loader, despite doing several things differently. It’s also available over at GitHub, for your reading pleasure.

If you’re looking to achieve something similar with your vintage hardware, it’s worth a look. Having the source available makes integrating it into further projects a snap. Learning to program these older machines can be challenging, but that’s half the fun – and when you build something awesome, be sure to drop it on the tips line.

Arduino GPS

A Simple And Inexpensive GPS Navigation Device

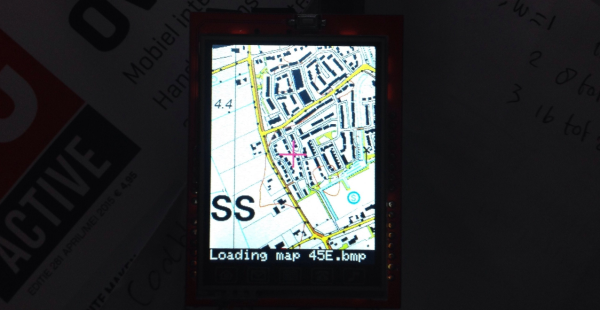
There are plenty of GPS navigation units on the market today, but it’s always fun to build something yourself. That’s what [middelbeek] did with his $25 GPS device. He managed to find a few good deals on electronics components online, including and Arduino Uno, a GPS module, and a TFT display.

In order to get the map images on the device, [middelbeek] has to go through a manual process. First he has to download a GEOTIFF of the area he wants mapped. A GEOTIFF is a metadata standard that allows georeferencing information to be embedded into a TIFF image file.  [middelbeek] then has to convert the GEOTIFF into an 8-bit BMP image file. The BMP images get stored on an SD card along with a .dat file that describes the boundaries of each BMP. The .dat file was also manually created.

The Arduino loads this data and displays the correct map onto the 320×240 TFT display. [middelbeek] explains on his github page that he is currently unable to display data from two map files at once, which can lead to problems when the position moves to the edge of the map. We suspect that with some more work and tuning this system could be improved and made easier to use, of course for under $25 you can’t expect too much.

Driving A T6963C Based Graphic LCD

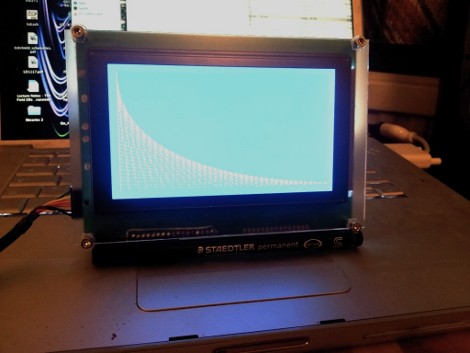
[Tom Fleet] spent the dreary weekend inside learning how to drive this T6963C based graphic LCD controller. Although this is his first time venturing away from HD44780 character displays, the availability of an Arduino library helped him go from being a newbie to coding his own animated graphics.

The hardware setup is straight-forward. The screen has a 20-pin connector and operates at 5V. We don’t see it on his protoboard, but usually these displays also need a potentiometer which serves as a voltage divider for the screen contrast. The data and control pins eat up most of the available I/O on the ATmega328 chip he used, but the I2C and SPI pins are still open and he plans a future project to make this a wireless display for his PC using one of those protocols.

As for fonts and animation, [Tom] links to several tools which will come in handy. There’s a font program that will convert Windows system fonts into a C file for use on the Arduino. The animations start with a 1:1 ratio animated graphic drawn with his favorite image editing software. He then converts those to monochrome bmp files and used bmp2c to convert each frame to a C array. After the break there’s a seven second example that would work well as a boot screen for his project.

Continue reading “Driving A T6963C Based Graphic LCD”

Drawing Images On A Character Display


[Dean Hall] doesn’t seem to know his Simpsons characters very well, but that didn’t stop him from coming up with this method for displaying a bitmap on an LCD character display with a Hitachi HD44780 chip.

[Hall] used an LCD with two 16 character rows and 8×5 pixels in each character. He displayed the image over 2×3 characters, which gave him 17×18 pixels (including the spaces between the characters) to work with. The first step after acquiring an image is to rasterize the image by hand onto graph paper. This won’t be scanned, it’s just a diagram to determine which pixels to light up.

Once the 6 characters were determined, [Hall] used this handy web-based tool to convert his graphed diagram to bitmap data. The data is loaded onto the microcontroller and the image shows up on the LCD. This is a pretty straightforward project, just be sure you properly identify your monkeys.

[via YourITronics]