Calculating Like It’s 1962

We sometimes forget that the things we think of as trivial today were yesterday’s feats of extreme engineering. Consider the humble pocket calculator, these days so cheap and easy to construct that they’re essentially disposable. But building a simple “four-banger” calculator in 1962 was anything but a simple task, and it’s worth looking at what one of the giants upon whose shoulders we stand today accomplished with practically nothing.

If there’s anything that [Cliff Stoll]’s enthusiasm can’t make interesting, we don’t know what it would be, and he certainly does the job with this teardown and analysis of a vintage electronic calculator. You’ll remember [Cliff] from his book The Cuckoo’s Egg, documenting his mid-80s computer sleuthing that exposed a gang of black-hat hackers working for the KGB. [Cliff] came upon a pair of Friden EC-132 electronic calculators, and with the help of [Bob Ragen], the engineer who designed them in 1962, got one working. With a rack of PC boards, cleverly hinged to save space and stuffed with germanium transistors, a CRT display, and an acoustic delay-line memory, the calculators look ridiculous by today’s standards. But when you take a moment to ponder just how much work went into such a thing, it really makes you wonder how the old timers ever brought a product to market.

As a side note, it’s great to see the [Cliff] is still so energetic after all these years. Watching him jump about with such excitement and passion really gets us charged up.

Continue reading “Calculating Like It’s 1962”

Build A Calculator, 1974 Style

Last month we touched upon the world of 1970s calculators with a teardown of a vintage Sinclair, and in the follow-up were sent an interesting link: a review of a classic Sinclair calculator kit from [John Boxall]. It’s a few years old now, from 2013, but since it passed us by at the time and there was clearly some interest in our recent teardown, it’s presented here for your interest.

It seems odd in 2017 that a calculator might be sold as a kit, but when you consider that in the early 1970s it would have represented an extremely expensive luxury purchase it makes some sense that electronics enthusiasts who were handy with a soldering iron might consider the cost saving of self-assembly to be worthwhile. The £24.95 price tag sounds pretty reasonable but translates to nearly £245 ($320) in today’s terms so was hardly cheap. The calculator in question is a Sinclair Cambridge, the arithmetic-only predecessor to the Sinclair Scientific we tore down, and judging by the date code on its display driver chip it dates from September 1974.

As a rare eBay find that had sat in storage for so long it was clear that some of the parts had suffered a little during the intervening years. The discrete components were replaced with modern equivalents, including a missing 1N914 diode, and the display was secured in its flush-fitting well in the board with wire links. The General Instrument calculator chip differs from the Texas Instruments part used in the Scientific, but otherwise the two calculators share many similarities. A full set of the notoriously fragile Sinclair battery clips are in place, with luck they’ll resist the urge to snap. A particularly neat touch is the inclusion of a length of solder and some solder wick, what seems straightforward to eyes used to surface-mount must have been impossibly fiddly to those brought up soldering tube bases.

The build raises an interesting question: is it sacrilege to take a rare survivor like this kit, and assemble it? Would you do it? We’d hesitate, maybe. But having done so it makes for a fascinating extra look at a Sinclair Cambridge, so is definitely worth a read. If you want to see the calculator in action he’s posted a video which we’ve put below the break, and if you need more detail including full-resolution pictures of the kit manual, he’s put up a Flickr gallery.

Continue reading “Build A Calculator, 1974 Style”

Teardown With A Twist: 1975 Sinclair Scientific Calculator

When writing a recent piece about Reverse Polish Notation, or RPN, as a hook for my writing I retrieved my Sinclair Scientific calculator from storage. This was an important model in the genesis of the scientific calculator, not for being either a trailblazer or even for being especially good, but for the interesting manner of its operation and that it was one of the first scientific calculators at an affordable price.

I bought the calculator in a 1980s rummage sale, bodged its broken battery clip to bring it to life, and had it on my bench for a few years. Even in the early 1990s (and even if you didn’t use it), having a retro calculator on your bench gave you a bit of street cred. But then as life moved around me it went into that storage box, and until the RPN article that’s where it stayed. Finding it was a significant task, to locate something about the size of a candy bar in the storage box it had inhabited for two decades, among a slightly chaotic brace of shelves full of similar boxes.

The Sinclair's clean design still looks good four decades later.
The Sinclair’s clean design still looks good four decades later.

Looking at it though as an adult, it becomes obvious that this is an interesting machine in its own right, and one that deserves a closer examination. What follows will not be the only teardown of a Sinclair Scientific on the web, after all nobody could match [Ken Shirriff]’s examination of the internals of its chip, but it should provide an insight into the calculator’s construction, and plenty of satisfying pictures for lovers of 1970s consumer electronics.

The Sinclair is protected by a rigid black plastic case, meaning that it has survived the decades well. On the inside of the case is a crib sheet for its RPN syntax and scientific functions, an invaluable aid when it comes to performing any calculations.

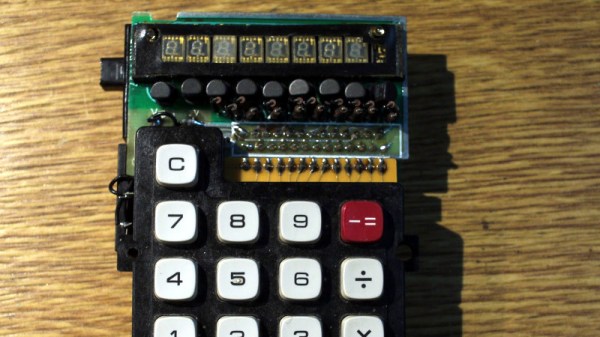
It shares the same external design as the earlier Sinclair Cambridge, a more humble arithmetic calculator, but where the Cambridge’s plastic is black, on the Scientific it is white. The LED display sits behind a purple-tinted window, and the blue-and-black keyboard occupies the lower two-thirds of the front panel. At 50 x 111 x 16 mm it is a true pocket calculator, with an elegance many of its contemporaries failed to achieve and which is certainly not matched by most recent calculators. Good industrial design does not age, and while the Sinclair’s design makes it visibly a product of the early 1970s space-age aesthetic it is nevertheless an attractive item in its own right.

Continue reading “Teardown With A Twist: 1975 Sinclair Scientific Calculator”

3D Printed Curta Gets Upgrades

It is amazing how makers can accomplish so much when they put their mind to something. [Marcus Wu] has uploaded a mesmerizing video on how to build a 3D printed Curta Mechanical Calculator. After nine iterations of design, [Marcus] presents a polished design that not only works but looks like a master piece.

For the uninitiated, the Curta is a mechanical calculator designed around the time of World War II. It is still often seen used in time-speed-distance (TSD) rallies to aid in the computation of times to checkpoints, distances off-course and so on. Many of these rallies don’t allow electronic calculators, so the Curta is perfect.  The complex inner workings of the contraption were a key feature and point of interest among enthusiasts and the device itself is a highly popular collectible.

As for the 3D printed design, the attention to detail is impeccable. The current version has around 80 parts that need to 3D printed and a requires a few other screws and springs. Some parts like the reversing lever and selector knobs have been painted and digits added to complete the visual detail. The assembly took [Marcus Wu] around 40 minutes to complete and is one of the most satisfying builds we have ever seen.

What is even more amazing is that [Markus Wu], who is a software engineer by profession has shared all the files including the original design files free of cost on Thingiverse. A blog with written instructions is also available along with details of the iterations and original builds. We already did a post on a previous version so check it out for a little more background info.

Thanks for the tip [lonestar] Continue reading “3D Printed Curta Gets Upgrades”

3D Printed Math Grenade

Calculator hacks are fun and educational and an awesome way to show-off how 1337 your skills are. [Marcus Wu] is a maker who likes 3D printing and his Jumbo Curta Mechanical Calculator is a project from a different era. For those who are unfamiliar with the Curta, it is a mechanical calculator that was the brainchild of Curt Herzstark of Austria from the 1930s. The most interesting things about the design were the compactness and the complexity which baffled its first owners.

The contraption has setting sliders for input digits on the side of the main cylindrical body. A crank at the top of the device allows for operations such as addition and subtraction with multiplication and division requiring a series of additional carriage shift operations. The result appears at the top of the device after each crank rotation that performs the desired mathematical operation. And though all this may seem cumbersome, the original device fit comfortably in one hand which consequently gave it the nick name ‘Math Grenade’.

[Marcus Wu] has shared all the 3D printable parts on Thingiverse for you to make your own and you should really take a look at the video below for a quick demo of the final device. There is also a detailed set of images (82 or so) here that present all the parts to be printed. This project will test your patience but the result is sure to impress your friends. For those looking to dip your toes in big printed machines, check out these Big Slew Bearings for some inspiration.

Finally, A Calculator For The Atomic Age!

In the 1950s, a nuclear-powered future seemed a certainty. The public had not been made aware of the dangers posed by radioactive material, any large-scale accidents involving nuclear reactors had either been hushed up or were yet to happen, and industry and governments were anxious to provide good PR to further their aims. Our parents and grandparents were thus promised a future involving free energy from nuclear reactors in all sorts of everyday situations.

With the benefit of hindsight, we of course know how the story turned out. Windscale, Three Mile Island, Chernobyl, and Fukushima, and we’re still waiting for our atomic automobiles.

If you have a hankering for nuclear-powered domestic appliances though, all is not lost. [GH] is leading the charge towards a future of atomic energy, with a nuclear-powered calculator. It’s not quite what was promised in the ’50s, but it is nevertheless a genuine appliance for the Atomic Age. At its heart is not a 1950s-style fission reactor though, but a tritium tube. Beta particles from the tritium’s decay excite a phosphor coating on the tube’s inside wall, producing a small amount of light. This light is harvested with a solar cell, and the resulting electrical energy is stored in an electrolytic capacitor. The cell has an open-circuit voltage of 1.8 V, and the 100 μF capacitor in question stores a relatively tiny 162 μJ. From this source, a dollar store calculator can operate for about 30 sec, so there should be no hanging about with your mathematics.

We’ve brought you a tritium battery before, albeit a slightly larger one. And should you need the comforting glow of a tritium tube but not the radiation risk, how about this LED-based substitute?

Hackaday Prize Entry: DIY ARM Scientific Calculator

What does a hacker do when he or she wants something but can’t afford it? They hack one together, of course. Or, in the case of [Ramón Calvo], they thoughtfully plan and prototype. [Ramón Calvo] wanted a scientific calculator, but couldn’t afford one, so he designed and built one himself.

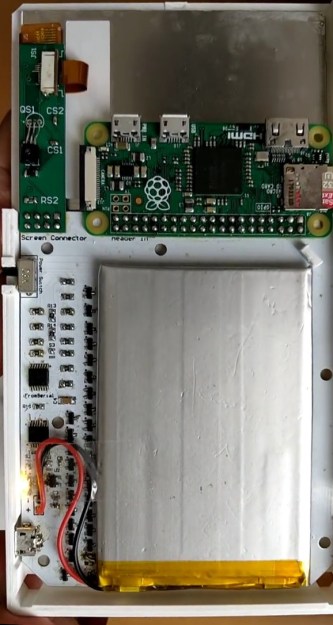
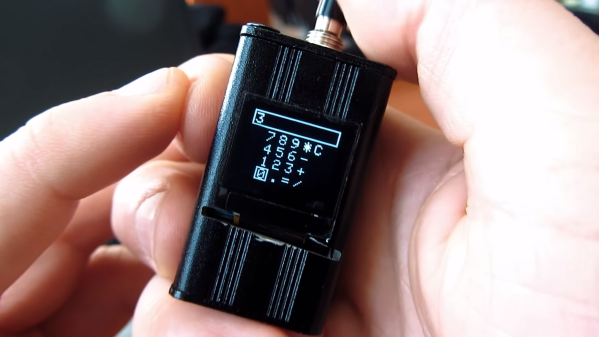
[Ramón] started off with Arduino but upgraded initially to Freescale’s Freedom KL25Z development board upgraded to an ARM Cortex-M0+ programmed using mbed. The display is an Electronic Assembly DOGL-128 128×64 pixel LCD. [Ramón] did a couple of iterations on the PCB, going from a large DIY one in order for the Arduino version to work, to the current, smaller version for the ARM chip with hand soldered SMD components. After that, [Ramón] looked into the algorithms needed to parse mathematical input. He settled on the shunting-yard algorithm, which converts the input into Reverse Polish Notation (RPN), which is easier for the software to work with.

[Ramón] has a ton of features working, including your standard add, subtract, multiply and divide operations, square root, nth root and exponentiation, trigonometry, log and log10, and factorial(!) There are a few things still on the to-do list, such as low power and a graphing mode, and there are a couple of bugs still in the system, but the overall system is up and running. [Ramón] has put up the schematic and KiCAD files up on his Hackaday.io project page along with the bill of materials.

We’ve had a few Hackaday prize entries in the form of calculators, such as this one with Nixie tubes and this one that emulates 70’s HP calculators.