Classic Calculators Emulated In Browser

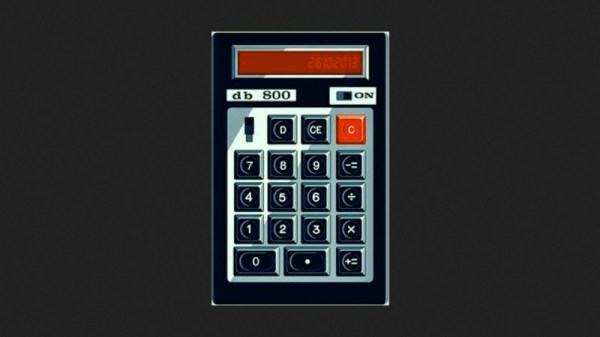
The Multiple Arcade Machine Emulator, now known simply as MAME, started off as a project to emulate various arcade games. The project is still adding new games to its library, but the framework around MAME makes it capable of emulating pretty much any older computer. The computer doesn’t even need to be a gaming-specific machine as the latest batch of retro hardware they’ve added support for is a number of calculators from the 90s and early 00s including a few classics from Texas Instruments.

Since no one is likely to build an arcade cabinet version of a TI-89, all of these retro calculators are instead emulated entirely within a browser. This includes working buttons and functions on an overlay of each of these calculators but also pixel-accurate screen outputs for each of these. The graphing calculators have more of what we would consider a standard computer screen, but even the unique LCDs of some of the more esoteric calculators are accurately replicated as well thanks to the MAME artwork system.

There are a number of calculators implemented under this project with a full list found at this page, and the MAME team has plans to implement more in the future. If you’re looking for something fun to do on a more modern calculator, though, take a look at this build which implements ray tracing on a TI-84 Plus CE.

Thanks to [J. Peterson] for the tip!

A Modern Tribute To The Classic HP-16C Calculator

The HP-16C Computer Scientist is much beloved as the only dedicated programmer’s calculator that Hewlett-Packard ever made. Most surviving examples in the world are well-used, and you haven’t been able to order one from HP since 1989. Thus, [K Johansen] set about building a tribute to the HP-16C using modern hardware.

The build relies on a Raspberry Pi Pico as the brains of the operation. As with so many classic HP calculators, it operates in Reverse Polish Notation, and includes the customary stack operations. To serve a programmer well, it’s set up to accept entry in hexadecimal, octal, decimal, and binary formats, and can readily convert between them. Beyond that, it’s equipped with the usual arithmetic operators, as well as bitwise operations like NOT, AND, and so on.

Perhaps what we love most, though, is the keypad. It was all put together with a combination of cheap AliExpress keypads, a label maker, and a laser printer. It’s a wholly DIY job, and a little rough around the edges, but it makes the calculator far easier to use.

It’s not an exact replica of the HP-16C, but the differences in operation are minor.Those wishing to build their own can grab the required files from the project’s Github page. We’ve seen replicas of other classic HP calculators before, too. If you’ve got your own mathematical projects brewing up in the lab, don’t hesitate to send them in to the tipsline!


Walnut Case Sets This Custom Arduino-Powered RPN Calculator Apart From The Crowd

How many of us have an everyday tool that’s truly unique? Likely not many of us; take a look around your desk and turn out your pockets, but more often than not, what you’ll find is that everything you have is something that pretty much everyone else on the planet could have bought too. But not so if you’ve got this beautiful custom RPN calculator in a wooden case.

This one comes to us from [Shinsaku Hiura], who generally dazzles us with unique mechanical clocks and displays. This calculator solves a more practical problem — the dearth of RPN calculators on the market with the correct keyboard feel, specifically with the large keys and light touch he desired. Appropriately, the build started with a numeric keypad, which once liberated of its USB interface was reverse-engineered to figure out how the matrix was wired. Next up, a custom PCB to connect the keypad to an Arduino and a 20×4 LCD display was milled up, while a test case was designed and printed to check fitment. The final case was milled from a block of solid walnut and fitted with an acrylic window, for a sharp look with clean lines and pleasing colors.

As for the calculator itself, the demo below shows it going through its paces. The code is clever because it leverages the minimal number of keys available by hiding all the scientific and engineering functions behind a “secret silver key” that was once the equals key and obviously not needed in RPN. Hats off to [Shinsaku] for a handsome and unique addition to his desk.

Continue reading “Walnut Case Sets This Custom Arduino-Powered RPN Calculator Apart From The Crowd”

Custom Calculator Brings Us Back To The 70s

There are certain design aesthetics from every era that manage to survive the fads of their time and live throughout history. Ancient Greek architecture is still drawn upon for design inspiration in modern buildings, the mid-century modern style from the 60s still inspires various designs of consumer goods, and the rounded, clean looking cars from the 90s are still highly desirable qualities in automotive design. For electronics, though, we like this 70s-inspired calculator that [Aaron] recently built.

The calculator hearkens back to the days of calculators like the HP-29C with its large buttons and dot-matrix display. [Aaron] built the case out of various woods with a screen angled towards the user, and it uses a LCD display similar to those found in antique calculators. The brain of the calculator is an Arduino which fits easily into the case, and [Aaron] also built the keyboard from scratch with Cherry MX-style mechanical keys soldered together into a custom shape.

The software to run the calculator is fairly straightforward, but we are most impressed with the woodworking, styling, and keyboard design in this build. [Aaron] is also still ironing out some bugs with the power supply as it uses a DC-DC converter to power the device from a single lithium battery. For those who are more fond of early 2000s graphing calculators instead, be sure to take a look at this graphing calculator arcade cabinet.

Continue reading “Custom Calculator Brings Us Back To The 70s”

Screenshot of the RSA calculator, showing the fields that you can fill into and the results as they propagate through the calculation

Lift The Veil On RSA With This RSA Calculator

Encryption algorithms can be intimidating to approach, what’s with all the math involved. However, once you start digging into them, you can break the math apart into smaller steps, and get a feel of what goes into encryption being the modern-day magic we take for granted. Today, [Henry Schmale] writes to us about his small contribution to making cryptography easier to understand – lifting the veil on the RSA asymmetric encryption technique through an RSA calculator.

With [Henry]’s calculator, you can only encrypt and decrypt a single integer, but you’re able to view each individual step of an RSA calculation as you do so. If you want to understand what makes RSA and other similar algorithms tick, this site is an excellent starting point. Now, this is not something you should use when roll your crypto implementations – as cryptographers say in unison, writing your own crypto from scratch is extremely inadvisable. [Henry] does say that this calculator could be useful for CTF players, for instance, but it’s also undeniably an accessible learning tool for any hacker out there wishing to understand what goes on under the wraps of the libraries we use.

In modern day, cryptography is instrumental to protecting our freedoms, and it’s a joy to see people work towards explaining the algorithms used. The cryptography tools we use day-to-day are also highly valuable targets for governments and intelligence agencies, willing to go to great lengths to subvert our communication security – so it’s even more important that we get acquianted with the tools that protect us. After all, it only takes a piece of paper to encrypt your communications with someone.

Pocket Computer Reminds Us Of PDAs

Before smartphones exploded on the scene in the late 00s, there was still a reasonable demand for pocket-sized computers that could do relatively simple computing tasks. Palm Pilots and other PDAs (Personal Digital Assistants) were all the rage in the ’90s and early ’00s, although for cutting-edge tech from that era plenty of these devices had astronomical price tags. This Arduino-based PDA hearkens back to that era, albeit with a much more accessible parts list.

The build is based around an Arudino Nano with an OLED screen and has the five necessary functions for a PDA: calculator, stopwatch, games, phonebook, and a calendar. With all of these components on such a small microcontroller, memory quickly became an issue when using the default libraries. [Danko] uses his own custom libraries in order to make the best use of memory which are all available on the project’s GitHub page. The build also includes a custom PCB to keep the entire pocket computer pocket-sized.

There are some other features packed into this tiny build as well, like the breakout game that can be played with a potentiometer. It’s an impressive build that makes as much use of the microcontroller’s capabilities as is possible, and if you enjoy projects where a microcontroller is used as if it is a PC take a look at this Arduino build with its own command-line interface.

Continue reading “Pocket Computer Reminds Us Of PDAs”

Reviving A 1974 Sinclair Scientific Calculator

When a treasure of retrotechnology fails to work, the natural next step is to have a go at repairing it. [Adam Wilson] found himself in this position when he acquired a 1974 Sinclair Cambridge Scientific calculator, and his progress with the device makes for an interesting read.

First up is something of value to all old Sinclair enthusiasts, he’s found a solution to the original battery connectors being prone to failure. A couple of parts stocked by RS can be used as replacements, which should save quite a lot of Sinclairs with crusty connectors.

Saving the connectors should have fixed the calculator, but only served to reveal that it had an electronic fault. Some detective work traced this to the power supply, which is a small switching circuit. The 1974 chip and associated coil had both failed, which rather drew the project to a halt. A second repair-or-spares Cambridge Scientific was sourced, and by good luck it happened to have a working PCB. So [Adam] got a working calculator, and we hope he’ll succumb to the temptation to shoehorn in a PSU from 2022 to get the other one working.

Anyone curious about this slightly unusual calculator should take a look at our teardown of one.