Amazon Echo Dot Upgraded To Retro Futuristic Look

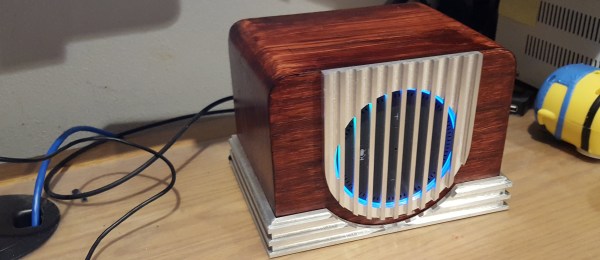
It takes a surprising amount of planning and work if you want something to look old. [vemeT5ak] wanted the Echo Dot sitting on his desk to fit a different aesthetic motivated by a 1940s Canadian radio. Armed with Solidworks, a Tormach CNC, and some woodworking tools at Sector67 hackerspace, he built a retro-futuristic case for the Amazon Alexa-enabled gadget. Future and past meet thanks to the design and material appearance of the metal grille and base molding wrapping the wood radio case. The finishing touch is of course the ring of blue light which still shines through from the Echo itself.

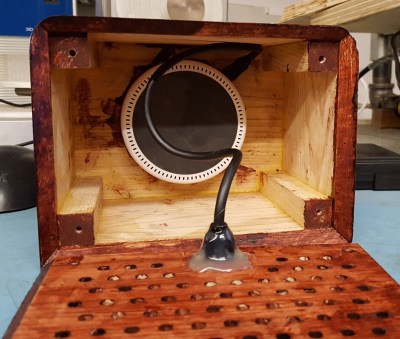
A short USB extension cable connects the Echo Dot to the back of the enclosure, and the cavernous inside plus ample holes provide a nice rich sound.

It took about 15 hours of modeling, scaling, and tweaking in Solidworks with an interesting design specification in mind: single-bit operation. This single-bit is not in the electrical sense, but refers to the CNC milling operation. All pieces are cut with a 1/4″ end mill, without any tool changes. Metal pieces were milled from 6061 aluminum and the hickory case (with burgundy stain) was mostly cut on a table saw, but the holes were CNC machined.

What looks like an otherwise perfect build has a single flaw that eats up [vemeT5ak]’s soul; the Echo Dot has a draft angle that wasn’t considered during modeling, and the hole is ever so slightly too wide, meaning it didn’t press fit perfectly flush. Fortunately it’s not noticeable behind the metal grill, and unless you knew (please help keep his dirty little secret), you would think everything turned out perfectly.

It turns out building a case for the Echo Dot is challenging for a few reasons; the rubbery material on the bottom doesn’t allow anything to stick to it, and the sides are smooth and featureless with a taper that makes it difficult to lock it in. Many cases resort to clipping over the top to hold it in place. Others install it into a fish or a furby.

The Improved Luggable PC

There are exactly two types of personal computers available today. If you need a lot of horsepower, a powerful GPU, or a full-power CPU, you’re going to end up with a desktop. If you need something portable, you’re getting a laptop with a wimpy CPU and an underpowered GPU. Historically, there has been a third type of PC, the luggable. The luggable is a desktop PC crammed into a case that makes it slightly more portable than a desktop and a monitor.  You cannot buy a luggable PC case right now. They simply do not exist as a commercial product you can shove your own hardware into. This is a form factor an entire industry forgot.

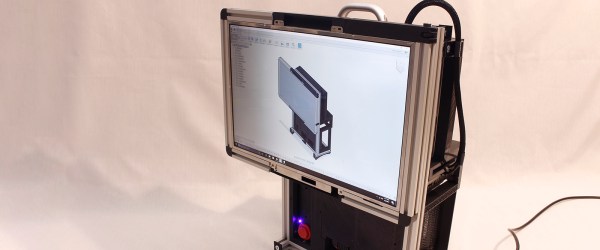
Now there’s a DIY luggable PC. This project from [Roger] packs a standard ATX motherboard, a full-size GPU, a full-size power supply, and everything else that makes a desktop PC powerful into a case that can be stored in an overhead bin.

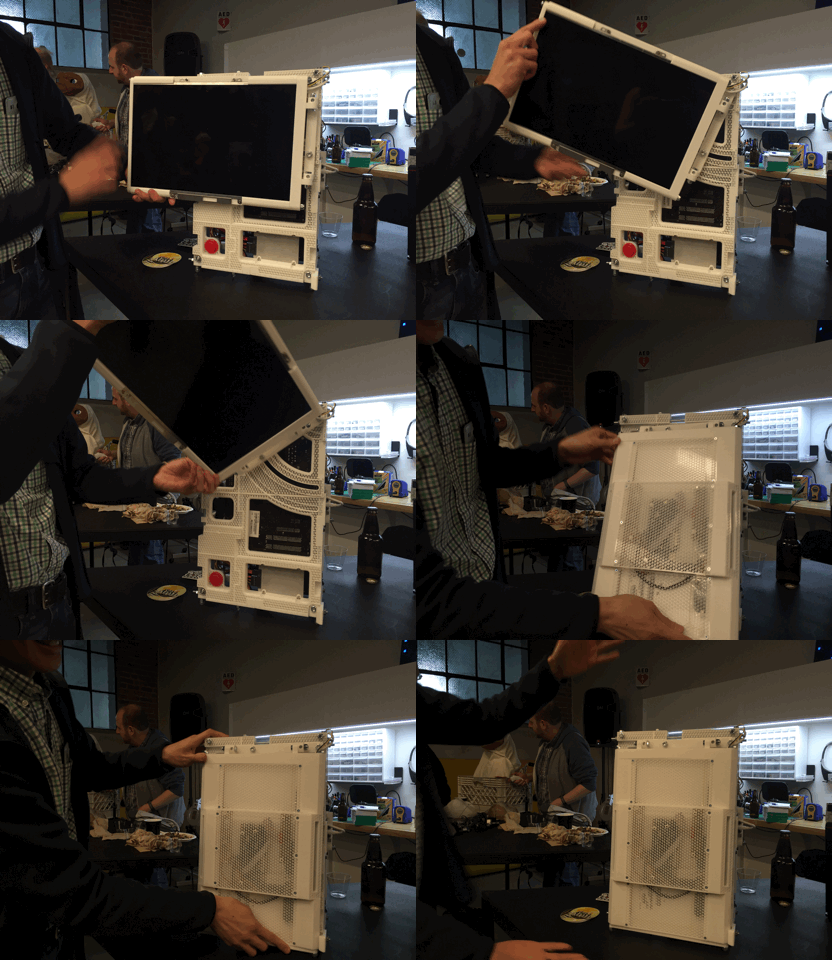
[Roger] has been working on this project for a while, and it was featured on Hackaday back when it looked like a RepRap Mendel. There have been some significant improvements over the earlier iterations of this project, including a very, very cool hinge mechanism that allows the display to fold in when the computer isn’t being used. It’s a mechanical wonder that prevents scratches. Neat. The rest of the case is constructed out of 2020 aluminum extrusion, and about a one kilogram spool of filament.

Since this is a portable case, there are a few compromises. There are no 5.25″ bays, no 3.5″ bays, and few 2.5″ bays. M.2 SSDs and USB-powered CD drives exist, so this isn’t a big deal.

This is a truly fantastic case in a form factor you can’t buy anywhere else. If you have a spare monitor and a bit of extrusion sitting around, this is one to build yourself.

Case Modding The Old School Way

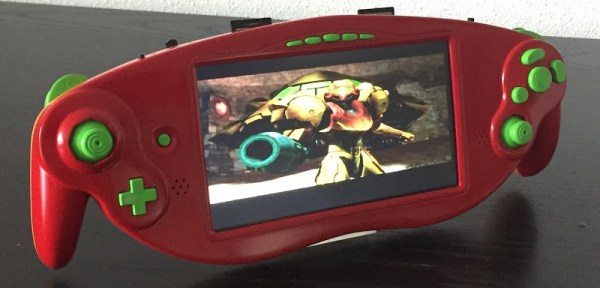
Since the release of the Raspberry Pi, the hallowed tradition of taking game consoles, ripping all the plastic off, and stuffing the components into nice, handheld form factors has fallen off the wayside. That doesn’t mean people have stopped doing it, as [Akira]’s masterful handiwork shows us.

This casemod began with a Nintendo GameCube ASCII keyboard controller, a slightly rare GameCube controller that features a full keyboard smack dab in the middle. While this keyboard controller was great for Phantasy Star Online and throwing at the TV after losing Smash, the uniqueness of this controller has outshadowed its usefulness. [Akira] began his build by ripping out the keyboard and installing a 7 inch LCD. It fits well, and makes for a very unique GameCube case mod.

The rest of the build is about what you would expect – the motherboard for a PAL GameCube is stuffed inside, a quartet of 18650 batteries provide the power, and the usual mods – a memory card is soldered to the motherboard and an SD Gecko allows homebrew games and emulators to be played.

The completed project is painted with the same theme as [Samus Arans]’ Varia suit, making this a one of a kind casemod that actually looks really, really good.

Battletech Case Mod Displays Awesome Woodwork, Hides Hacks

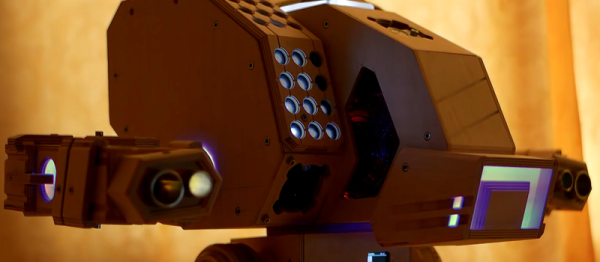
[S.PiC] has been working on a computer case styled to look like the Vulture mech from Battletech. We’re not sure if his serious faced cat approves or not, but we do.

The case is made from artfully cut plywood. We kind of hope he keeps the wood aesthetic. However, that would be getting dangerously close to steampunk. So perhaps a matching paint job at the end will do. In some of the videos we can how he’s cleverly incorporated the computer’s components into the design of the case. For example, the black mesh on the front actually hides the computer’s power supply intake fan.

The computer inside is a small micro-itx formfactor one. Added as peripherals to it [S.Pic] has pulled out the hacker-electronics-tricks bible. From hand soldered LED grids to repurposed Nokia LCD screens, he has it all. In one video we can even see the turret of the mech rotating under its own power.

It looks like the build still has a few more steps before completion, but it’s already impressive enough to be gladly worth the useful table space consumed on any hacker’s desk. Video after the break.

Continue reading “Battletech Case Mod Displays Awesome Woodwork, Hides Hacks”

Mythical Game Boy Advance Colors Hacked Into Reality

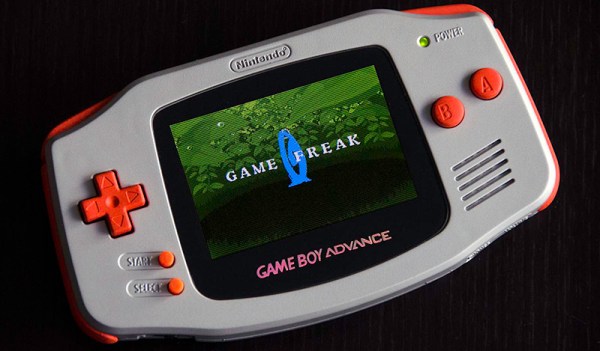
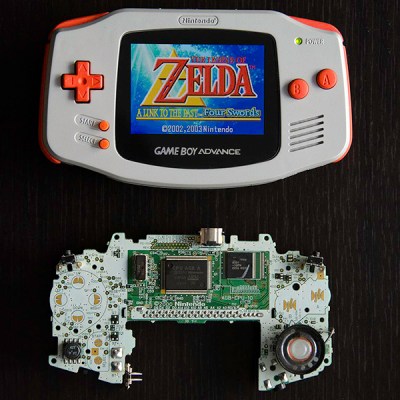
When it was announced in 2000 at a Nintendo trade show, the Game Boy Advance was clad in beautiful silver plastic, accented with brilliant orange buttons. As is usually the case with product introductions, the first color and style displayed to be public became the most popular. There was one problem with this silver and orange GBA; Nintendo never put it into production. Fast forward fifteen years, and [Michael Choi] decided it was time to make his own silver and orange Game Boy. It’s a great introduction to mold making and very detailed painting, and a useful guide for turning engineering prototypes into beautiful objects.

[Michael]’s build began with an aftermarket shell, painted with Tamiya spray paints. The color is remarkably accurate, considering the only pictures for the silver and orange Game Boy are fifteen years old, and with the right painting technique, these colors are indistinguishable from a properly colored, injection molded piece of plastic.

GBAsquareThe buttons were not as easy as the shell. [Michael] originally decided casting would be the best solution, but after multiple attempts, he couldn’t get the color right. Even with opaque dyes in the resin, the buttons would still come out slightly translucent. In the end, [Michael] decided to paint the original buttons.

This casemod isn’t just about changing the color of the enclosure. [Michael] also wanted is Game Boy to have the backlight found in the second revision clamshell GBA. This was easily acquired on eBay, and with a few slight hardware modifications and a beautiful glass lens to replace the plastic occupying the bezel, [Michael] has a gorgeous Game Boy Advance, taken straight from a press event fifteen years ago.

Wii U Laptop

Stuffing A Wii U Into A Laptop

For some reason, a lot of hackers seem to have an obsession with jamming video game consoles into smaller boxes with screens. It’s more portable yes, but be honest — how much use is it actually going to get? Regardless, [RedmagnusX] has just finished up what might be the first Wii U laptop.

He’s using a 17″ laptop screen from a Dell XPS M1730, which he’s combined with a case of his own design that fits the Wii U’s guts. To interface the screen from the Wii, he picked up a driver-board from NJYtouch. He’s also managed to cram the power regulator into the laptop, and a few small speakers for audio output. He also integrated the sensor bar into the top of the unit. Not too shabby!

It reminds us a lot of this older Xbox 360 laptop mod, and looks surprisingly similar. However our favorite case mod still has to be the PlayBox — [Eddie Zarick’s] beautiful combination unit featuring an Xbox One and the PS4 in a single 22″ box.

[Thanks for the tip Jon!]

RetroPie Turned Game Gear

Running vintage console emulators on a Raspberry Pi seems to be the thing all the cool kids are doing. The coolest RetroPie builds take a vintage console – usually of the Nintendo genus – stuff a Raspi in there somehow, and Bob’s your uncle. [Phil Herlihy] over at Adafruit is throwing his hat into the ring with a similar build. For this one, though, he’s using Sega’s oft-maligned Game Gear. He might actually get more than a few hours out of the battery with this one, and the battery is rechargeable, too. You can’t beat that.

The build begins with tearing down an old Game Gear, chopping up the PCB to save the button contact, and starting to fit all the components in there. The display is completely replaced with a 3.5″ composite display, a bit larger than the 3.2″ display found in a stock Game Gear. That’s not a problem, there’s a surprising amount of space behind the bezel, and if you’re good enough with an xacto blade and a file, it will look stock.

The rest of the components include an amplifier board, battery charge regulator, a 2500mAh LiPo, and a Teensy to read the buttons. There are a few modifications required for the Pi, but the finished device presents a USB port to the outside world; keep a keyboard by your side, and this is a portable Pi in every respect.