Kitchen Steganography With Turmeric

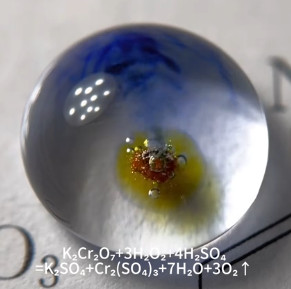
It is a classic rite of passage for nerdy kids to write secret messages using lemon juice. If you somehow missed that, you can’t see the writing until you heat the paper up with, say, an old-fashioned light bulb. If you were a true budding spy, you’d write a boring normal letter with wide spacing and then fill in the blanks between the lines with your important secrets written in juice. This is a form of steganography — encoding secret messages by hiding them in plain sight. [Randomona] shares a different technique that seems to be way cooler than lemon juice using, of all things, turmeric. This isn’t like the invisible ink of our childhood.

That’s probably a good thing. We doubt an LED bulb makes enough heat to develop our old secret messages. [Ranomona’s] ink doesn’t use heat, but it uses a developer. That means you must make two preparations: the ink and the developer. The results are amazing, though, as shown in the video below.

Continue reading “Kitchen Steganography With Turmeric”

Supremely-tough Glass Performs Under Pressure

There’s some nifty research from the University of Bayreuth, together with partners in China and the U.S., on creating supremely tough aluminosilicate glass that boasts an unusual structure. The image above represents regular glass structure on the left, and the paracrystalline structure on the right.

Aluminosilicate, which contains silicon, aluminum, boron and oxygen, is a type of oxide glass. Oxide glasses are a group to which borosilicate and other common glasses belong. Structurally speaking, these glasses all have a relatively disordered internal structure. They’re known for their clarity, but not especially their durability. Continue reading “Supremely-tough Glass Performs Under Pressure”

Different Etching Strokes For Different PCBs, Folks

[Sebastian] probably didn’t think he was wading into controversial waters when he posted on his experimental method for etching PCBs (in German). It’s not like etching with hydrochloric acid and peroxide is anything new, really; it was just something new to him. But is it even possible these days to post something and not find out just how wrong you are about it?

Sadly, no, or at least so it appears from a scan of [Sebastian]’s tweet on the subject (Nitter). There are a bunch of ways to etch copper off boards, including the messy old standby etchant ferric chloride, or even [Sebastian]’s preferred sodium persulfate method. Being out of that etchant, he decided to give the acid-peroxide method a go and was much pleased by the results. The traces were nice and sharp, the total etching time was low, and the etchant seemed pretty gentle when it accidentally got on his skin. Sounds like a win all around.

But Twitter wouldn’t stand for this chemical heresy, with comments suggesting that the etching process would release chlorine gas, or that ferric chloride is far safer and cleaner. It seems to us that most of the naysayers are somewhat overwrought in their criticism, especially since [Sebastian]’s method used very dilute solutions: a 30% hydrochloric acid solution added to water — like you oughta — to bring it down to 8%, and a 12% peroxide solution. Yes, that’s four times more concentrated than the drug store stuff, but it’s not likely to get you put on a terrorism watch list, as some wag suggested — a hair stylist watchlist, perhaps. And 8% HCl is about the same concentration as vinegar; true, HCl dissociates almost completely, which makes it a strong acid compared to acetic acid, but at that dilution it seems unlikely that World War I-levels of chlorine gas will be sweeping across your bench.

As with all things, one must employ caution and common sense. PPE is essential, good chemical hygiene is a must, and safe disposal of spent solutions is critical. But taking someone to task for using what he had on hand to etch a quick PCB seems foolish — we all have our ways, but that doesn’t mean everyone else is wrong if they don’t do the same.

Continue reading “Different Etching Strokes For Different PCBs, Folks”

Old Film Camera Modified For Different Chemistry

While most photographers have moved on to digital cameras with their numerous benefits, there are a few artists out there still taking pictures with film. While film is among the more well-known analog photographic methods available, there are chemically simpler ways of taking pictures available for those willing to experiment a little bit. Cyanotype photography is one of these methods, and as [JGJMatt] shows, it only takes a few commonly available chemicals, some paper, and a slightly modified box camera to get started.

Cyanotype photography works by adding UV-reactive chemicals to paper and exposing the paper similarly to how film would be exposed. The photographs come out blue wherever the paper wasn’t exposed and white where it was. Before mixing up chemicals and taking photos, though, [JGJMatt] needed to restore an old Kodak Brownie camera, designed to use a now expensive type of film. Once the camera is cleaned up, only a few modifications are needed to adapt it to the cyanotype method, one of which involves placing a magnet on the shutter to keep it open for the longer exposure times needed for this type of photography. There is some development to do on these pictures, but it’s relatively simple to do in comparison to more traditional chemical film development.

For anyone looking for a different way of taking photographs, or even those looking for a method of taking analog pictures without the hassle of developing film or creating a darkroom, cyanotype offers a much easier entry point and plenty of artists creating images with this method don’t use a camera at all. There are plenty of other photographic chemistries to explore as well; one of our favorites uses platinum to create striking black-and-white photos.

No Fish Left Behind

For hundreds of years, Icelanders have relied on the ocean for survival. This is perhaps not surprising as it’s an isolated island surrounded by ocean near the Arctic circle. But as the oceans warm and fisheries continue to be harvested unsustainably, Iceland has been looking for a way to make sure that the fish they do catch are put to the fullest use, for obvious things like food and for plenty of other novel uses as well as they work towards using 100% of their catch.

After harvesting fish for food, most amateur fishers will discard around 60% of the fish by weight. Some might use a portion of this waste for fertilizer in a garden, but otherwise it is simply thrown out. But as the 100% Fish Project is learning, there are plenty of uses for these parts of the fish as well. Famously, cod skin has been recently found to work as skin grafts for humans, while the skin from salmon has been made into a leather-type product and the shells of crustaceans like shrimp can be made into medicine. The heads and bones of fish can be dried and made into soups, and other parts of fish can be turned into things like Omega-3 capsules and dog treats.

While we don’t often feature biology-related hacks like this, out-of-the-box thinking like this is an important way to continue to challenge old ideas, leave less of a footprint, improve human lives, and potentially create a profitable enterprise on top of all of that. You might even find that life in the seas can be used for things you never thought possible before, like building logic gates out of crabs.

Thanks to [Ben] for the tip!

Stirring Up 3D-Printed Lab Equipment

Magnetic stirrers are a core part of many chemistry labs. They offer many advantages for ensuring the effective mixing of solutions compared to other methods of stirring, including consistency, precise control, operation within closed systems, and of course, hands-free automatic operation. With so many reasons for employing a magnetic stirrer, it’s not too surprising that [Joey] would want one. He built his using 3D-printed parts rather than purchasing it.

The magnetic stirrer uses a 3D-printed enclosure for the base. Inside is a PWM controller which sends power to a small DC motor. A 3D-printed arm is attached to the motor, which hosts a pair of magnets. As the arm spins inside the enclosure, the magnetic fields from the magnet couple with the stir bar inside the mixture, allowing it to spin without any mechanical link to the stirring device and without any input from the user. [Joey] has also made all the 3D-printed parts for this build available on Printables.

While magnetic stirrers aren’t the most complicated of devices (or the most expensive), building tools like this anyway often has other advantages, such as using parts already on hand, the ability to add in features and customizations that commercial offerings don’t have, or acting as a teaching aid during construction and use. It’s also a great way to put the 3D printer to work, along with this other piece of 3D-printed lab equipment designed for agitating cell cultures instead.

Cooling Paint You Can Actually Make

[NightHawkInLight] has been working on radiative sky paint. (Video, embedded below.) That’s a coating that radiates heat in the infrared spectrum at a wavelength that isn’t readily absorbed or reflected by the atmosphere. The result is a passive system that keeps materials a few degrees cooler in direct sunlight than an untreated piece in the shade. That sounds a bit like magic, but apparently the math checks out.

Continue reading “Cooling Paint You Can Actually Make”