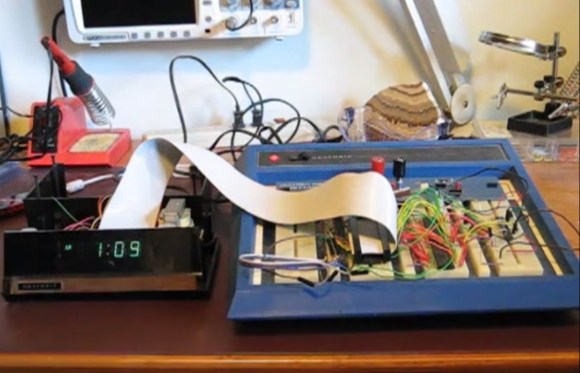
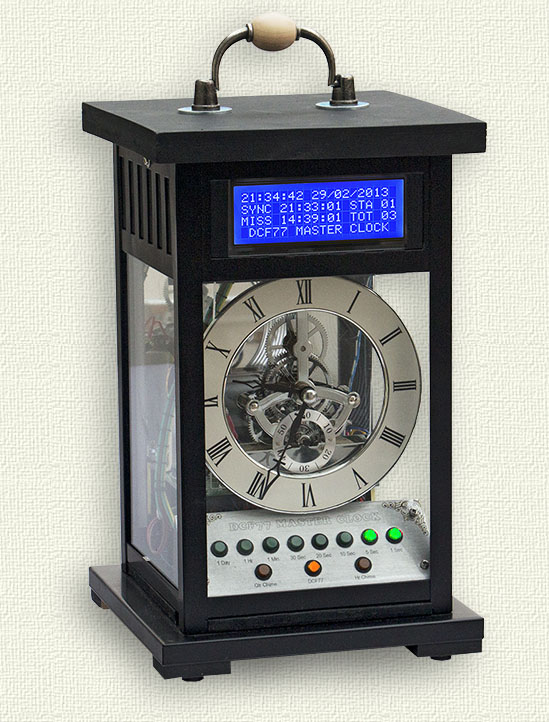
The Greenest Wall-Powered Clock

clock

Some of the most inefficient appliances in the home are AC mains-powered clocks. You can’t exactly turn them off and they use a whole lot of energy considering how often they’re looked at. [t3andy] came up with a great low power AC Mains clock that is only on 3% of the time. As a neat bonus, it also looks really, really cool.

[t3andy] is using a Teensy 3 as the brains of this clock, and the serial interface on the board provides a relatively easy means of setting the time without having to use buttons or tact switches. The clock face consists of 13 neopixels, with two red pixels showing the hour and a single green pixel showing the minutes. The time is measured with a DS3232 I2C real time clock with a battery backup.

The design is remarkably efficient since the LEDs are off 97% of the time, only being lit at the top of the minute. There are provisions for IR control and a PIR sensor to display the time whenever it’s needed, but that would obviously mean a hit to the energy efficiency.

A Cable Box Becomes A Network Time Display

DVR

In 2011 [Erkki]’s DVB box gave up the ghost. It had been a fixture of his media center for quite a while, decoding cable and recording shows faithfully for years. A flaky power supply will bring down the mightiest machine, though. and the Topfield box eventually found itself in disuse. One thing [Erkki] liked about this cable box is its wonderful green LED clock – even after the box had been declared dead, he still used it as a clock. Not wanting to keep a faulty machine on life support, [Erkki] decided to strip the guts and replace them with a networked Arduino that receives time over a network

[Erkki] originally used an Arduino and an ENC28J60 Ethernet module to receive time from an NTP server and spit it out onto the LCD display. A full Arduino for this kind of job, especially one that’s a more or less complete project, is a bit overkill so [Erkki] designed a PCB to put his ‘duino to better use.

One interesting bit about this build is that [Erkki] found it completely broken one day. Figuring this was a problem with the microcontroller, he first fried the ATMega with 9 volts – the reasons escape us, however – and started work on programming a new chip. After looking at different ports on his NTP server with a microcontroller, [Erkki] realized he had reset his network switch recently, meaning the previous microcontroller was working perfectly.

In the future, [Erkki] hopes to add some new features to this 8×4 seven-segment display sitting in a large box; something like reading off the temperature, checking IRC and his physical mailbox, and notifying him when someone is at the front door.

Twenty Two Servos And An Awesome Clock

servo

We can never get enough interesting clock builds, and [ebrithil]’s servo clock (Deutsche, Google translation) is up there with the best of them. There’s twenty-two servos in this clock, moving time forward with the mechanistic precision only an Arduino project can.

The digits in [ebrithil]’s clock are constructed like seven-segment displays, only instead of lighting up LEDs, servos turn small bits of paper that are light on one side and dark on the other. Turing the servo 180 degrees changes each segment from one shade to the other, making for an electromechanical seven-segment display.

The servos are controlled by an Arduino Mega connected to a DS1302 real-time clock. One problem [ebrithil] had with this project is having the segments rotate slightly every time someone turned on a light attached to the same circuit. He solved this problem by running the circuit off a perpetually charging cell phone battery, allowing him to take this clock on the go without losing time.

Continue reading “Twenty Two Servos And An Awesome Clock”

Designing And Building A Wooden Mechanical Clock

wooden-clock-prototype

Electronics are undoubtedly the basis for our modern society. Leaving out transistor-based devices, and a mechanical clock would be one of the most intricate devices man has come up with. As a Mechanical Engineer, I thought it would be a fun challenge to design and build my own gear-driven clock.

Because clocks have obviously been invented, I wouldn’t be starting from scratch, and I don’t think I could have figured out an escapement on my own. I explain my initial clock escapement and gear reduction design thoughts in this post, and originally getting the escapement to work was my biggest fear.

As seen in the first video after the break, the escapement gear is still a big problem, but not really for the reason I expected. The shaft that the gear sits on seems to be bent, so it allows the escapement to “go free” for part of it’s cycle, losing any sense of accurate timekeeping. Be sure to also check out the second video, especially around 1:50 when I show what happens when an escapement gear goes much faster than a normal clock. Continue reading “Designing And Building A Wooden Mechanical Clock”

NES Annoyance Timer Makes No Friends At Your Work

mario-annoyance-timer

Still trying to solidify that reputation as the office Grinch? This project will let everyone know you’re a complete jerk in no time. It’s called the 8-bit Annoying Person Remover. It detects when someone enters your office at which point it starts to play the Super Mario Bros. theme song while the display counts down 400 seconds. Just like in the game the music gets faster at the end and when it stops they know it’s time to get the heck out.

The hardware inside isn’t too complicated. An Arduino and a Wave shield do most of the work. The song played is stored on an SD card and can easily be changed. There’s a speaker mounted under the top heat vent of the enclosure. The device defaults to displaying the time of day, but monitors a motion sensor on one side to detect when someone comes through the door. This also works when someone leaves, cutting off the music and resetting the display. Don’t miss a video of it in action after the break.

It’s as if this was made specifically for the Comic Book Guy

Continue reading “NES Annoyance Timer Makes No Friends At Your Work”

Making A QR Clock Bigger, Cheaper, And Better

With the massive response and blog cred from his QR Code clock, [ch00f] felt it was time to step up his game and update his design to a proper commercial product. His new QR clock is bigger, brighter, cheaper, and in every way better than the old version, but these improvements came at a cost.

The LED matrices [ch00f] used in his earlier, smaller version weren’t very aesthetically pleasing. He wanted the lights to shine a brilliant white, and also be somewhat attractive when not illuminated. The 8×8 LED arrays [ch00f] picked up from Futurlec had a disgusting yellow coating on each LED that turned light emitted by the blue LEDs inside to a brilliant white. This simply wouldn’t do for a commercial product with [ch00f]’s name on it, so he turned to the one place in the universe where everything was for sale: alibaba.com.

After some trials and tribulations with component manufacturers in China, [ch00f] had the perfect LED matrix; not too expensive, very good quality control, and something that looked really good when both unpowered and illuminated.

Now that his boards are being spun up, [ch00f] hopes to sell his QR clock on Tindie. Each 24×24 LED matrix should cost less than $100, a pretty good deal if you ask us. He’d like to know if anyone out there has any feature requests, to which we can only say he should get rid of the PCB border. Tiling a few of these displays and controlling them via serial would be much cooler than a QR Code clock.

Harry Potter Location Clock Spies On Your Smart Phone

harry-potter-clock

The location clock found in the Harry Potter books makes for a really fun hack. Of course there’s no magic involved, just a set of hardware to monitor your phone’s GPS and a clock face to display it.

[Alastair Barber] finished building the clock at the end of last year as a Christmas gift. The display seen above uses an old mantelpiece clock to give it a finished look. He replace the clock face with a print out of the various locations known to the system and added a servo motor to drive the single hand. His hardware choices were based on what he already had on hand and what could be acquired cheaply. The an all-in-one package combines a Raspberry Pi board with a USB broadband modem to ensure that it has a persistent network connection (we’ve seen this done using WiFi in the past). The RPi checks a cellphone’s GPS data, compares it to a list of common places, then pushes commands to the Arduino which controls the clock hand’s servo motor. It’s a roundabout way of doing things but we imagine everything will get reused when the novelty of the gift wears off.