Coin Cell Challenge: Jump Starting A Car

Clearly a believer in the old adage, “Go Big or Go Home”, [Ted Yapo] has decided to do something that seems impossible at first glance: starting his car with a CR2477 battery. He’s done the math and it looks promising, though it’s yet to be seen if the real world will be as accommodating. At the very least, [Ted] found a video by [ElectroBOOM] claiming to have started a car with a super capacitor, so it isn’t completely without precedent.

Doing some research, [Ted] found it takes approximately 2,000 W to 3,000 W at 14 V to start the average car engine. This is obviously far in excess of what a coin cell can put out instantaneously, but the key is in the surprising amount of potential energy stored in one of these batteries. If the cell is rated for 1000 mAh at 3 V, [Ted] shows the math to find the stored energy in Joules:

According to the video by [ElectroBOOM], he was able to start his car with only 6,527 J, and [Ted] calculates it should only take about 9,000 J on the high side from his research. So as long as he can come up with a boost converter that can charge a capacitor with high enough efficiency, this one should be in the bag.

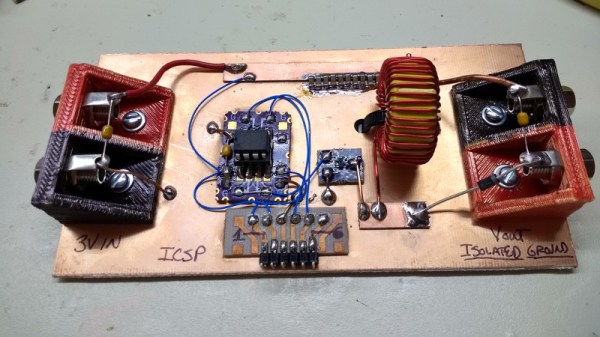
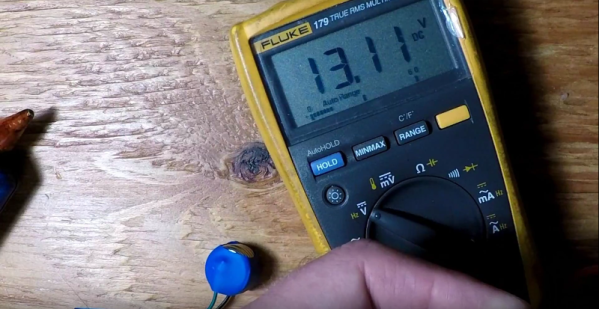
[Ted] has started putting together some early hardware, and has even posted the source code he’s using on a PIC12LF1571 to drive the converter. He notes the current charge efficiency is around half of what’s needed according to his calculations, but he does mention it was an early test and improvements can be made. Will it start? If it does, this is some awesome Heavy Lifting.

The Incredible Shrinking Coin Cell Battery Pack

How’s it going with your project for the coin cell challenge? You can only use a single one, but Hackaday alum [Jeremy S Cook] has a great way to package coin cells into a sleek little power packs whether you need one, two, or even four.

[Jeremy] is building a wireless Wii nunchuk, so he needs a small battery that won’t short out or get punctured in the confines of the controller body. A single coin cell holder is already a bit bulky, and he needs to use two in series. He thought, why not try shrink wrapping them together? The only downside here is that the biggest tube that came with your average heat shrink multi-pack is probably a bit too tight to fit around them, so you might have to buy more (aw, shucks!).

After trying a few ways to make a good connection between the leads and the bare coin cell faces, [Jeremy] settled on generously stripping stranded wire and wrapping the long strands around the end to form a conductive swab. This slides in nicely between the coin cell and preshrunk tube. A little more heat will make a good connection, and some hot glue secures the wires. Click past the break for his build video and the other connection methods he tried. Have you come up with something better? Let us know in the comments.

Stray a bit further from the bench and you might come up with something like this googly eye battery holder we saw a few months ago.

Continue reading “The Incredible Shrinking Coin Cell Battery Pack”

Coin Cell Challenge: Use Coin Cell, Win Prizes

Today, we’re calling all hackers to do the most with a single coin cell. It’s the Coin Cell Challenge, and we’re looking for everything from the most low-power electronics to a supernova in a button cell battery.

Electronics are sucking down fewer and fewer amps every year. Low power is the future, and we’re wondering how far we can push the capabilities of those tiny discs full of power. The Coin Cell Challenge is your chance to plumb the depths of what can be done with the humble coin cell.

This is a contest, and as with the tradition of the Open 7400 Logic Competition and the recent Flashing Light Prize, we want to see what the community can come up with. The idea is simple: do something cool with a single coin cell and you’ll secure your fifteen minutes of fame and win a prize.

Three Challenges

To kick this contest off, we’re opening up three challenges to all contenders to the world heavyweight champion of button cell exploits. The first, the Lifetime Award, will go to whoever can run something interesting the longest amount of time on a coin cell. The Supernova Award is the opposite – what is the most exciting thing you can do with a button cell battery, lifetime be damned? The Heavy Lifting Award will go to the project that is the most unbelievable. If you think you can’t do that with a coin cell battery — lifting a piano or starting a car, for example — odds are you probably can. We want to see it.

Prizes and Rules

All Hackaday hardware hacking challenges need prizes, and for this one, we’re rolling out the red carpet. We’re offering up cash prizes for the top coin cell hacks. There are three $500 USD cash prizes, one for each winner of the Lifetime, Supernova, and Heavy Lifting awards. We’re not stopping there, because the top twenty builds overall will each receive $100 in Tindie credit, where the winners can cash in on some artisanal electronics sold by the people who design them.

What do you have to do to get in on this action? First, you need to build something. This something must be powered by nothing more than a single coin cell battery and must include some type of electronics. We also want this to be Open Source, and you’ll need to start a project on hackaday.io. The full rules are available over here, but don’t wait — the deadline for entry is January 8th, 2018.

We’re excited to see what the community comes up with, and who will find a production coin cell that’s the size of a dinner plate. This is going to be a great contest with overheating coin cells and tiny bits of metal flying across the room. This is going to be a contest filled with blinkies and wireless devices that run for far, far too long. Someone is going to misread the rules and tape together a meter tall pile of coin cells. It’s going to be awesome, so start your project now.

Hackaday Prize Entry: A PCB To Emulate Coin Cells

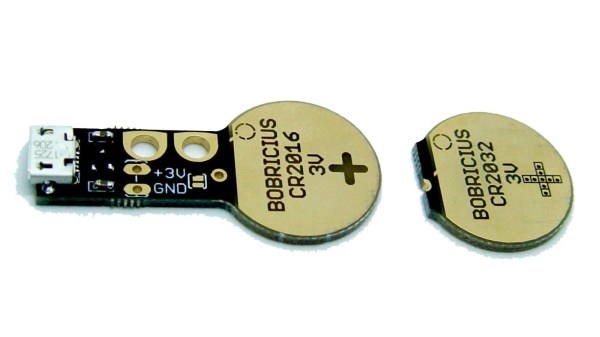
The Coin Cell Emulator CR2016/CR2032 by [bobricius] homes in on a problem some hardware developers don’t realize they have: when working on hardware powered by the near-ubiquitous CR2016 or CR2032 format 3V coin cells, power can be a bit troublesome. Either the device is kept fed with coin cells as needed during development, or the developer installs some breakout wires to provide power from a more convenient source.

[bobricius]’s solution to all this is a small PCB designed to be inserted into most coin cell holders just like the cell itself. It integrates a micro USB connector with a 3V regulator for using USB as an external power source. The board also provides points for attaching alligator clips, should one wish to conveniently measure current consumption. It’s a tool with a purpose, and cleverly uses the physical shape of the PCB itself as an integral part of the function, much like another of [bobricius]’s projects: the Charlieplexed 7-segment LED display.

Clever Battery Holder Hack Makes Brilliant Earrings

A ‘googly eye’ with hole for LED leads on one side, slot for coin cell on the other. Black disk for pupil removed.

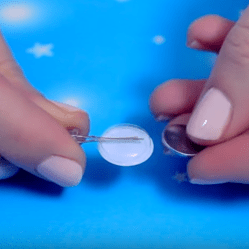
We love seeing a thing get used effectively for other than its intended purpose, and this DIY LED Earrings project is a great example. [IdunnGoddess] liked the idea of making light-up LED earrings powered by a small coin cell, but an enclosure and power connection for the battery were sticking points. The solution? A googly eye after a few minor modifications turned out to be perfect.

A googly eye resembles a thin, flat, hollow plastic bulb. Choose one that’s just a bit bigger than the coin cell, and cut a slot in one end and a small hole in the other. The LED leads go into the hole, and the coin cell slides into the slot. The result? A lightweight battery holder for an attached LED, and as a bonus the hacked googly eye is a clean and super smooth surface that can easily be painted or decorated to make it part of the design. The video embedded below demonstrates the process and showcases a few sample designs.

Continue reading “Clever Battery Holder Hack Makes Brilliant Earrings”

Edge-lit Pendants Show Two Layers Are Better Than One

Engraved acrylic lights up nicely with LED lighting. Simply engrave clear acrylic with a laser engraver, then edge-light the acrylic and watch the engraving light up. This badge made by [Solarbotics] shows how they used this principle when creating some pendants for an event that performed particularly well in the dark.

The pendants they created have two engraved acrylic panels each, and that’s about it. Two LEDs and a CR2032 battery nestle into pre-cut holes, and the engraved sides are placed face-to-face, so the outer surfaces of the pendant are smooth. By using some color-cycling RGB LEDs on one panel and blue LEDs on the other panel, the effect is that of an edge-lit outer design with a central element that slowly changes color separately from the rest of the pendant.

The design stacks the LED leads and coin cells in such a way that a simple wrap of tape not only secures things physically, but also takes care of making a good electrical connection. No soldering or connectors of any kind required. [Solarbotics] found that CR2032 cells would last anywhere between a couple of days to a week, depending on the supplier.

This design is great for using a minimum of materials, but if that’s not a priority it’s possible to go much further with the concept. Multiple layers of edge-lit acrylic were used to make numeric 0-9 display modules as well as a full-color image.


Mitosis: Anatomy Of A Custom Keyboard

Ergonomic. Wireless. Low-latency. Minimalist. Efficient. How far do you go when you design your own open-source keyboard? Checking off these boxes and providing the means for others to do so, Redditor [reverse_bias] presents the Mitosis keyboard, and this thing is cool.

The custom, split– as the namesake implies — mechanical keyboard has 23 keys on each 10 cm x 10 cm half, and, naturally, a custom keymapping for optimal personal use.

Upper and lower PCBs host the keys and electronic circuits respectively, contributing to the sleek finished look. Key caps and mechanical switches were ripped from sacrificial boards: two Waveshare core51822 Bluetooth modules are used for communication, with a third module paired with a Pro Micro make up the receiver. Continue reading “Mitosis: Anatomy Of A Custom Keyboard”