The Coming Copper Shortage: Aluminium Or Carbon Nanotubes To The Rescue?

The use of aluminium in wiring is unlikely to bring a smile to the face of anyone who has had to deal with it in a 1960s, or early 1970s-era house. The causes behind the fires and other accidents were myriad, including failure to deal with the higher thermal expansion of aluminium, the electrically insulating nature of aluminium oxide, and the general brittleness of aluminium when twisted.

Yet while copper is superior to aluminium in terms of electrical conductivity and ease of installation, copper prices have skyrocketed since the 1970s, and are on the verge of taking off to the moon. A big part of the reason is the increased use of copper in everything from electronics and electrical motors to generators, driven by large-scale deployment of wind turbines and electrical vehicles.

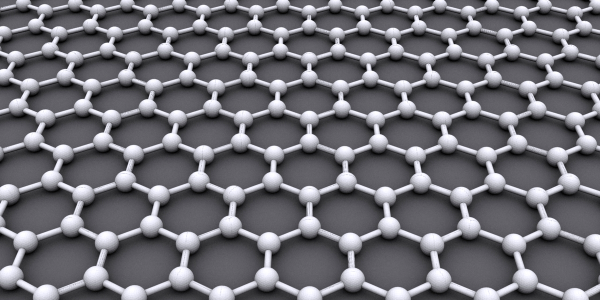
As the world moves to massively expand the use of electrical cars and installation of wind turbines, copper demand is predicted to outstrip current copper supply. With aluminium likely to make a big return as a result, it’s worth taking a look at modern-day aluminium-based wiring, including copper-clad aluminium and the use of carbon-based replacements. Continue reading “The Coming Copper Shortage: Aluminium Or Carbon Nanotubes To The Rescue?”

Robert Murray Smith Discusses Rivets and Riveting

Old School Fastener Tutorial Is Riveting

Whether you’re making, repairing, or hacking something together, we all need fastners. Screws, nuts and bolts, and pop rivets are handy sometimes. Various resins and even hot glue are equally useful. In some cases however the right fastener for the job eludes us, and we need another trick up our sleeve.

[Robert Murray-Smith] found himself in such a position. His goal was to join two pieces of aluminum that need a nice finish on both sides. Neither glue, pop rivets, screws, nuts or bolts would have been appropriate. [Robert] is always flush with ideas both new and old, and he resorted to using an old school fastener as explained as explained in his video “How To Make And Use Rivets“.

In the video below the break, [Robert] goes into great detail about making a simple rivet die from a 5 mm (3/16”) piece of flat steel, creating the rivet from a brass rod, and then using the flush rivet to join two pieces of aluminum. The simple tooling he uses makes the technique available to anybody with a propane torch, a vise, some basic tools, and a simple claw hammer. We also appreciate [Robert]’s discussion of cold riveting, hot riveting, and annealing the rivets as needed.

Not only is riveting a technique thousands of years old, its advancement and application during the Industrial Revolution enabled technologies that couldn’t have existed otherwise. Hackaday’s own [Jenny List] did a wonderful write-up about rivets in 2018 that you won’t want to miss!

Continue reading “Old School Fastener Tutorial Is Riveting”

3D Printed Copper Rocket Nozzle Costs Under Two Grand

You don’t think of hobby-grade 3D printing as a good method for creating rocket nozzles. But [Mister Highball] managed to create a copper nozzle using a common printer, a kiln, and some special copper-bearing filament.

The copper filament is about 90% metal. Virtual Foundry recommends preheating it before printing and you have to sinter it in an oven to remove the plastic and leave a solid metal piece which will, of course, shrink.

Continue reading “3D Printed Copper Rocket Nozzle Costs Under Two Grand”

Open-Source Method Makes Possible Two-Layer PCBs With Through-Plating At Home

If the last year and its supply chain problems have taught us anything, it’s the value of having a Plan B, even for something as commoditized as PCB manufacturing has become. If you’re not able to get a PCB made commercially, you might have to make one yourself, and being able to DIY a dual-layer board with plated-through vias might just be a survival skill worth learning.

Granted, [Hydrogen Time]’s open-source method, which he calls “Process 01”, is something that he has been working on for years now. And it’s quite the feat of chemistry, which may require you to climb a steep learning curve, depending on how neglected the skills from high school or college chemistry are. But for as complex as Process 01 is, it’s actually pretty straightforward, and the first video below covers it in extreme detail. It starts with a drilled double-sided copper-clad board, which after cleaning is given a bath in palladium chloride. A follow-up dunk in stannous chloride leaves a thin film of palladium metal over all surfaces, even the via walls. This then acts as a catalyst for electroless copper plating in a solution of copper sulfate, followed by an actual electroplating step to thicken the copper plating.

After more washing, photoresist is applied to define the traces as well as to protect the now-plated vias, the board is etched, and a solder mask layer is applied. The boards might not be mistaken for commercial PCBs, but they’re pretty darn good, and as [Hydrogen Time] states, Process 01 is only a beginning. We expect this will be improved and streamlined as time goes by.

Fair warning, though — some steps require a fume hood to be performed safely. Luckily, we’ve got that covered. Sort of.

Continue reading “Open-Source Method Makes Possible Two-Layer PCBs With Through-Plating At Home”

Electroplating 3D Printed Parts For Great Strength

Resin 3D printers have a significant advantage over filament printers in that they are able to print smaller parts with more fine detail. The main downside is that the resin parts aren’t typically as strong or durable as their filament counterparts. For this reason they’re often used more for small models than for working parts, but [Breaking Taps] wanted to try and improve on the strength of these builds buy adding metal to them through electroplating.

Both copper and nickel coatings are used for these test setups, each with different effects to the resin prints. The nickel adds a dramatic amount of stiffness and the copper seems to increase the amount of strain that the resin part can tolerate — although [Breaking Taps] discusses some issues with this result.

While the results of electroplating resin are encouraging, he notes that it is a cumbersome process. It’s a multi-step ordeal to paint the resin with a special paint which helps the metal to adhere, and then electroplate it. It’s also difficult to ensure an even coating of metal on more complex prints than on the simpler samples he uses in this video.

After everything is said and done, however, if a working part needs to be smaller than a filament printer can produce or needs finer detail, this is a pretty handy way of adding more strength or stiffness to these parts. There’s still some investigating to be done, though, as electroplated filament prints are difficult to test with his setup, but it does show promise. Perhaps one day we’ll be able to print with this amount of precision using metal directly rather than coating plastic with it.

Thanks to [smellsofbikes] for the tip!

Continue reading “Electroplating 3D Printed Parts For Great Strength”

A Hair-Raising Twist On Infinity Mirrors

Just when we thought we’d seen it all in the infinity mirror department, [FieldCrafting] blazed a tiny, shiny new trail with their electroplated infinity mirror hair pin. We’d sure like to stick this in our French twist. Fortunately, [FieldCrafting] provided step-by-step instructions for everything from the 3D printing to the copper electroplating to the mirror film and circuitry application.

And what tiny circuitry it is! This pin is powered by a coin cell and even has a micro slider switch to conserve it. The stick parts are a pair of knitting needles, which is a great idea — they’re pointy enough to get through hair, but not so pointy that they hurt.

[FieldCrafting] was planning to solder 1206 LEDs to copper tape and line the cavity with it, but somehow the CAD file ended up with 0603, so there wasn’t enough space for two tape traces. We think it’s probably for the better — [FieldCrafting]’s solution was to use two-conductor wire, strategically stripped, which seems a lot less fiddly than trying to keep two bare tape traces separated and passing pixies.

Don’t have enough hair for one of these? Surely you could use some handsome infinity coasters to round out that home bar setup.

Turning A Waffle Iron Into A Reflow Station

There are a ton of ways to go about building your own reflow oven. Most of these builds start with, well, an oven — usually a toaster oven — with a small but significant minority choosing to modify a hotplate. But this might be the first time we’ve seen a waffle iron turned into a reflow oven.

Of course, what [Vincent Deconinck] came up with is not an oven per se. But his “RefloWaffle” certainly gets the job done. It started with an old waffle maker and a few experiments to see just how much modification it would take to create the various thermal reflow profiles. As it turned out, the original cooking surfaces had too much thermal inertia, so [Vincent] replaced them with plain copper sheets. That made for quicker temperature transitions, plus created some space between the upper and lower heating elements for the SMD board.

As for control, [Vincent] originally used an Arduino with a relay and a thermocouple, but he eventually built a version 2.0 that used a hacked Sonoff as both controller and switch. Adding the thermocouple driver board inside the Sonoff case took a little finagling, but he managed to get everything safely tucked inside. A web interface runs on the Sonoff and controls the reflow process.

We think this is a great build, one that will no doubt see us trolling the thrift stores for cheap waffle irons to convert. We’ve seen some amazing toaster oven reflows, of course, but something about the simplicity and portability of RefloWaffle just works for us.