The 8086 has been around since 1978, so it’s pretty well understood. As the namesake of the prevalent x86 architecture, it’s often studied by those looking to learn more about microprocessors in general. To this end, [Ken Shirriff] set about reverse engineering the 8086’s multiplication algorithm.
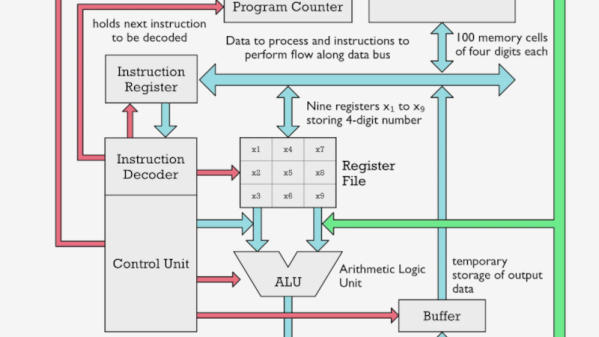
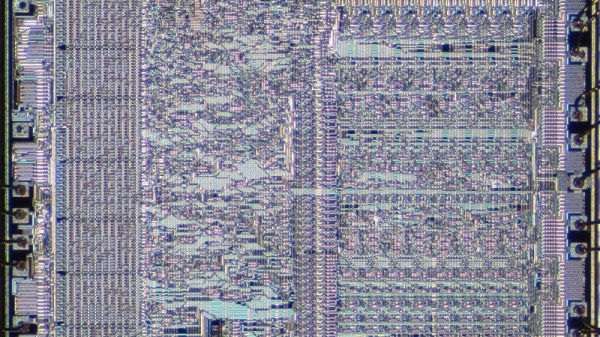
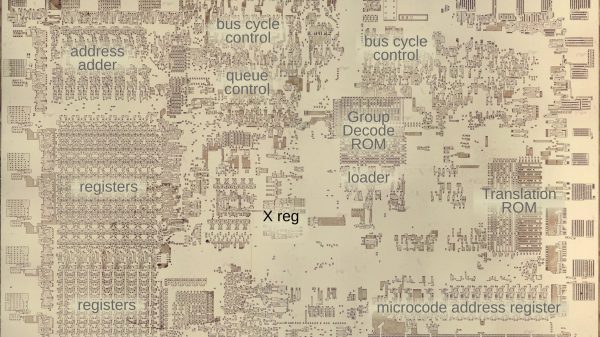
[Ken]’s efforts were achieved by using die photos of the 8086 chip. Taken under a microscope, they can be used to map out the various functional blocks of the microprocessor. The multiplication algorithm can be nutted out by looking at the arithmetic/logic unit, or ALU. However, it’s also important to understand the role that microcode plays, too. Even as far back as 1978, designers were using microcode to simplify the control logic used in microprocessors.
[Ken] breaks down his investigation into manageable chunks, exploring how the chip achieves both 8-bit and 16-bit multiplication in detail. He covers how the numbers make their way through various instructions and registers to come out with the right result in the end.
It’s a fun look at what’s going on at the ground level in a chip that’s been around since before the personal computer revolution. For any budding chip designers, it’s a great academic exercise to follow along at home. If you’ve been doing your own digging deep into CPU architectures, don’t hesitate to drop us a line!