Digital To Analog To Digital To Analog To Digital Conversion

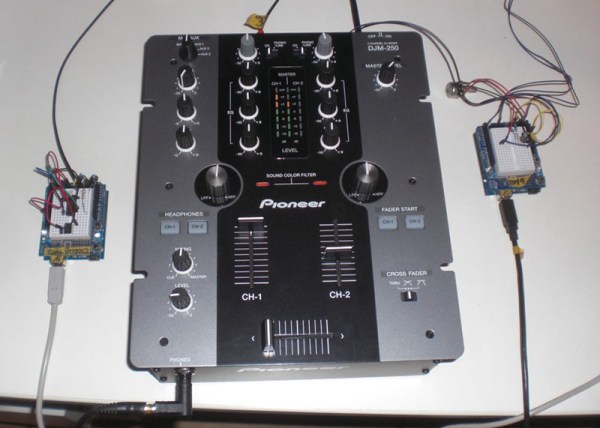
[Andy] had the idea of turning a mixing desk into a MIDI controller. At first glance, this idea seems extremely practical – mixers are a great way to get a lot of dials and faders in a cheap, compact, and robust enclosure. Exactly how you turn a mixer into a MIDI device is what’s important. This build might not be the most efficient, but it does have the best name ever: digital to analog to digital to analog to digital conversion.

The process starts by generating a sine wave on an Arduino with some direct digital synthesis. A 480 Hz square wave is generated on an ATTiny85. Both of these signals are then fed into a 74LS08 AND gate. According to the schematic [Andy] posted, these signals are going into two different gates, with the other input of the gate pulled high. The output of the gate is then sent through a pair of resistors and combined to the ‘audio out’ signal. [Andy] says this is ‘spine-crawling’ for people who do this professionally. If anyone knows what this part of the circuit actually does, please leave a note in the comments.

The signal from the AND gates is then fed into the mixer and sent out to the analog input of another Arduino. This Arduino converts the audio coming out of the mixer to frequencies using a Fast Hartley Transform. With a binary representation of what’s happening inside the mixer, [Andy] has something that can be converted into MIDI.

[Andy] put up a demo of this circuit working. He’s connected the MIDI out to Abelton and can modify MIDI parameters using an audio mixer. Video of that below if you’re still trying to wrap your head around this one.

Continue reading “Digital To Analog To Digital To Analog To Digital Conversion”

Scope Noob: Microcontroller Quirks With DDS

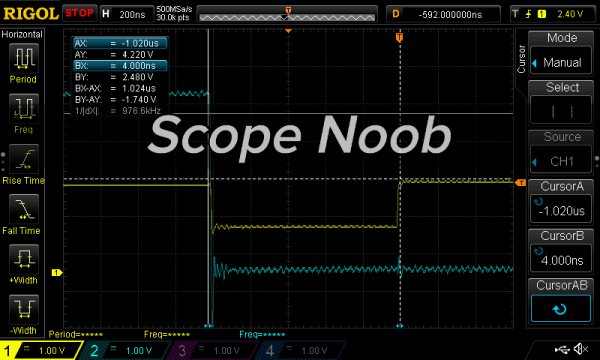
In this installment of Scope Noob I’m working with Direct Digital Synthesis using a microcontroller. I was pleasantly surprised by some of the quirks which I discovered during this process. Most notably, I had a chance to look at errant triggers solved by using holdoff and a few timing peculiarities introduced by my use of the microcontroller. Here’s a video synopsis but I’ll cover everything in-depth after the break.

Continue reading “Scope Noob: Microcontroller Quirks With DDS”

Direct Digital Synthesis (DDS)

Direct Digital Synthesis (DDS) Explained By [Bil Herd]

One of the acronyms you may hear thrown around is DDS which stands for Direct Digital Synthesis. DDS can be as simple as taking a digital value — a collection of ones and zeroes — and processing it through a Digital to Analog Converter (DAC) circuit. For example, if the digital source is the output of a counter that counts up to a maximum value and resets then the output of the DAC would be a ramp (analog signal) that increases in voltage until it resets back to its starting voltage.

This concept can be very useful for creating signals for use in a project or as a poor-man’s version of a signal or function generator. With this in mind I set out here to demonstrate some basic waveforms using programmable logic for flexibility, and a small collection of resistors to act as a cheap DAC. In the end I will also demonstrate an off-the-shelf and inexpensive DDS chip that can be used with any of the popular micro-controller boards available that support SPI serial communication.

All of the topics covered in the video are also discussed further after the break.

Continue reading “Direct Digital Synthesis (DDS) Explained By [Bil Herd]”

The LPT DAC

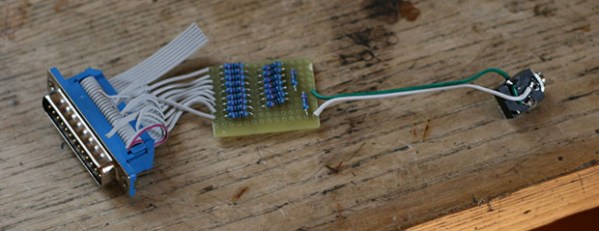
About 30 years ago, before every computer had CD quality audio built in, audio cards and chips were technological marvels. MIDI chips, FM synthesis, and synths on a chip reigned supreme but one little device – just a handful of resistors – sounded fantastic. it was the Covox Speech Thing, a simple resistor ladder wired up to the parallel port of a computer that would output 8-bit audio to an external amplifier. [FK] recently built his own Covox (Czech, Google translatrix) with just 18 resistors, and the results sound fantastic.

Instead of fancy chips, the original Covox Speech Thing used the 8 bit parallel port on a PC. Back in the olden days, this was the fastest way to get digital data out of a computer, but since it was digital only, a DAC was required to turn this into audio. A simple resistor ladder was sufficient, and this hardware was eventually supported by the old DOS games from Sierra and Id.

[FK] has a demo of this LPT DAC available here, but we’re not thinking that link will last long. If anyone has a better link, leave a note in the comments and we’ll update this post. Thanks [beavel] for sending this in.

A Hackable Hi-Fi Audio DSP

DSP 01 Hi-fi Signal Processor


Audiophiles tend to put analog systems on a pedestal. Analog systems can provide great audio performance, but they tend to be quite costly. They’re also hard to tinker with, since modifying parameters involves replacing components. To address this, [tshen2] designed the DSP 01.

The DSP 01 is based around the Analog Devices ADAU1701. This DSP chip includes two ADCs for audio input, and four DACs for audio output. These can be controlled by the built in DSP processor core, which has I/O for switches, buttons, and knobs.

[tshen2]’s main goal with the DSP 01 was to implement an audio crossover. This device takes an input audio signal and splits it up based on frequency so that subwoofers get the low frequency components and tweeters get the higher frequency components. This is critical for good audio performance since drivers can only perform well in a certain part of the audio spectrum.

Analog Devices provides SigmaStudio, a free tool that lets you program the DSP using a drag-and-drop interface. By dropping a few components in and programming to EEPROM, the DSP can be easily reconfigured for a variety of applications.

The Analog Swiss Army Knife

11300

While FPGAs get all the credit for being the hip new thing, they are inherently digital devices. Without a proper ADC and DAC, you won’t be delving into the analog domain with your programmable logic. Maxim has just put out a chip that does just that: an analog swiss army knife with 20 pins that are configurable as analog to digital converter, digital to analog converters, GPIO, or any mix of the above.

The MAX11300 includes twenty IO ports, each capable of becoming an ADC, DAC, or GPIO, with pairs of ports capable of being configured as a logic level translator or an analog switch. The ADCs and DACs are 12-bit, with input and output ranges from -10V to +10V.

As a nice little bonus, the chip is controlled over SPI, making this an interesting device for a small “do anything analog” tool we’re sure will hit Tindie or Seeed Studio before the year is out. Luckily for whoever would create such a device, Maxim has a nice GUI for configuring each of the 20 pins on their chip, Of course Maxim already offers an evaluation kit for the MAX11300. It’s $100 USD and is Windows only.

The MAX11300 is available in either 40-pin TQFN or 48-pin TQFP packages (with the larger, easier to solder TQFP shipping later) for about $5.80 USD in quantity 1000, or $11.37 in quantity one.Video below showing off the MAX11300 reading and writing analog values to a few pins, and a good look at the configuration software.

Continue reading “The Analog Swiss Army Knife”

Arduino Electronic Load

A Simple Programmable Electronic Load Using The Arduino

Some projects are both educational and useful. We believe that [Jasper’s] Arduino based electronic load is one of those project.

[Jasper’s] electronic load can not only act as a constant current load, but also as a constant power and constant resistive load as well. The versatile device has been designed for up to 30V, 5A, and 15W. It was based on a constant current source that is controlled by a DAC hooked up to the Arduino. By measuring both the resulting voltage and current of the load, the system can dynamically adapt to achieve constancy. While we have seen other Arduino based constant loads before, [Jasper’s] is very simple and straight forward compartively. [Jasper] also includes both the schematic and Arduino code, making it very easy to reproduce.

There are tons of uses for a voltage controlled current source, and this project is a great way to get started with building one. It is an especially great project for putting together your knowledge of MOSFET theory and opamp theory!