Reconstructing Data From A Corrupt Apple ][ Floppy Disk

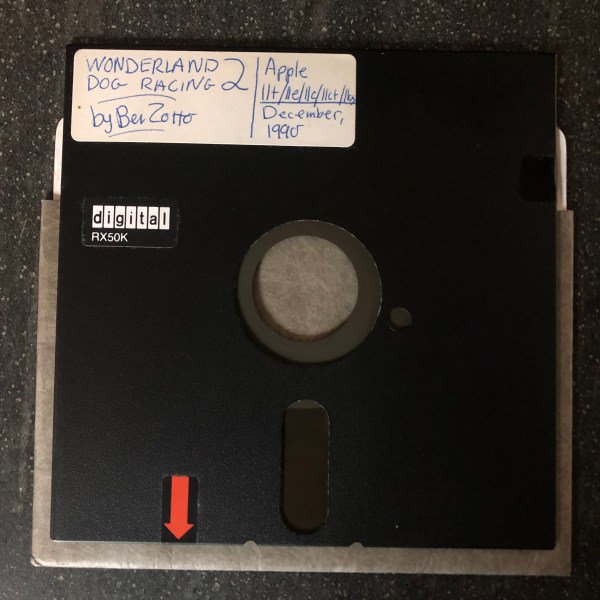
Back in 1990 [Benjamin Zotto] wrote – while in elementary school – a dog racing game called Wonderland 2. The BASIC source code and images for the game were stored on a single ProDOS formatted, soft-sectored 5.25″ floppy disk. Fast-forward thirty years to today and [Benjamin] found to his dismay that ProDOS could no longer read the floppy, giving an I/O error. Not deterred, he set about to recover the data, as documented in this Twitter thread.

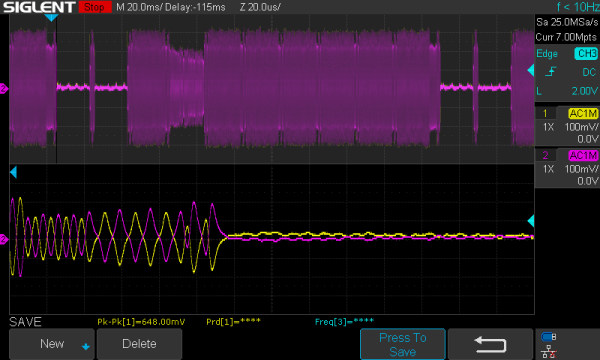
Applesauce visualization of the patterns on the corrupted disk, with soft-sectoring spiral arms.

The gist of the story is that the floppy disk’s surface could still be scanned with help from the aptly named Applesauce Floppy Drive Controller, which got the following visualization of the magnetic patterns on the disk surface:

This data could then be analyzed sector by sector, with the bad sectors and the cause for ProDOS flaking out with its reading attempts here marked in red.

Checking the data recovered so far confirmed that it was a ProDOS disk. It also confirmed that the sector containing the directory listing was shot. This required diving into the technical reference manual for ProDOS and its filesystem to figure out how to reconstruct the directory layout. This required figuring out the offsets and sizes of the files, assisted by knowing what was likely on the disk, and having some bits and pieces of the original volume listing still intact. This allowed for the directory volume to be rebuilt, one byte at a time.

Sectors on the disk, with bad sectors in red.

At the end of that arduous and highly educational journey success waited, and [Benjamin] was once again able to relive his memories of 1990s BASIC and hand-drawn bitmap graphics.

Hackaday Links Column Banner

Hackaday Links: January 5, 2020

It looks like the third decade of the 21st century is off to a bit of a weird start, at least in the middle of the United States. There, for the past several weeks, mysterious squads of multicopters have taken to the night sky for reasons unknown. Witnesses on the ground report seeing both solo aircraft and packs of them, mostly just hovering in the night sky. In mid-December when the nightly airshow started, the drones seemed to be moving in a grid-search pattern, but that seems to have changed since then. These are not racing drones, nor are they DJI Mavics; witnesses report them to be 6′ (2 meters) in diameter and capable of staying aloft for 90 minutes. These are serious professional machines, not kiddies on a lark. So far, none of the usual government entities have taken responsibility for the flights, so speculation is all anyone has as to their nature. We’d like to imagine someone from our community will get out there with radio direction finding gear to locate the operators and get some answers.

We all know that water and electricity don’t mix terribly well, but thanks to the seminal work of White, Pinkman et al (2009), we also know that magnets and hard drives are a bad combination. But that didn’t stop Luigo Rizzo from using a magnet to recover data from a hard drive. He reports that the SATA drive had been in continuous use for more than 11 years when it failed to recover after a power outage. The spindle would turn but the heads wouldn’t move, despite several rounds of percussive maintenance. Reasoning that the moving coil head mechanism might need a magnetic jump-start, he probed the hard drive case with a magnetic parts holder until the head started moving again. He was then able to recover the data and retire the drive. Seems like a great tip to file away for a bad day.

It seems like we’re getting closer to a Star Trek future every day. No, we probably won’t get warp drives or transporters anytime soon, and if we’re lucky velour tunics and Spandex unitards won’t be making a fashion statement either. But we may get something like Dr. McCoy’s medical scanner thanks to work out of MIT using lasers to conduct a non-contact medical ultrasound study. Ultrasound exams usually require a transducer to send sound waves into the body and pick up the echoes from different structures, with the sound coupled to the body through an impedance-matching gel. The non-contact method uses pulsed IR lasers to penetrate the skin and interact with blood vessels. The pulses rapidly heat and expand the blood vessels, effectively turning them into ultrasonic transducers. The sound waves bounce off of other structures and head back to the surface, where they cause vibrations that can be detected by a second laser that’s essentially a sophisticated motion sensor. There’s still plenty of work to do to refine the technique, but it’s an exciting development in medical imaging.

And finally, it may actually be that the future is less Star Trek more WALL-E in the unlikely event that Segway’s new S-Pod personal vehicle becomes popular. The two-wheel self-balancing personal mobility device is somewhat like a sitting Segway, except that instead of leaning to steer it, the operator uses a joystick. Said to be inspired by the decidedly not Tyrannosaurus rex-proof “Gyrosphere” from Jurassic World, the vehicle tops out at 24 miles per hour (39 km/h). We’re not sure what potential market for these things would need performance like that – it seems a bit fast for the getting around the supermarket and a bit slow for keeping up with city traffic. So it’s a little puzzling, although it’s clearly easier to fully automate than a stand-up Segway.

Hard Drive Data Recovery – Why Not DIY?

Hard drive failures can be tough to bear, particularly for the average person who doesn’t back up. When it comes to data recovery, there’s always those bleating from the sidelines that it’s a job that must be left to the professionals. However, this is Hackaday, not HireSomeoneADay, so [Matt]’s video on do-it-yourself hard drive repair is just what we like to see.

The video begins with plugging the non-functional drive into an external caddy, and using a microphone to listen to the sounds it makes. Upon analysis, [Matt] concludes that the drive is not spinning up, and suspects the heads may be stuck, causing the problem. When tapping the drive fails to unstick the heads, the next step is disassembly.

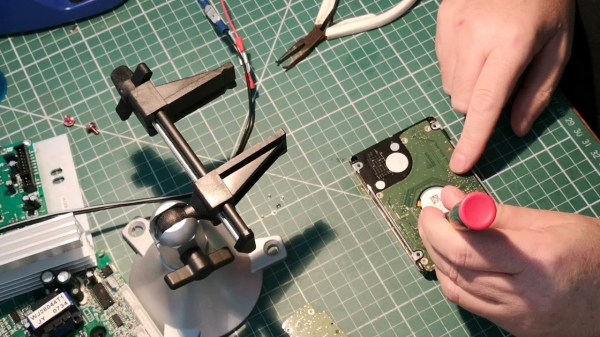
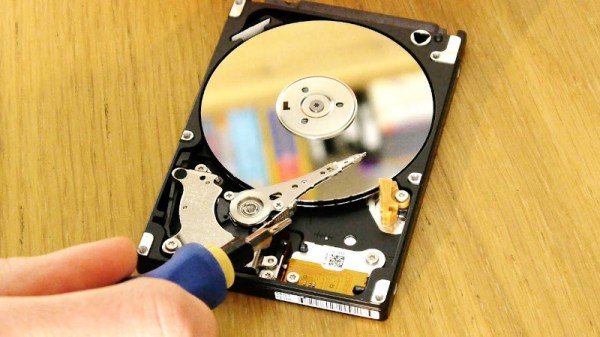
Despite the best advice from armchair commentators, this can be achieved at home without a clean room. [Matt] opens the drive carefully, and notes that the head is indeed stuck to the platter, instead of sitting in its home position. Using a screwdriver, the platters are rotated in their usual direction while gentle pressure is applied to pull the head away, being sure to use a light touch to avoid ripping the heads off entirely. With this done, the drive is reassembled and powered up. Amazingly, the repair is successful, and data is able to be recovered!

It’s important to note that this is a highly risky procedure, and not guaranteed to succeed. Truly valuable data should be left to the professionals, but if you’re skint or simply unbothered, it doesn’t hurt to have a go yourself. Be sure to avoid dust entering the drive, and take care not to touch the platters themselves. Of course, if you brick the device, you can always scavenge it for parts. Video after the break.

Continue reading “Hard Drive Data Recovery – Why Not DIY?”

Soldering Saves Data From Waterlogged Laptop

What happens when you drop your laptop in the pool? Well, yes, you buy a new laptop. But what about your data. You do have backups, right? No, of course, you don’t. But if you can solder like [TheRasteri] you could wire into the flash memory on the motherboard and read it one last time. You can see the whole exploit in the video below.

There’s really three tasks involved. First is finding the schematic and board layout for motherboard. Apparently, these aren’t usually available from the manufacturer but can be acquired in some of the seedier parts of the Internet for a small fee. Once you have the layout, you have to arrange to solder wires to the parts of the flash memory you need to access.

Continue reading “Soldering Saves Data From Waterlogged Laptop”

EMMC To SD Hack Rescues Data From A Waterlogged Phone

How do I get the data off this destroyed phone? It’s a question many of us have had to ponder – either ourselves or for friends or family. The easy answer is either spend a mint for a recovery service or consider it lost forever.  [Trochilidae] didn’t accept either of those options, so he broke out the soldering iron and rescued his own data.

A moment’s inattention with a child near a paddling pool left [Trochilidae’s] coworker’s wife with a waterlogged, dead phone. She immediately took apart the phone and attempted to dry it out, but it was too late. The phone was a goner. It also had four months of photos and other priceless data on it. [Trochilidae] was brought in to try to recover the data.

The phone was dead, but chances are the data stored within it was fine. Most devices built in the last few years use eMMC flash devices as their secondary storage. eMMC stands for Embedded Multimedia Card. What it means is that the device not only holds the flash memory array, it also contains a flash controller which handles wear leveling, flash writing, and host interface. The controller can be configured to respond exactly like a standard SD card.

The hard part is getting a tiny 153 ball BGA package to fit into an SD card slot.  [Trochilidae] accomplished that by cutting open a microSD to SD adapter. He then carefully soldered the balls from the eMMC to the pins of the adapter. Thin gauge wire, a fine tip iron, and a microscope are essentials here. Once the physical connections were made,  [Trochilidae] plugged the card into his Linux machine. The card was recognized, and he managed to pull all the data off with a single dd command.

[Trochilidae] doesn’t say what happened after the data was copied, but we’re guessing he analyzed the dump to determine the filesystem, then mounted it as a drive. The end result was a ton of recovered photos and a very happy coworker.

If you like crazy soldering exploits, check out this PSP reverse engineering hack, where every pin of a BGA was soldered to magnet wire.

Rescuing An SD Card With An Arduino

A few days ago, one of [Severin]’s SD cards died on him, Instead of trashing the card, he decided to investigate what was actually wrong with the card and ended up recovering most of the data using an Arduino and an immense amount of cleverness.

SD cards can be accessed with two modes. The first is the SDIO mode, which is what cameras, laptops, and other card readers use. The second mode is SPI mode. SPI is slower, but much, much simpler. It turned out the SDIO mode on [Severin]’s card was broken, but accessing it with an Arduino and SPI mode worked. There was finally hope to get files off this damaged card.

[Severin] used a few sketches to dump the data on the SD card to his computer. The first looked at the file system and grabbed a list of files contained on the card. The second iterated over the file system and output all the files in hex over the serial port. With a bit of Python, [Severin] was able to reconstruct a few files that were previously lost forever.

Even though the SD card was completely inaccessible with a normal card reader, [Severin] was able to get a few files off the card. All the sketches and Python scripts are available on the Githubs, ready to recover files from your broken SD cards.

Recovering Data For A Homemade Cray

In our hubris, we pat ourselves on the back when we’re able to pull data off our old SCSI drives. [Chris Fenton]’s attempt to get an OS for a homebrew Cray-1 puts us rightfully to shame.

Last year we saw [Chris]’ fully functional 1/10th scale Cray-1 supercomputer built around FPGA. While the reproduction was nearly cycle-accurate, [Chris] hasn’t had an opportunity to test out his system because of the lack of available Cray software. A former Cray employee heard of his plight and loaned an 80 Megabyte CDC 9877 disk pack to in the hope of getting some system software.

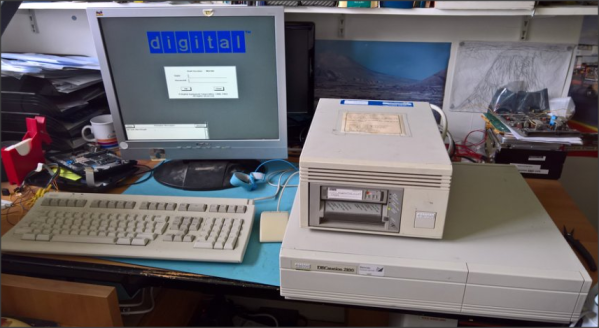
[Chris] acquired a monstrous 100 pound disk drive to read the disk pack, but after 30 years in storage a lot of electrical problems cropped up. Since reading the drive digitally proved to be an exercise in futility, [Chris] hit upon the idea of taking analog data straight from the read head. This left him with a magnetic image of the disk pack that was ready for some data analysis.

After the disk image was put up on the Internet, the very talented [Yngve AAdlandsvik] figured out the data, header, and error correction formats and sent [Chris] a Python script to tease bits from the analog image. While no one is quite sure what is on the disk pack provided by the Cray employee, [Chris] is remarkably close to bringing the Cray-1 OS back from the dead. There’s also a great research report [Chris] wrote as penance for access to the CDC disk drive. Any Hack A Day readers feel like looking over the data and possibly giving [Chris] a hand?