Digital Picture Frame Turned Vectrex Overlay

For Hackaday readers which might not be so well versed in the world of home video gaming before the 1983 crash, the Vectrex was an interesting attempt at bringing vector graphics into player’s living rooms. Priced around $500 in today’s dollars, the machine was unique in that it included its own black and white CRT display rather than requiring the owner to plug it into their television. To spice things up a little bit, games would include a thin plastic overlay you could put over the screen to give the game faux colors. What can we say? It was the 1980’s.

Like many vintage gaming systems, the Vectrex still commands a devoted following of fans, some of which continue to find ways to hack and mod the system nearly 40 years after its release. One such fan is [Arcade Jason], who’s recently been fiddling with the idea of creating a modern take on the overlay concept using a hacked LCD display. While it’s still a bit rough around the edges, it does hold promise. He hopes somebody might even run with the idea and turn it into a marketable product for the Vectrex community.

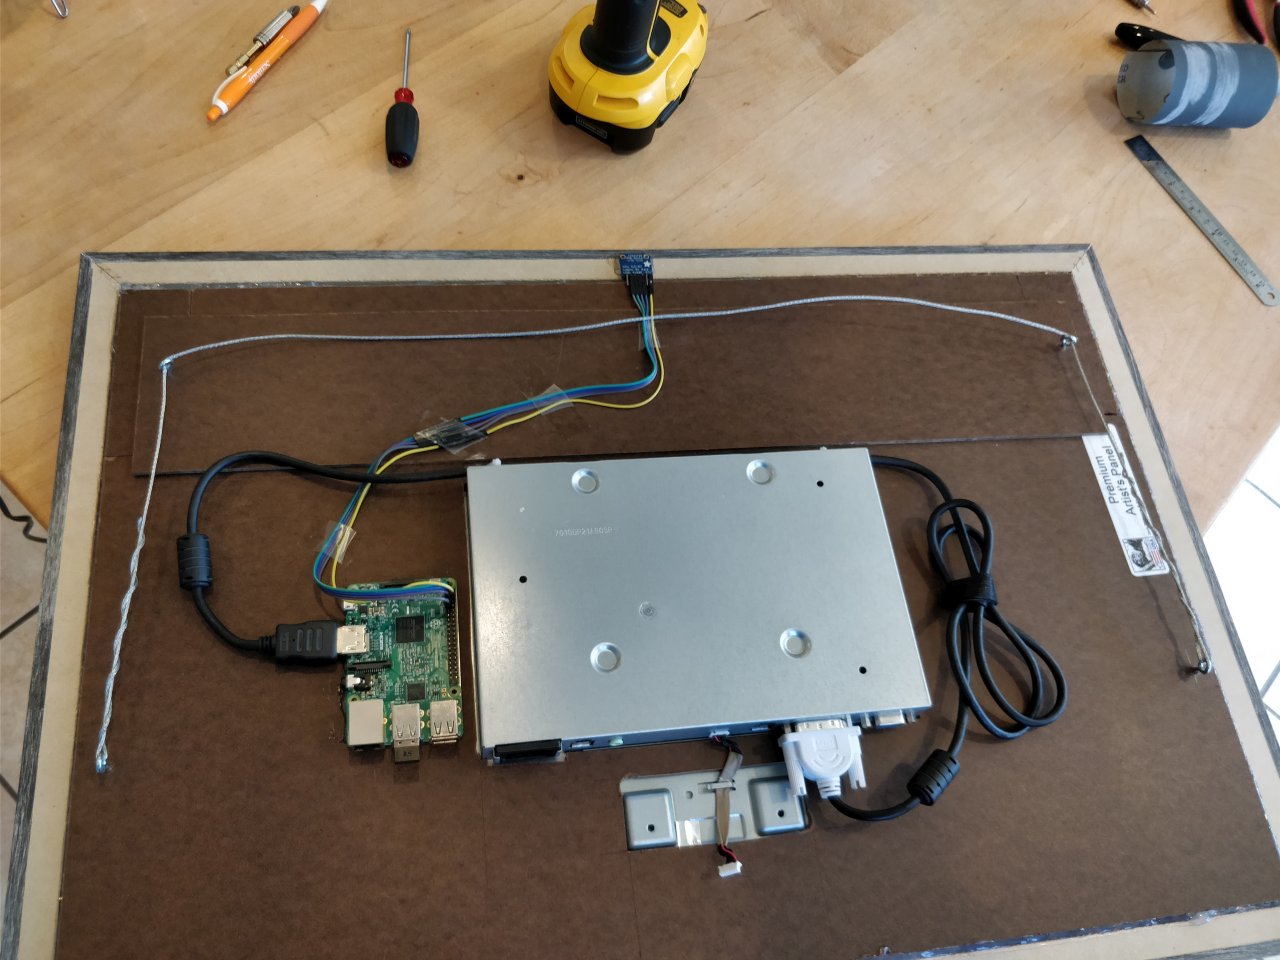
[Jason] started by getting an old digital picture frame and tearing it down until he liberated the LCD panel. By carefully disassembling it, he was able to remove the backlight and was left with a transparent display. He then installed the panel over the display of the Vectrex, leaving the picture frame’s PCB and controls dangling off to the side. Extending the display’s ribbon cable should be easy enough for a more robust installation.

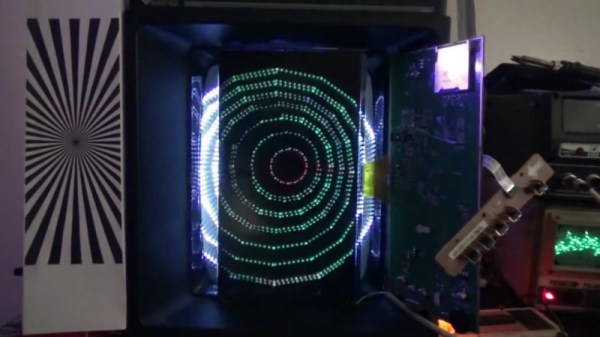
He then loaded the frame with random psychedelic pictures he found online, as well as some custom overlays which he quickly whipped up using colored blocks in an art program. In the video after the break, [Jason] shuffles through images on the frame using the buttons on the PCB while loading different demos to show the kind of visual effects that are possible.

While a neat concept, there are a couple of issues that need to be resolved before this could really be put into practice. For one, the LCD panel isn’t the proper size or aspect ratio to match the Vectrex display, so it doesn’t cover the whole CRT. It’s also rather difficult to select images to show on the LCD panel; an improved version might use something like the Raspberry Pi to load images on the panel while exposing a control interface on a secondary screen of some type.

This isn’t the first time [Jason] has experimented with the Vectrex, or even the first time he’s tried to add color to the classic system. We’re interested to see what he comes up with next.

Continue reading “Digital Picture Frame Turned Vectrex Overlay”

Shoot-And-Forget Digital Photo Frame

Digital photo frames these days require you to manage the photos stored on it or the cloud-based service tied to the frame’s manufacturer. [Henric Andersson] realized that he and his wife take a lot of photos but find little time to go through them — like photo albums of days past — and add them to any photo frame-like appliance or service. Since Google photos can do a lot of the sorting for them, he decided to incorporate that into a digital photo frame.

Using his wife’s old Viewsonic 24” 1080p monitor, he cracked it open and incorporated the screen into a 24×16 distressed wood frame — reinforcing it to account for the bulky, built-in power supply with pieces of HDF and a lot of glue. The brains behind this digital photo frame is a Raspberry Pi 3 he received from a friend. To turn the whole on/off, he built a small circuit but it turned out it wasn’t strictly necessary since everything started just fine without it.

While functionally complete, it needed one more addition. A little thing called ‘color temperature calibration’ — aka white balance.

Finding the TCS34725 RGB color sensor by Adafruit — and readily available code for easy integration — [Andersson] puzzled over how to add it to the frame. To disguise it while retaining its effectiveness, he had to glue it to the rear of the frame after drilling a hole in the top piece and sticking a plastic stick through the hole to let light through to the sensor.

To get the photos to display, [Henric Andersson] says all he did was add a few queries to Google Photos and it will display all your relevant photos that have been synced to the service. For a breakdown of that side of this hack, check out his other post with the details.

While Google Photos deftly displays photos of various orientations, sizes, and aspect ratios, we’ve featured a digital photo frame that handles the task a little differently.

Rotating Frame Will Change Your View Of Vertical Images

[Tim] was tired of compromising his portrait-oriented digital photos by shoehorning them into landscape-only frames. Unable to find a commercial solution, he built his own rotating digital photo frame from a 27″ LCD TV.

It uses a Raspi 3 to find [Tim]’s pictures on a giant SD card. He originally wanted to have the Pi pull pictures from Google Photos and display them randomly, but the API doesn’t work in that direction. Instead, a Python script looks at the pictures on the SD card and determines whether each is landscape or portrait-oriented. If a picture was taken in portrait-mode, the display will rotate 90 degrees. Rotation is handled with an Arduino, a stepper motor, and some 3D-printed herringbone gears. The first version was a bit noisy, so [Tim] re-printed the motor mount and the pinion gear out of flexible filament.

[Tim] designed the mount and frame himself and laser-cut the pieces out of birch plywood. We like that he accounted for the front-heaviness and that he covered the high voltage circuitry with acrylic to mitigate the risk of shock. All the code and design files are available on his project page. Make the jump to see a brief demonstration followed by a walk-through and stay for the six-minute slide show.

Continue reading “Rotating Frame Will Change Your View Of Vertical Images”

RaspPi Photo Frame

Raspberry Pi Powered Super Digital Photo Frame

HaD reader [Greg] just finished an LCD picture frame project he’s been working on for a while. This is no ordinary photo display. His brother came up with the idea of having a device to display photos that could be changed remotely. [Greg] gave it some thought and came up with a plan; use a Raspi as the brains, connect to the internet via WiFi and display photos stored in a specific Google Drive folder. Any authorized user can upload photos remotely to the frame so the frame-owner has a constant stream of new photos to view.

Of course, using an off-the-shelf picture frame may have been too easy. Instead [Greg] decided to start with an old computer monitor and wrap it in a wooden frame so it looks good. Mounted to the back of the LCD is a Raspberry Pi with a USB WiFi dongle. The monitor runs at 14 VDC and luckily has an external power supply. Since the Pi runs at 5 V, a buck converter taps into the LCD’s input power and outputs a Pi-happy 5 volts.

This project doesn’t stop with displaying photos! The user can also switch to a weather view. The weather image displayed is generated from weather data pulled from the internet in the exact same manor used by folks who make stand-alone weather displays out of old Kindles. Oh yeah, switching between photos and weather is done by wireless remote! On the frame unit itself there is only one button, but it has 3 functions: A quick press turns the screen off, a short hold syncs with Google Drive and a long hold powers off the RaspPi.

If you’d like to make your own frame, [Greg] has graciously made all his scripts available for download…. not to mention his very detailed build log.

20 Android Tablets Form An Interactive Photo Collage

You might not have a small army of unused tablets lying around, but if you did, you should try turning them into what Minn calls a “Giant Interactive Photo Array Display:” A Giant IPAD. Har har.

[Minn’s] first step was to hit eBay, hoping to find a score of low-priced, broken-yet-easily-repairable tablets. The only ones available (and for cheap), however, were resistive touch screens with narrow viewing angles. After waiting patiently for nearly half a year, [Minn] hit the capacitive touch jackpot: snagging a pile of 10″ and 7″ Android tablets. The frame is custom made to provide a solid surface for mounting and enough depth for the tablets to fit correctly. Rather than form his own brackets to hold each device, [Minn] re-purposed some IKEA cupboard handles, screwing them into the MDF backboard and clamping the tablets to them with bolts that press against the case. An adhesive rubber bumper stuck to the top of the bolts prevents any damage.

Providing power to the diverse collection required another custom solution; two 5V 10A supplies and one 9V 16A supply fit into an accompany box safely deliver the needed juice. [Minn] chose an app that will grab photos from cloud storage so he can update the collection without having to dig around inside the frame. See the result in a video below! Want to try this project but only have one tablet to spare? The in-wall tablet mount might help.

Continue reading “20 Android Tablets Form An Interactive Photo Collage”

A No-touchscreen Picture Frame?

Many people have touch-screen devices, however, this hack claims to be the first picture frame to feature a “no-touch” interface. Although someone somewhere certainly has a digital picture frame hooked up to a “Clapper”, we’re going to give [Wasabi] the benefit of the doubt.

After buying a Microtouch kit from Adafruit several months ago with the intention of building something meaningful, [Wasabi] ran into a common problem among hackers, a lack of time. Instead of totally giving up on the device, the decision was made to make it into a simple picture frame. Although the Microtouch features a touchscreen, it also features an accelerometer. With a little hacking, as described in his write-up, the “touchless” picture frame was born. Cleverly, the screen was hidden behind glass, but through this interface, interaction was still possible.

The device itself seems like a great hacker tool, especially at a price point of just under $70. Here’s a hack where “Zork” was ported to this device, but be sure to send us any other projects you come up with using it! Check out the video after the break of this device in action!

Continue reading “A No-touchscreen Picture Frame?”

How-to: Digital Picture Frame, 100% DIY

frontii

There are a ton of digital picture frame tutorials out there. Most are old laptops with crafty case reconfigurations that fit a photo frame profile.

We set out to build a 100% DIY, scratch-built digital picture frame. Our frame has a 12bit color LCD, gigabytes of storage on common, FAT-formatted microSD cards, and you can build it at home. We’ve got the details below.

Continue reading “How-to: Digital Picture Frame, 100% DIY”