Virtual reality doesn’t feel very real if your head is the only thing receiving the virtual treatment. For truly immersive experiences you must be able to use your body, and even interact with virtual props, in an intuitive way. For instance, in a first-person shooter you want to be able to hold the gun and use it just as you would in real reality. That’s exactly what [matthewhallberg] managed to do for just a few bucks.
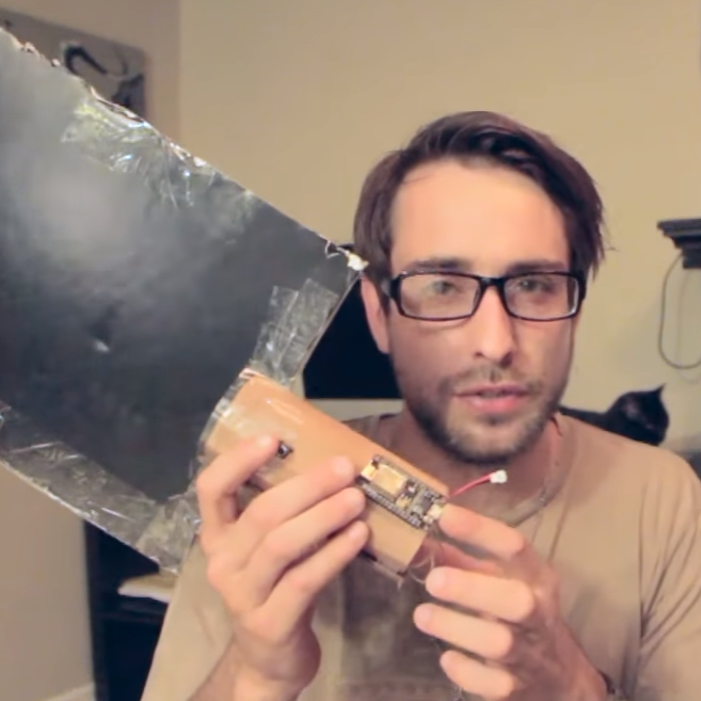
This project is an attempt to develop a VR shooting demo and the associated hardware on a budget, complete with tracking so that the gun can be aimed independent of the user’s view. [matthewhallberg] calls it The Oculus Cardboard Project, named for the combined approach of using a Google Cardboard headset for the VR part, and camera-based object tracking for the gun portion. The game was made in Unity 3D with the Vuforia augmented reality plugin. Not counting a smartphone and Google Cardboard headset, the added parts clocked in at only about $15.
Using corrugated cardboard and a printout, [matthewhallberg] created a handheld paddle-like device with buttons that acts as both controller and large fiducial marker for the smartphone camera. Inside the handle is a battery and an ESP8266 microcontroller. The buttons on the paddle allow for “walk forward” as well as “shoot” triggers. The paddle represents the gun, and when you move it around, the smartphone’s camera tracks the orientation so it’s possible to move and point the gun independent of your point of view. You can see it in action in the video below.
Tracking a handheld paddle with a fiducial marker isn’t a brand new idea; We were able to find this project for example which also very cleverly simulates a trigger input by making a trigger physically alter the paddle shape when you squeeze it. The fiducial is altered by the squeeze, and the camera sees the change and registers it as an input. However, [matthewhallberg]’s approach of using hardware buttons does allow for a wider variety of reliable inputs (move and shoot instead of just move, for example). If you’re interesting in trying it out, the project page has all the required details and source code.
This isn’t [matthewhallberg]’s first attempt and getting the most out of an economical Google Cardboard setup. He used some of the ideas and parts from his earlier DIY Virtual Reality Snowboard project.
A VMC (vertical machining center) is essentially a CNC vertical milling machine on steroids. Many CNC mills are just manual milling machines that have been converted to CNC control. They work nicely, but have a number of drawbacks when it comes to real world CNC milling: manual tool changes, lack of chip collection, lack of coolant containment, and backlash issues (which a manual machinist normally compensates for).
These problems are solved with a VMC, which will usually have an automatic tool changer, and an enclosure to contain coolant and wash chips down into a collection pan. They are, however, very expensive, very big, and very heavy. Building one from scratch is a massive undertaking, but one which [Chris DePrisco] was brave enough to take on.
Want to get somewhere safely, but all you have is a Segway? An afternoon spent tinkering can turn your Segway into a lounging cruiser with this hoverseat attachment, just like YouTuber [Inflatable Boats]’s hot new ride.
The backbone of the cart is the Segway Mini Pro. An aluminium frame attaches to the Segway via an eye-bolt and two carabiners, the larger of which has some tape wrapped around it to reduce wear. A swivel caster is attached with u-bolts to support the weight of the rider along the middle of this makeshift go-cart. Pushing on a t-handle made of pvc — connected to the Segway’s knee brace with a simple strap — engages the motor in lieu of the normal lean-to-go-forward action. Turning is simply done by swinging the handle or pressing with your feet.
DIY medical science is fun stuff. One can ferret out many of the electrical signals that make the body run with surprisingly accessible components and simple builds. While the medical community predictably dwells on the healthcare uses of such information, the hacker is free to do whatever he or she wants.
A good first start is to look at the relatively strong electrical signals coming off of the heart and other muscles. [Bernd Porr] has put together a simple bioamplifier circuit, and his students have made a series of videos explaining its use that’s well worth your time if you are interested in these things. Continue reading “All About Biosignals”→
If you had made it this far in your journey from project to kit, you would now have a box of electronic components, a pile of printed instructions, and a box of plastic bags, thin card boxes, or whatever other retail packaging you have chosen for your kit. You are ready to start stuffing kits.
It’s All In The Presentation
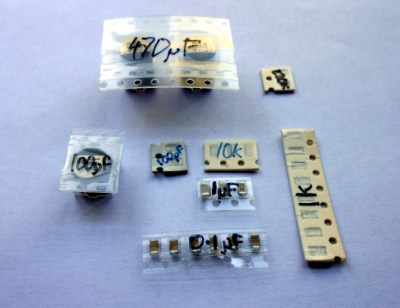
Label all your hard-to-identify components, your customers will appreciate it.
Your priorities when stuffing a kit are to ensure that your customer receives all the components they should, they can easily identify each component, and that the whole kit is attractively presented such that it invites them to buy or build it when they first see it. This starts before you have packed any components, you must carefully prepare each component into units of the required number and label them if they are otherwise not easy to identify. Pre-cut any components supplied on tape, and write the part number or value on the tape if it is not easily readable. You may even have to package up some difficult-to-identify components in individual labeled bags if they can not have their values written on them, though this incurs an extra expense of little bags and stickers. Some manufacturers will insist on using black tape on which an indelible pen doesn’t show up!
Take care cutting tapes of components, it is sometimes easy to damage their pins. Always cut the tape from the bottom rather than the side with the peelable film, and if necessary carefully bend the tape slightly to open up the gap between components for your scissors.
If you start by deciding how many kits you want to stuff in a sitting, list all the kit components and prepare that number of each of them in the way we’ve described. Then take the required number of packages or bags, and work through each component on the list, stuffing all the bags with one component before starting again moving onto the next. In time you will have a pile of stuffed kits ready to receive their instructions and labeling.
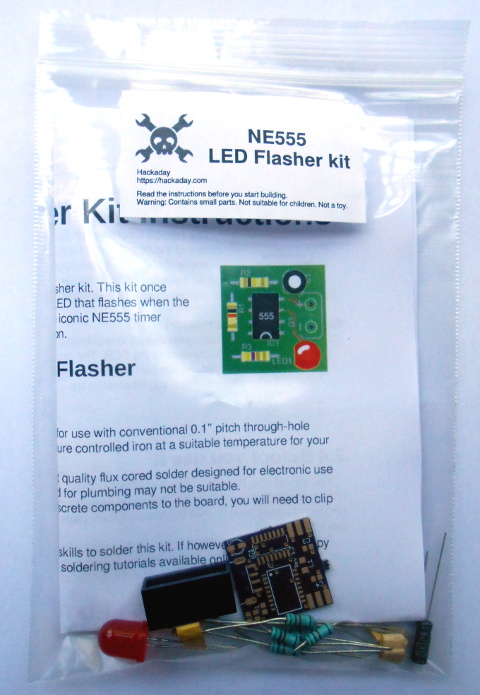
The next step will be to fold your instruction leaflet and pack it in the kit. Take a moment to consider how it can be most attractively presented. For example with a kit packaged in a click-seal plastic bag it makes sense to fold the leaflet such that the colour photo of a completed kit is visible from the front. And when you place it in the bag make sure that the PCB is visible top-outwards in front of it. A customer looking at your kit wants to immediately see what they are likely to create with it.
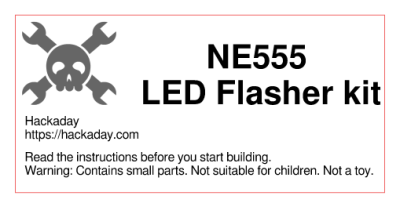
You can now seal the bag or box, the kit is packed. It only remains to give it a label that has all the pertinent information and is attractive to the customer. You will probably want to put your logo or web address on the label as well as any small print required, alongside the most important feature — the kit description. We’ve put a warning about small parts and curious children, you may also want to put any reglatory or compliance information here. For example in Europe you might have a CE mark and a WEEE logo. Once you have your design sorted you can run it up in your favourite label designing software – we used gLabels – and print as many as you like on sheets of sticky labels. We strongly suggest buying good quality branded labels, the extra money is well worth it when you consider that they will have much more reliable glue, and the extra cost per individual kit will be marginal. Pick a label size which fills a decent space and is easy to read on your packaging without being too big, we used 70mm x 37mm laser labels of which 24 can be had on a single sheet.
Your First Finished Product
If Hackaday made electronic kits, they might look a little like this.
It’s an exciting moment when you apply a label to your first fully packed kit and see for the first time what your customers will see: a finished product. You aren’t quite done though, because there is still the small matter of quality control. Take a kit or two from your batch at random, and count all their contents off against your list of what they should contain. This should help you ensure you are packing the kits correctly. Finally, give a completed kit to a friend who has never seen it before, and tell them to build it as a final piece of quality control. They are simulating your customer in every way, if they have no problems then neither should anyone who buys the kit.
Once you’ve built your batch of kits, you will now have the stock you will send out to your customers. Imagine yourself as a customer, if you order a kit you will expect it to arrive in pristine condition. You should therefore now take care of this stock of kits to ensure that it does not come to any harm, its packaging is as crisp and new when you send it out as when you packed it, and it has not attracted any dust while in storage. We would suggest having a separate plastic box for the stock of each kit in your range, and protecting the kits from dust with a lid, or by storing them inside a larger plastic bag.
As we’ve worked through this series of articles, we’ve tried to give you a flavour of the process of bringing an electronic kit from a personal project to the masses. We’ve looked at learning about the market for your kit, we’ve discussed turning a project into a product before writing the best instructions possible and now stuffing your first kits ready for sale. In the next article in the series we’ll talk about how you might sell your products, the different choices open to you for online shops, marketplaces, and crowdfunding.
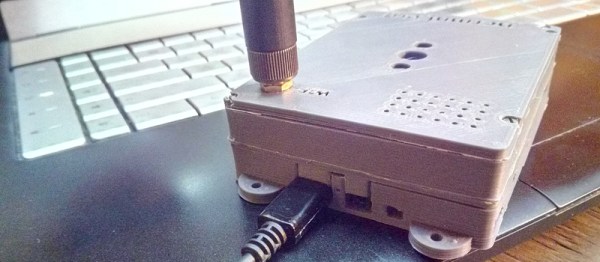
[Ncrmnt] had a busted tablet PC with an Allwinner A23 SoC inside. He combined two of our favorite past-times, Linux hacking and 3D printing, to make a rather sweet little single-board-computer out of it, giving the tablet a second life.
Step one was to make sure that the thing works. Normally, you’d hook up a wired serial terminal and start hacking. [Ncrmnt] took it one step further and wired in a HC-05 Bluetooth serial module, so he can pull up the debug terminal wirelessly. The rest of the hackery was just crafting a bootable SD card and poking around in the Android system that was still resident in the flash memory of the system.
Once the board was proven workable, [Ncrmnt] designed and printed a sweet custom case using Solvespace, a constraint-based 3D CAD modeler that was new to us until recently. The case (after three prints) was a perfect fit for the irregularly shaped system board, a 3.7 V LiIon battery, and a speaker. He then added some nice mounting tabs. All in all, this is a nice-looking and functional mini-computer made out of stuff that was destined for the trash. It’s fast, it’s open-source, and it’s powerful. Best of all, it’s not in the dumpster.
There are pictures and more details on his blog, as well as [Ncrmnt]’s TV-stick to computer conversion that we’ve covered before.
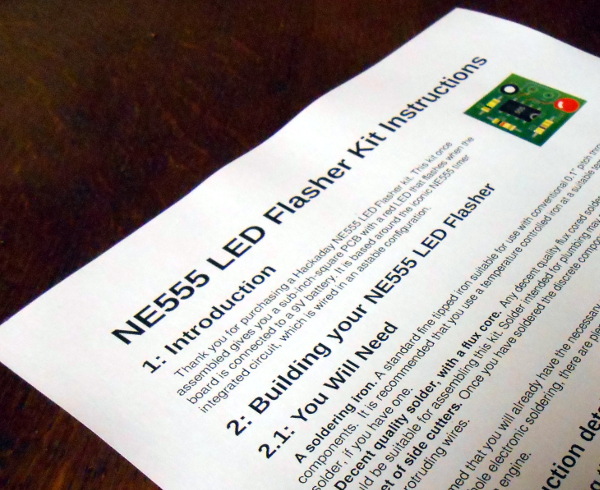
A printed copy of the instructions for our example kit
We’ve had two previous articles in this series on turning a personal electronic project into a saleable kit, in which we’ve examined the kit market in a broader context for a new entrant, and gone on to take a look at the process of assembling the hardware required to create a product. We’ve used an NE555 LED flasher as a simple example , from which we’ve gone through the exercise of setting a cost of production and therefore a retail price.
The remaining task required to complete our kit production is to write the documentation that will accompany it. These will be the instructions from which your customers will build the kit, and their success and any other customers they may send your way will hang on their quality. So many otherwise flawless kits get this part of the offering so wrong, so for a kit manufacturer it represents an easy win into which to put some effort. Continue reading “From Project To Kit: Instructions Are Everything”→

 Using corrugated cardboard and a printout, [matthewhallberg] created a handheld paddle-like device with buttons that acts as both controller and large fiducial marker for the smartphone camera. Inside the handle is a battery and an ESP8266 microcontroller. The buttons on the paddle allow for “walk forward” as well as “shoot” triggers. The paddle represents the gun, and when you move it around, the smartphone’s camera tracks the orientation so it’s possible to move and point the gun independent of your point of view. You can see it in action in the video below.
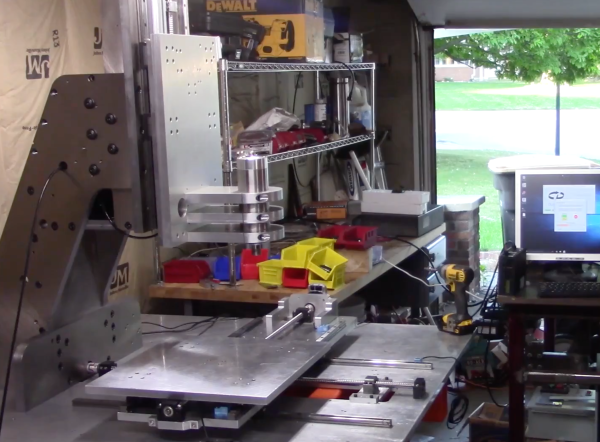


 You can now seal the bag or box, the kit is packed. It only remains to give it a label that has all the pertinent information and is attractive to the customer. You will probably want to put your logo or web address on the label as well as any small print required, alongside the most important feature — the kit description. We’ve put a warning about small parts and curious children, you may also want to put any reglatory or compliance information here. For example in Europe you might have a CE mark and a WEEE logo. Once you have your design sorted you can run it up in your favourite label designing software – we used