A Doorbell Loud Enough To Wake The Dead

really_loud_doorbell

[Ed Nauman] runs a machine shop, which we imagine can be quite loud at times. Sick of never hearing the doorbell when he was busy working on things, he decided that the solution to his problem was a new doorbell…an incredibly loud doorbell.

His Really Loud Doorbell (RLD for short) is actually a pretty simple device. We imagine he could have wired up an old alarm bell instead, but where’s the fun in that? The doorbell was built using a PIC16F876 uC, which is used to control the air flow through a pneumatic valve. When someone rings his doorbell, the pneumatic actuator pulses up and down, rapidly striking a piece of 1/4” thick steel pipe. As you can see in the video below, it is quite loud and likely to cut through any shop noise without much trouble.

We have seen some extremely loud doorbells before, but we figured that at least a handful of you work in similar environments – have you implemented any inventive ‘notification’ systems in your workspace? Let us know in the comments.

[via Adafruit Blog]

Continue reading “A Doorbell Loud Enough To Wake The Dead”

DIY Softboxes Light Your Photos On The Cheap

diy_softboxes

Softboxes are often considered a must-have piece of equipment when doing any sort of portrait or studio photography. While they are not the most expensive photography accessory, they can be built far cheaper than you would pay for an off the shelf model.

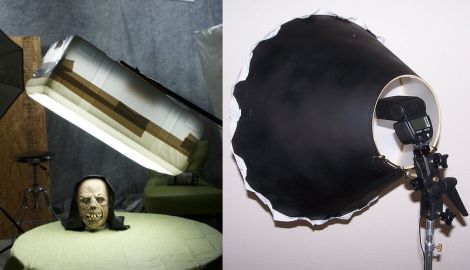
[Don] needed a softbox for his studio, and he ended up constructing a fairly nice one out of a styrofoam cooler. He mounted an outdoor light receptacle inside the cooler after laying down a reflective backing, bolting everything to a piece of plywood situated on the back of the cooler. He stretched some white cloth over the front to diffuse the light, and then mounted it on a light stand. You can see a video of the construction process below, as well as additional softbox-lit images on his site.

[Aud1073cH] had a similar need for a softbox, but went about his construction a bit differently. He grabbed a lampshade and a white dress shirt at a thrift store, stretching the shirt over the bottom opening before securing it with Velcro. He mounted the lampshade on a light stand, inserting his camera’s speed light through the smaller lampshade opening. As you can see in his photostream, the softbox does a great job at softening the shadows in his pictures.

Continue reading “DIY Softboxes Light Your Photos On The Cheap”

DIY High Voltage Electric Field Detector

electric_field_detector

Who needs a Fluke high voltage detector when you’ve got one of these things?

Actually, we still recommend a professional high voltage detector for serious work, but you’ve got to like this electric field detector that [Alessandro] recently put together.

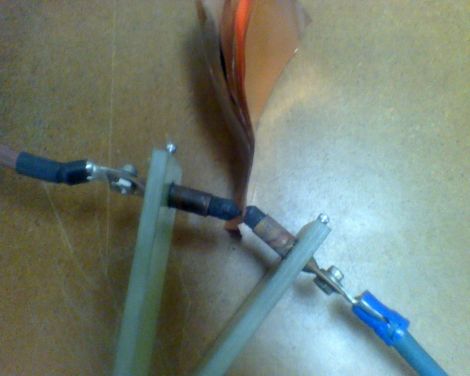
The detector works by using a JFET to detect the high impedance electric fields that are generated by high voltage lines. The JFET amplifies the signal while dropping the impedance in order to drive a pair of NPN transistors which are used as a threshold amplifier. Once the voltage hits 3V, an LED is lit, indicating the presence of high voltage near the detector’s probe. A wire-wrapped resistor does double-duty serving as the probe while providing a high impedance path to ground, ensuring that stray charge does not accumulate on the JFET’s gate, causing false readings.

It’s a neat project, and something that can be constructed in no time, making it perfect for beginner electronics classes.

Keep reading to see a quick video of the HV detector in action.

Continue reading “DIY High Voltage Electric Field Detector”

DIY Inkjet Printer Begs To Be Hacked

diy_inkjet

[Nicholas C Lewis, Patrick Hannan, Jared Knutzen, and Joy Markham], students from the University of Washington, have recently taken the wraps off a project which they have been collaborating on, a DIY inkjet printer. The group set out to construct a low cost, open source inkjet printer for personal use that utilizes standard inkjet technology. Their working prototype, pictured above, satisfies all of those requirements, making it an ideal device for the at-home hobbyist.

The printer was constructed from easy to obtain components such as steel rods and stepper motors, along with other parts that can be printed using a RepRap or similar machine. An Arduino Mega manages the steppers and repurposed print head, recreating whatever Processing-generated image it has been given.

The printer is quite a hit so far, and people are already talking about adapting the design to print on spherical objects (think EggBot), to create direct etch resist PCBs, and more. We think it would make a great direct to garment printer with just a few small tweaks.

Check out the short video embedded below to see the printer in action.

[via Make]

Continue reading “DIY Inkjet Printer Begs To Be Hacked”

Roll Your Own Capacitors

diy_caps

Rolling your own electronics components can be fun, but can also help in explaining how certain items actually work. [Addie] from The Toymakers recently set off to figure out how capacitors work, by making her own.

She understood the general concept behind capacitors and how they are constructed, but she wanted to see how it was done first-hand. To construct her capacitor, she selected aluminum foil as her conductor, and saran wrap as the dielectric. She admits that her first attempt was a failure, but undaunted, she carried on. Friends suggested that her conductors were a bit too small to hold any reasonable charge, so she tried larger sheets of aluminum foil to no avail.

She kept at it and found success after using several feet of foil to construct her capacitor. She charged it with a handful of AA batteries and was excited to see her multimeter come to life when she touched the leads to the cap.

While you likely wouldn’t use a hand-made capacitor in your next build, it is a fun experiment to do with children interested in learning about electronics.

[via Adafruit blog]

Continue reading “Roll Your Own Capacitors”

DIY Sunrise Alarm Clock

sunrise_alarm_clock

As a project for an embedded systems class, [Alan] recently built himself a sunrise-simulating alarm clock. You are probably familiar with these sorts of timepieces – they gradually light up the room to awaken the sleeping individual rather than jarring them awake with a buzzer or the radio. Since many commercial units with this feature are sold for $70 and up, his goal was to replicate the functionality at a fraction of the cost, using only open source components.

An Arm Cortex M3 processor runs the show, displaying the time via a pair of 8×8 LED matrix panels on the front of the device. The clock is programmed to gently wake up its user by simulating a sunrise over a period of 5, 15, 30, 45, or 60 minutes. If the user has not woken up before the sunrise simulation is complete, the clock resorts to a traditional piezo alarm to rouse the heavy sleeper.

The project is nicely done, and after looking at his bill of materials it seems to be far cheaper than many sunrise alarm clocks you will find in stores.

DIY Resin Cast Project Box

resin_casting

[Rhys] wrote in to share a custom project box he built from scratch using polyester resin. He states that in New Zealand, he tends to have problems finding the perfect project box. They are typically too big or small to get the job done, so he figured he might as well just build his own to spec.

Using Google SketchUp, he designed his ideal project box, then got busy building wooden molds. He scored some free melamine scraps from a local company, which he used to build the base of his molding rig. Once the inner and outer molds were built, he secured them to his base and mixed up some polyester resin.

A few hours later, he pulled apart his molds and smoothed out his project box with some sandpaper. He drilled and tapped screw holes, then prepared to make a lid and base for the box.

He admits that the process is quite involved, but there is something to be said for building yourself an enclosure made specifically for the project it is going to house. If you are looking to do something similar be sure to check out his blog – he offers up some sound resin casting tips, as well as some pitfalls to avoid.