Autonomous Balloon Popping

Quadcopter drone for popping balloons

Taking on an autonomous vehicle challenge, [Randy] put together this drone which can locate and pop balloons. It’s been assembled for this year’s Sparkfun Autonomous Vehicle Competition, which will challenge entrants to locate and pop 99 luftbaloons red balloons without human intervention.

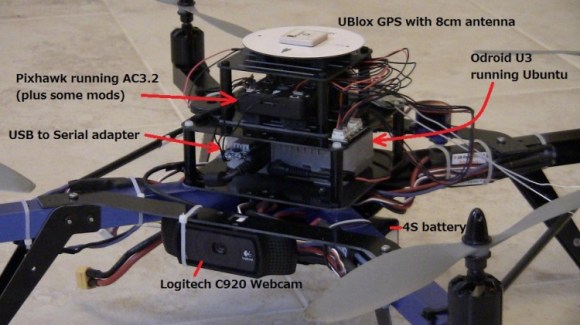
The main controller for this robot is the Pixhawk, which runs a modified version of the ArduCopter firmware. These modifications enable the Pixhawk to receive commands from an Odroid U3 computer module. The Odroid uses a webcam to take images, and then processes them using OpenCV. It tries to locate large red objects and fly towards them.

The vision processing and control code on the Odroid was developed using MAVProxy and Drone API. This allows for all the custom code to be developed using Python.

The Sparkfun AVC takes place tomorrow — June 21st in Boulder, Colorado. You can still register to spectate for free. We’re hoping [Randy]’s drone is up to the task, and based on the video after the break, it should be able to complete this challenge.

Continue reading “Autonomous Balloon Popping”

R/C Plane Flies With A Cockpit View

That’s not a jet jockey making a low altitude turn up there. In fact, the pilot has his feet planted firmly on the ground. [Reliku] has built a radio controlled BAE Hawk which is flown via First Person View (FPV). FPV models often have a small camera mounted on the exterior of the craft. This camera gives a great field of view, but it isn’t exactly how full scale planes are flown.

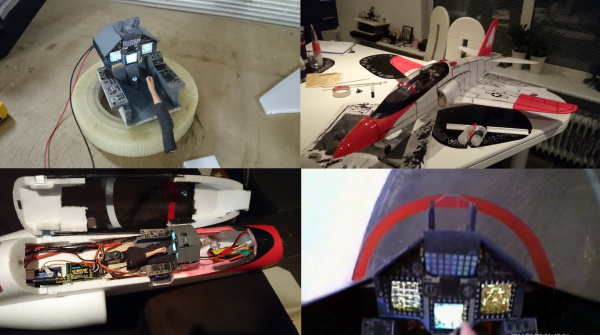
[Reliku] took it to the next level by creating a scale cockpit for his plane. The cockpit is accurate to the real BAE Hawk T2, and features back lit simulated screens. Even the pilot got the FPV treatment. Micro servos move the pilot’s right hand in response to aileron and elevator inputs from the radio control system. The pilot’s head has been replaced with the FPV camera, which is mounted on a pan tilt unit. Pan and tilt are controlled by a head tracking system attached to [Reliku’s] video goggles. The entire experience is very immersive.

All this is built into a Hobbyking BAE Hawk Electric Ducted Fan (EDF) model, so space is at a premium. Even with the Hawk’s relatively large cockpit, [Reliku] found he was tight on space. While attempting to keep the cockpit scale from the pilot’s view, he found he was barely able to fit a single seat cockpit into a space designed for two! Adding all these modifications to a plane and still keeping the model flyable was not easy, as displayed by [Reliku’s] earlier attempt with an F-16.

The ends do justify the means though, as the final model looks great. We’d love to see those static cockpit displays replaced with small LCD or OLED panels for an even more realistic experience!

Continue reading “R/C Plane Flies With A Cockpit View”

Autonomous Plane Flying Across The USA

sky

Somewhere between San Diego and South Carolina is an unmanned aerial vehicle attempting to make the first autonomous flight across the United States. The plane is electric and requires a landing and battery swap every hour or so, however the MyGeekShow guys are so far the only non-military entity to attempt such an ambitious flight.

The plane making the multiple flights is a Raptor 140 capable of cruising at 75 kph for about an hour before requiring a battery swap. Ground control is an RV, loaded up with LCDs and radios; as long as the RV is within a kilometer or so of the plane, the guys should be able to have a constant telemetry link.

Already the guys at MyGeekShow have pulled off a 52 km autonomous flight, following their flying wing in a car. Even though a hard landing required swapping out the carbon fiber spar for an aluminum one, the plane making the truly cross-country flight is still in good condition, ready to land on a South Carolina beach within a week.

You can follow the trip on the MyGeekShow Twitter. The guys are pulling off an incredible amount of updates and even a few live streams from the mobile command station.

UPDATE: It crashed. Tip stalls aren’t your friend, and undercambered wings exist. Good try, though.

Droning On: Choosing A Flight Controller

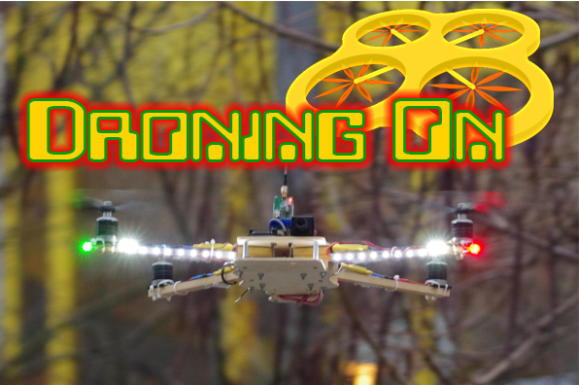
do4 The flight controller is the nerve center of a drone. Drone flight control systems are many and varied. From GPS enabled autopilot systems flown via two way telemetry links to basic stabilization systems using hobby grade radio control hardware, there is an open source project for you.
Modern drone flight controllers can trace their roots back to R/C helicopters. Historically, R/C planes were controlled directly by the pilot’s radio. Helicopters added a new wrinkle to the mix: tail rotors. Helicopters use their tail (or anti-torque) rotor to counteract the torque of the main rotor attempting to spin the entire helicopter’s body. It all works great when the helicopter is hovering, but what about when the pilot throttles up to fly out? As the pilot throttles up, the torque increases, which causes the entire helicopter to do a pirouette or two, until the torque levels out again. The effect has caused more than one beginner pilot to come nose to nose with their R/C heli.

The solution to this problem was gyroscopes, heavy brass spinning weights that tilted in response to the helicopter’s motion. A hall effect sensor would detect that tilt and command the tail rotor to counteract the helicopter’s rotation. As the years wore on, mechanical gyros were replaced by solid state MEMS gyros. Microcontrollers entered the picture and brought with them advanced processing techniques. Heading hold gyros were then introduced. Whereas older “rate only” gyros would drift, weathervane, and wiggle, heading hold gyros would lock down the helicopter’s nose until the pilot commanded a turn. These single axis flight controllers were quickly adopted by the R/C helicopter community.

Today’s flight control systems have many sensors available to them – GPS, barometric pressure sensors, airspeed sensors, the list goes on. The major contributors to the flight calculations are still the gyros, coupled with accelerometers. As the name implies, accelerometers measure acceleration – be it due to gravity, a high G turn, or stopping force. Accelerometers aren’t enough though – An accelerometer in free fall will measure 0 G’s. Turning forces will confuse a system trying to operate solely on accelerometer data. That’s where gyros come in. Gyros measure rate of rotation about an axis. Just as our helicopter example above covered yaw, gyros can be used to measure pitch and roll of an aircraft. A great comparison of gyros and accelerometers is presented in this video from InvenSense.

Stay with us after the break for a tour of available flight controllers and what each adds to the mix. Continue reading “Droning On: Choosing A Flight Controller”

The Autopilot Shield For The Raspberry Pi

Navio

In the world of drones, quadcopters, and unmanned aerial vehicles, the community has pretty much settled on AVR microcontrollers for the low end, and ARM for the high performance boards. If the FAA doesn’t screw things up, there will soon be another market that requires even more computational power, and Navio, the autopilot shield for the Pi, is just the thing for it.

Where high end multicopter and autopilot boards like the OpenPilot Revolution use ARM micros, there’s a small but demanding segment of the hobby that needs even more processing power. Think of something like the Outback Challenge, where fixed-wing drones search the desert for a lost mannequin autonomously. You’re going to need OpenCV for that, and that means Linux.

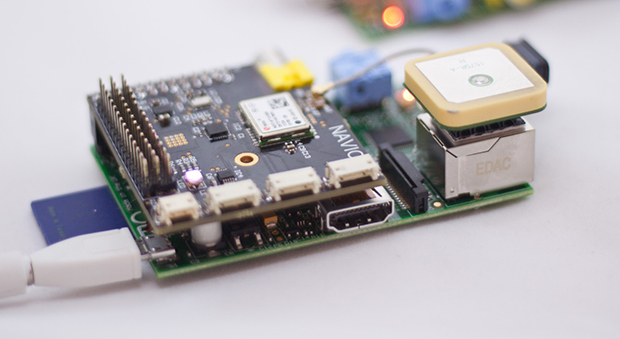
Navio is a shield for the Raspberry Pi, complete with a barometric pressure sensor, gyros, accelerometer, and compass, and GPS. It’s designed to run a more real-time version of Linux, and has the ability to do some interesting telemetry configurations – putting a 3G modem on the Navio isn’t much of a problem, and since it’s a Raspi, doing image processing of a downward facing camera is just a matter of writing the code.

The Navio team is currently running an Indiegogo campaign, with the baseline version available for $145. That’s pretty close to the price of the OpenPilot Revolution. There’s also a version upgraded with the U-blox NEO-6T that allows for on-board processing of raw GPS data.

A Quadcopter From Scratch

Quadcopter

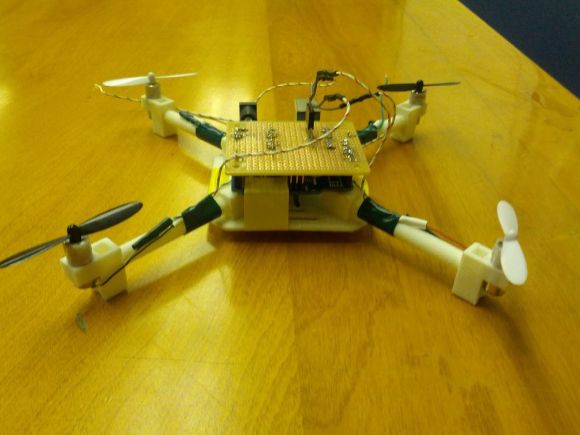
[AwesomeAwesomeness] wanted a low cost quadcopter, so he built one from scratch. Okay, not quite from scratch. [AA’s] cookie mix came in the form of an Arduino Uno and some motors. He started with motors and propellers from a Hubsan X4 quadcopter. Once the power system was specified, [AA] designed a frame, arms, and motor pods in Solidworks. He printed his parts out and had a sweet quadcopter that just needed a brain.

Rather than buy a pre-made control board, [AA] started with an Arduino Uno.  An Arduino alone can’t source enough current to drive the Hubsan motors. To handle this, [AA] added a ULN2003A  Darlington transistor array. The 2003A did work, but [AA] had some glitching issues. We think FETs would do much better in this application, especially when running PWM.

On the control side of things, [AA] added an MPU-6050 Triple Axis Accelerometer and Gyro breakout from SparkFun. The 6050 has 3 gyros and 3 accelerometers in one package. Plenty for a quadcopter.

All this left was the coding. Multicopters generally use Proportional-Integral-Derivative (PID) control loops to maintain stability in the air. [AA] used the Arduino PID library for his quadcopter. He actually created two PID instances – one for pitch and one for roll.

[AA] doesn’t have any videos of his quadcopter in action yet, and we’re guessing this is due in part to weight. Lifting an Uno, a perfboard, and a frame is a tall task for those motors. Going with a one of the many tiny Arduino’s out there would help reduce weight. In addition, [AA] could use a gear system similar to what is used in the Syma X series quadcopters. Stick with it – you’re on the right track!


Quadcopter Built From Recycled Motherboards

A quadcopter built from a motherboard

[Eric] has figured out a great way to build quadcopters out of recycled computer motherboards. Multicopters come in all shapes and sizes these days. As we mentioned in the last issue of Droning On, they can be bought or built-in a multitude of materials as well. Drones have been built using materials as varied as wood, PVC pipe, carbon fiber, and aluminum.

One of the more common commercial materials is G10 fiberglass sheet. It’s stiff, strong, and relatively light. Printed circuit boards are generally made of FR-4 fiberglass, G10’s flame resistant cousin. It’s no wonder [Eric] had quadcopters in his eyes when he saw a pile of motherboards being thrown out at his university.

[Eric] used a heat gun and a lot of patience to get all the components off the motherboard. With a bit of care, most of the components can be saved for future hardware hacks. This is one step that’s best performed outside. Hot melting plastics, metals, and resin fumes aren’t the greatest things to inhale.

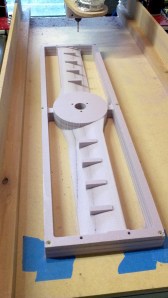
Computer motherboards being cut on a shopbotClean PCBs in hand, [Eric] headed to his local TechShop. He drew his dead cat style frame in SolidWorks and cut it out on a ShopBot. While a high-end CNC cutter is nice, it’s not absolutely necessary. The fiberglass sheets could be cut with a rotary tool or a jigsaw. No matter how you cut it, be sure to wear a mask rated for fiberglass resins and some protective clothing. Fiberglass plate is nasty stuff to cut.

Once the upper and lower frame plates were cut, [Eric] completed his quad frame with some square wooden stock for arms. The final quad is a great flier, and spare parts are easy to source. Nice work on the recycling, [Eric]!

Continue reading “Quadcopter Built From Recycled Motherboards”