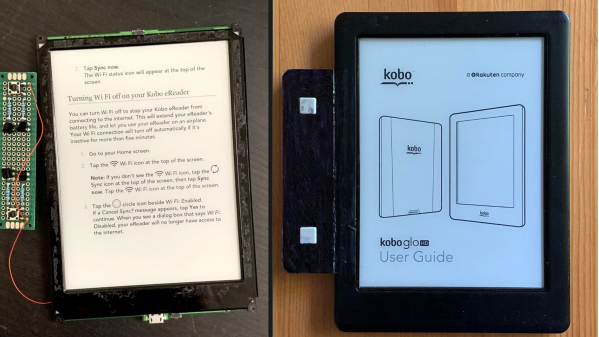
Corporate Badgelife: Oracle’s Code Card

We tend to think of elaborate electronic conference badges as something limited to the hacker scene, but it looks like the badgelife movement is starting to hit the big time. Now even the “big boys” are getting into the act, and pretty soon you won’t be able to go to a stuffy professional conference without seeing a sea of RGB LEDs firing off. We’ll let the good readers of Hackaday determine if this means it’s officially post-cool or not.

[Noel Portugal] writes in to tell us about how he created the “Code Card” during his tenure with the Oracle Groundbreakers Team. Featuring an ESP8266 and an e-ink screen, the Code Card serves not only as swanky way of identifying yourself, but as a real-world demonstration of physical devices pulling content from Oracle’s Cloud. Gotta keep those corporate overlords happy.

The Code Card is a fairly simple piece of hardware as far as badges go these days, but then the goal was never to be flashy. It does feature dual four-pin Grove System connectors on the backside though, so you can plug in additional sensors and gadgets for the customary badge hacking sessions.

To maximize runtime on the rechargeable coin cell battery, the Code Card only turns on the ESP after the user has pressed one of the buttons on the front. Once the ESP has finished performing whatever task the user requested, its powered back off completely rather than put into standby. Combined with the e-ink screen, power consumption while the device isn’t actively updating the display or pulling down new content is negligible.

[Noel] really went all-out on the software side, going as far as developing a web application which let conference attendees configure their Code Cards from their smartphones. Different functions could be assigned to short and long presses on the badge’s two buttons, and users could even select icons for the various functions from a list of images included in the firmware. A feature where attendees could upload their own images didn’t make the cut, but that surely won’t stop people from hacking around in the published Arduino source code and figuring out how to do it manually.

If you think the Code Card looks a bit familiar, it’s perhaps because it was designed in conjunction with Squarofumi, creators of the Badgy. So even if you aren’t hitting up any of Oracle’s upcoming conferences, you’re not completely out of luck if you want an e-ink badge to play with.

E-ink Typewriter Is Refreshingly Slow

It’s pretty hard to use the internet to complete a task without being frequently distracted. For better or worse, there are rabbit holes at every turn and whilst exploring them can be a delight, sometimes you just need to focus on a task at hand. The solution could be in the form of distraction-blocking software, razor-sharp willpower, or a beautifully crafted modern “typewriter”. The constraint and restriction of a traditional typewriter appealed to [NinjaTrappeur], but the inability to correct typos and share content online was a dealbreaker. A hybrid was the answer, with a mechanical keyboard commanding an E-ink display driven by a Raspberry Pi.

The main point of interest in this build is the E-ink screen. Though it’s easy to acquire theses displays in small sizes, obtaining a screen greater than four inches proved to be a challenge. Once acquired, driving the screen over SPI was easy, but the refresh rate was horrific. The display takes three seconds to redraw, and whilst [NinjaTrappeur] was hoping to implement a faster “partial refresh”, he was unable to read the appropriate values from the onboard flash to enable manual control of the drawing stages. Needless to say, [NinjaTrappeur] asks if people have had success driving these displays at a more usable rate, and would love to hear from you if so.

Some auxiliary hacks come in the form of terminal emulator adaptation, porting the E-ink screen library from C++ to C, and capturing the keyboard input. A handmade wooden case finishes it off.

If it’s old-school typewriters that float your boat, we’ve got you covered: this solenoid-actuated typewriter printer eventually became a musical instrument, and this daisy wheel machine produces ASCII art from a live camera.

[Via Boing Boing]

Run A Linux Terminal On Cheap E-Ink Displays

If you haven’t kept up with the world of e-ink displays, here’s some good news: they are pretty cheap now. For as little as $15 you can get a small e-ink display that has good enough performance and contrast to actually do something useful. There’s only one problem: figuring out how to drive them in your project.

Tired of seeing nothing but wiring diagrams and sample code when it came to actually putting these e-ink modules to use, [Jouko Strömmer] decided to try his hand at creating a turn-key application for these gorgeous little displays. The result is PaperTTY, a Python program that allows the user to open up a fully functional Linux virtual terminal on an e-ink display.

Of course, there are some caveats. For one, this all assumes you’re using a Waveshare display (specifically their 2.13 inch HAT) connected to a Raspberry Pi over SPI. Not to say that’s the only hardware combination that will work, but it’s the only one that [Jouko] has done any testing on at this point. If you want to try to shake things up in terms of hardware, you might need to get your hands dirty.

The advantage of being able to open a Linux VT on one of these e-ink displays is pretty simple: you can run basically any piece of software you want on it. Rather than having to come up with software that specifically features support for the display, you can just use (or write) standard Linux console programs. [Jouko] mentions a number of popular programs such as vim and irssi, but you could just as easily write a Bash script to dump whatever data you like to the screen.

In the video after the break [Jouko] shows PaperTTY in action for the doubters who think these sorts of displays are no good for interactive use. The display is very crisp and readable, with no signs of flickering. Overall he says the experience is not unlike using a slow SSH connection. It might not be how we’d like to use a computer full time, but we can definitely see the potential.

With the recent progress with Kindle hacking, it seems that interest in e-ink is as high as ever. Despite what the haters might claim, it’s a useful niche tech that still holds plenty of promise.

Continue reading “Run A Linux Terminal On Cheap E-Ink Displays”

Programmable Badge Uses E-Ink And ESP8266

You’ve probably noticed that the hacker world is somewhat enamored with overly complex electronic event badges. Somewhere along the line, we went from using a piece of laminated paper on a lanyard to custom designed gadgets that pack in enough hardware that they could have passed for PDAs not that long ago. But what if there was a way to combine this love for weighing down one’s neck with silicon jewelry and the old school “Hello my name is…” stickers?

[Squaro Engineering] might have the solution with Badgy, their multi-function e-ink name…well, badge. Compatible with the Arduino SDK, it can serve as anything from a weather display to a remote for your smart home. Oh, and we suppose in an absolute emergency it could be used to avoid having to awkwardly introduce yourself to strangers.

Powered by an ESP-12F, Badgy features a 2.9″ 296×128 E-Ink display and a five-way tactical switch for user input. The default firmware includes support for WiFiManager and OTA updates to make uploading your own binaries as easy as possible, and a number of example Sketches are provided to show you the ropes. Powered by a LIR2450 3.6 V lithium-ion rechargeable coin cell, it can run for up to 35 days in deep sleep or around 5 hours of heavy usage.

Schematics, source code, and a Bill of Materials are all available under the MIT license if you want to try your hand at building your own, and assembled badges are available on Tindie. While it might not be as impressive as a retro computer hanging around your neck, it definitely looks like an interesting platform to hack on.

Tearing Down A $1000 E-Ink Display

Back in 2016, Chinese company Dasung blew past their Indiegogo goal to fund the Paperlike: the world’s first general purpose E-Ink display. Rather than being stuck in a reader from your favorite purveyor of DRM like previous displays, the Paperlike could be used with whatever device you wanted; albeit in black and white and at a relatively low refresh rate. It promised to allow reading and writing on your computer or tablet without needing a backlight. The price was steep at $800 USD for a 13″ display, but clearly enough people were interested to make the device a reality.

At least they have a sense of humor about it.

You can count [Kev Zettler] among the Paperlike devotees. He’s such a fan of the technology that he’s on the road to building a DIY E-Ink laptop using the latest generation Paperlike Pro. But before he can do that, he’s got to take the thing apart and see how it ticks. While a lot of the proprietary magic that makes the display work is still a mystery, he does his best to document the internals for those of us who are a bit to shy to take a screwdriver to a display that costs $1,000.

It looks like the Paperlike Pro is designed (either intentionally or otherwise) to look a bit like the Amazon Kindle, and the construction method is unfortunately the same. The front panel is glued on, and needs to be peeled off by getting under it with something sharp and prying it off carefully. For a $100 e-reader we can deal with that, but for as much as the Paperlike Pro costs that kind of disassembly gives us the chills.

He’s identified the bare display module as a 13.3 inch ED133UT2, which led him down an interesting path investigating other displays in the same family. It turns out the one Dasung went with is essentially the low end of the spectrum. The display has glare issues and is permanently bonded to a piece of glass, whereas other models in the same family boast not only flexibility but anti-glare coatings. There’s even one with integrated touch screen. [Kev] mentions that one of those displays would be much better for his E-Ink laptop project, but we’re assuming he’s not going to toss this thing in the bin just because there’s better options out there.

Beyond the display itself there’s a custom Dasung control board that [Kev] says is a bit too complex for him to decipher, made especially difficult thanks to the fact that the chips have had their labels removed. One interesting discovery though was the USB port which is officially supposed to be just for power has all four wires connected to the main board, raising the possibility of some future software hacking.

You might not know this, but hackers absolutely love E-Ink. We’ve covered some very impressive projects utilizing this paper-like tech in the past, from an entry in our 2017 Hackaday Prize to the chemistry involved in homebrewing your own displays.

Evil Hotspot Costume Makes Valuable Connections

This year for Hallowe’en, [Scott] went out dressed as a Comcast xfinity hotspot. Funny, yes, but there’s a deeper meaning here. [Scott] really went as a walking PSA that illustrates the dangers of making assumptions about the relative safety of WiFi networks based solely on their broadcast names.

[Scott] could have gone chaotic evil with this setup, but he didn’t. No one could actually get on the Internet through him. Inside the “hotspot” are a Wi-Fi adapter and a Pi Zero running a captive portal. It broadcasts the default ‘XFINITY’ and ‘xfinitywifi’ SSIDs, plus a bunch of other common network names. Whenever anyone tries to connect, or worse, their phone automatically connects, they’ll hear a sad tuba cadence. This comes courtesy of a multi-sound effects box that’s controlled by the Pi through a relay board.

Meanwhile, the mark’s device is redirected to an internally-hosted “xfinity” login page. Anyone who actually goes on to enter their login credentials is treated to a classic horror film scream sample while the evil hotspot quietly stores their name and password and displays them on an e-ink display for all to see — a walking e-ink wall of sheep. Check out the demo after the break.

[Scott]’s evil hotspot is powered by a huge battery that can run it for 24 hours. Here’s a wind- and solar-powered WAP we covered several years ago.

Continue reading “Evil Hotspot Costume Makes Valuable Connections”

Ben Krasnow hacks E-paper

[Ben Krasnow] Hacks E-Paper For Fastest Refresh Rate

[Ben Krasnow] is known for his clear explanations alongside awesome hardware, being one of only a few hackers who owns an electron microscope. This time he’s explaining how E-paper works while modifying the firmware of a 4.2 inch E-paper module to get a higher refresh rate. As for the awesome hardware, he also analyses the signals going to the E-paper using an ultra-fancy loaner oscilloscope.

E-paper explanation diagram

After starting out with a demo of the firmware in action before and after his modification, he explains how the E-paper works. The display is made up of many isolated chambers, each containing charged particles in a liquid. For example, the positive particles might be black and the negative might be white. By putting an electric field across each chamber, the white particles would be attracted to one end while the black would be attracted to the other, which could be the end you’re looking at. He also explains how it’s possible to get a third color by using different sized particles along with some extra manipulation of the electric field. And he talks about the issue of burn-in and how to avoid it.

Having given us that background, he then walks us through some of the firmware and shows how he modified it to make it faster, namely by researching various datasheets and subsequently modifying some look-up-tables.

Turning back to the hardware, he shows how he scratches out some traces so that he can attach scope probes. This alone seems like a notable achievement, though he points out that the conductive layer holds up well to his scratching. At that point he analyses the signals while running some demos.

The result is the very informative, interesting and entertaining video which you can watch below.

Continue reading “[Ben Krasnow] Hacks E-Paper For Fastest Refresh Rate”