Corporate Badgelife: Oracle’s Code Card

We tend to think of elaborate electronic conference badges as something limited to the hacker scene, but it looks like the badgelife movement is starting to hit the big time. Now even the “big boys” are getting into the act, and pretty soon you won’t be able to go to a stuffy professional conference without seeing a sea of RGB LEDs firing off. We’ll let the good readers of Hackaday determine if this means it’s officially post-cool or not.

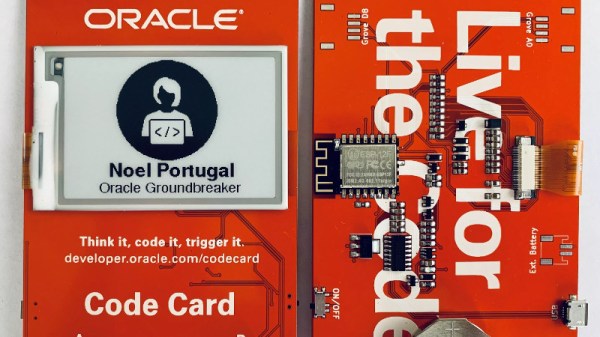
[Noel Portugal] writes in to tell us about how he created the “Code Card” during his tenure with the Oracle Groundbreakers Team. Featuring an ESP8266 and an e-ink screen, the Code Card serves not only as swanky way of identifying yourself, but as a real-world demonstration of physical devices pulling content from Oracle’s Cloud. Gotta keep those corporate overlords happy.

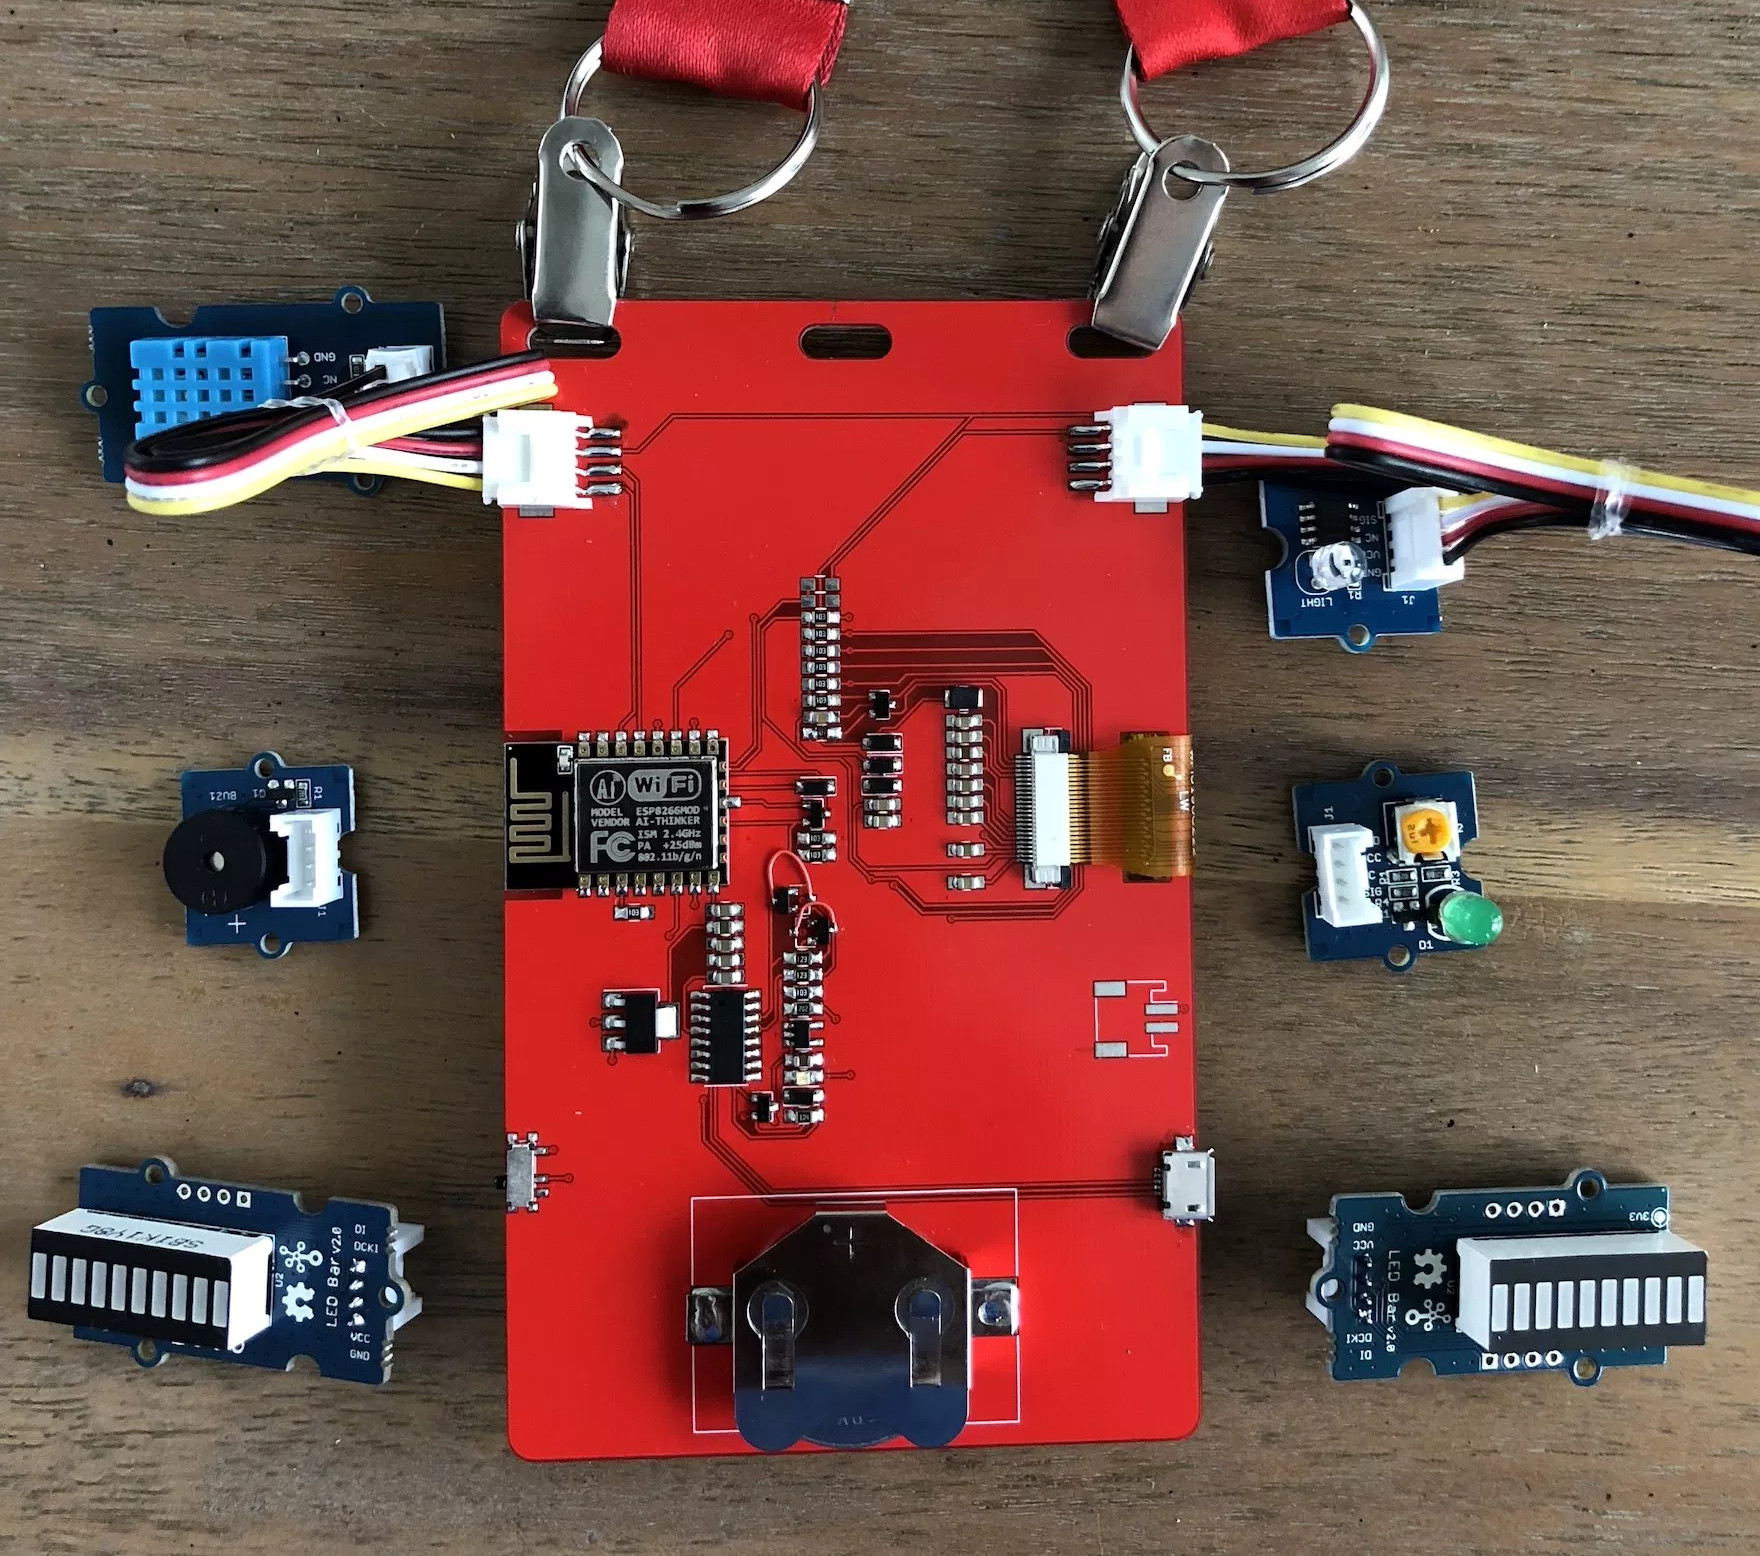
The Code Card is a fairly simple piece of hardware as far as badges go these days, but then the goal was never to be flashy. It does feature dual four-pin Grove System connectors on the backside though, so you can plug in additional sensors and gadgets for the customary badge hacking sessions.

To maximize runtime on the rechargeable coin cell battery, the Code Card only turns on the ESP after the user has pressed one of the buttons on the front. Once the ESP has finished performing whatever task the user requested, its powered back off completely rather than put into standby. Combined with the e-ink screen, power consumption while the device isn’t actively updating the display or pulling down new content is negligible.

[Noel] really went all-out on the software side, going as far as developing a web application which let conference attendees configure their Code Cards from their smartphones. Different functions could be assigned to short and long presses on the badge’s two buttons, and users could even select icons for the various functions from a list of images included in the firmware. A feature where attendees could upload their own images didn’t make the cut, but that surely won’t stop people from hacking around in the published Arduino source code and figuring out how to do it manually.

If you think the Code Card looks a bit familiar, it’s perhaps because it was designed in conjunction with Squarofumi, creators of the Badgy. So even if you aren’t hitting up any of Oracle’s upcoming conferences, you’re not completely out of luck if you want an e-ink badge to play with.

The Modern Analog Soldering Station

There is a certain sense of accomplishment one gets when building their own tools. This is what [Alejandro Velazquez] was going for when he built his own soldering station. Sure you can get a decent station for a pittance on Amazon, or eBay. You can even build your own microprocessor controlled station. [Alejandro] is currently interested in analog electronics, so he went that route to build his own closed-loop station.

The handle is a 50 watt, 24-volt affair with a thermocouple. You can find this handle on many Hakko 907 clone soldering stations, often referred to as the 907A. The station itself is completely analog. A triac switches the current going to the heater. The triac is controlled by a PWM signal. The PWM itself is generated and regulated by an LM324 quad op-amp, which is the heart of the station. The op-amp compares the setpoint with the current temperature read from the soldering handle’s thermocouple, then adjusts the duty cycle of the PWM signal to raise, or lower the temperature.

It’s a classic control system, and the schematic is definitely worth checking out if you want to understand how op-amps can be used to create complex operations.

You can find plenty more information on analog electronics right here on Hackaday — we’ve covered thermocouple amplifiers, as well as instrumentation amps. If you’re more of a digital man, check out this Arduino controlled soldering station!

7 Segment Clockwork Display Made From Cardboard

We’ve seen a variety of oddball 7-segment displays in the past, but this one uses a new material: both for the display and the mechanical mechanism that drives it; cardboard. Yup, the whole thing is made from cardboard, wood and a few rubber bands. [The Q] shows how he put together in this nice video, starting from first principles that show how the segments are made: simple pieces of cardboard painted on one side with fluorescent paint. A piece of wood pushes the element out to blank it, and each element is connected to a cam wheel that pushes the wood in or out.

The really clever bit is that [The Q] mapped digits 0 – 9 onto a matrix for which of the 7 segments is “on” or “off”. He then used this information to create a stack of 7 cams on a central axle. As you rotate the axle, the cams turn, moving the wooding arms. The arms then cause the elements to flip as they count up through the digits. In essence, he engineered a physical decimal to 7 segment decoder, much like the electronic one inside the SN74LS47. The whole assembly is capped by a knob that indicates which digit is currently displayed. If mechanical displays like this are your thing, check out this one made from LEGO parts, or this awesome 3D printed creation.

Continue reading “7 Segment Clockwork Display Made From Cardboard”

Speak Your WiFi

When you create a Thing for the Internet of Things, you’ve made a little computer that does a simple job and which probably has a minimal interface. But minimal interfaces leave little room for configuration, such as entering WiFi details. Perhaps if you made the Thing yourself you’ve hard-coded your WiFi credentials in your code, but that hardly translates to multiple instances. So, how to put end-user WiFi credentials easily on more than one Thing? Perhaps [Rob Dobson] has the answer with his technique of sending them as a sequence of audible tones.

There is a piece of Javascript code in a browser into which you enter your WiFi credentials, which are then expressed through the speaker as a set of FSK tones to be picked up by a microphone on the Thing. They can then be decoded into the credentials, and the Thing can connect. All the code is available, on GitHub, should you fancy it yourself.

Of course, this is nothing new, as any owner of an 8-bit machine that had a cassette interface will tell you. And on the face of it it’s much easier than those awkward impromptu hotspots with a web interface to which you connect and pass on your credentials. But while we quite like the convenience, we can’t help wondering whether expressing the credentials in audible free space might be a bit too insecure for many readers. The technique however remains valid, and we’re sure that other less sensitive applications might be found for it. Meanwhile we hope he hasn’t inadvertently shared his WiFi password in the video below the break.

Continue reading “Speak Your WiFi”

This Weekend: The Greatest Hardware Conference

The Hackaday Superconference is this weekend and it’s the greatest hardware con on the planet. Tickets are completely sold out, but you can still get in on the fun by watching the livestream and joining Supercon chat.

For everyone who will be here in person, the entire Hackaday crew is busy as beavers preparing for your arrival. We’re assembling badges, rigging AV for the talks, stuffing goodie bags, calling caterers, and taping cables to the floor. This is by far the biggest Superconference yet.

Doors open at 9 am Friday at the Supplyframe HQ. This is your first chance to get your hands on the fantastic Supercon Badge that’s a freakin’ computer. The day is filled with badge hacking, workshops, badge talks, and a launch party. [Rich Hogben] and [Andrew Bakhit] will be doing live IDM sets on Friday night, as we celebrate into the wee hours of the morning.

Saturday, doors open at 9 am over at the Supplyframe Design Lab as we turn on the livestream and get the main event under way with over 50 speakers and workshops. Badge hacking continues throughout the weekend, and this year we’ve added the SMD Soldering Challenge to the fun. There will be meetups during Supercon; the Tindie meetup and the amateur radio meetup are both Saturday at 1 pm.

Subscribe to Hackaday on YouTube and follow us on Facebook to keep up with everything going on.

The Swiss Army Knife Of Audio Synthesis

Thirty years ago, we would be lucky if a computer could play audio. Take a computer from twenty years ago, and you’ll be lucky if it can play an MP3 in real-time. Now, computers can handle hundreds of tracks of CD-quality audio, and microcontrollers are several times more powerful than a desktop computer of the mid-90s. This means, of course, that microcontrollers can do audio very, very well. For his entry to the Hackaday Prize, [Fabien] is capitalizing on this power to create a Swiss Army knife of audio synthesis. It’s called the Noise Nugget, and it’s just what you need when you want to put audio in anything.

The microcontroller in question is an ARM Cortex-M4 running at 180MHz, with a quality DAC. There’s connectivity in the form of USB, two audio outs, one audio in, I2C, UART, and GPIOs. With this, you’ve got a digital synthesizer with a MIDI interface, audio effects for guitar pedal tomfoolery, an audio effect trigger board for playing pre-recorded sounds, a digital recorder, and a USB sound interface.

So, with all that processing power, what can the Noise Nugget actually do? Well, first of all, it’s a sampler. [Fabien] has a video demo of the Noise Nugget set up in sampler mode, where it can play a lute-ish sample and a cat sound. All of this is controlled over MIDI and played through a cheap speaker. The results — except for the cat sample — sound great. You can check that video out below.

Continue reading “The Swiss Army Knife Of Audio Synthesis”

Ask Hackaday: What Are Your Less Extreme Brain Hacks?

Kahn — perhaps Star Trek’s best-hated villain — said: “Improve a mechanical device and you may double productivity, but improve man and you gain a thousandfold.” In fact, a lot of hacking effort goes into doing just that. Your phone has become an extension of your memory, for example. We use glasses, cameras, and hearing aids to shore up failing senses or even give us better senses than normal. But hacking your body — or someone else’s — has always been controversial. While putting an RFID chip in your finger is one thing, would you consider having a part of your brain removed? That sounds crazy, but apparently, there is a growing interest in having your amygdala removed.

To be clear: we think this is a terrible idea. The science is shaky, at best, and we certainly wouldn’t want to be among the first to try something so radical. But why is anyone even talking about it?

The amygdala is part of your brain that causes at least some of your fear and anxiety. Get rid of your amygdala, get rid of anxiety? What’s even stranger is this the procedure — an amygdalectomy — has been going on since the 1960s! Injections of oil and wax destroy the tissue and this treatment is used for some forms of epilepsy and to manage certain aggressive behavior problems in mentally ill patients. In modern times, the procedure is not very common although it appears that it does still occur in some places. But the technology to do it does exist. There have also been documented cases where people lose their amygdala from natural causes that gives us some clues of what life would be like without one.

However, it is hard to say if these people lost fear. Most of the surgical patients were already suffering from a variety of problems. There is some evidence that the naturally occurring amygdalaless patients experienced less fear in some situations, but may experience more fear in others. They also may have other problems such as difficulty understanding social cues or making eye contact. We’re not 100% sure what the amygdala does, even disregarding potential side effects.

Continue reading “Ask Hackaday: What Are Your Less Extreme Brain Hacks?”