Solar Pi Zero E-Paper Photo Frame Waits For The Right Moment

One of the biggest advantages of electronic paper is that it doesn’t require a constant power source to display a static image. Depending on the application, this can lead to a massive energy savings compared to more traditional display technologies. Of course, the electronics that actually drive the display are another story entirely. You need to reduce the energy requirements of the whole system if you really want to stretch your battery life.

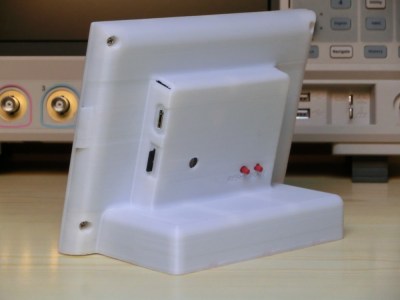
So when [Giacomo Miceli] wanted to put together this solar powered e-paper photo frame, he had to come up with some creative ways to curb the energy consumption of the Raspberry Pi Zero that runs the show. While the 10.3 inch 1872 × 1404 panel would only require the occasional burst of power to flick over to a new image, the Pi would be a constant drain on the internal battery pack. Considering he wanted the frame to recharge from ambient light with an array of small solar panels, that simply wouldn’t do.

The solution came in the form of a PiJuice HAT and some scripts that decide how often the Pi is to be powered on based on the current battery level. If there’s enough power, it might be every hour or so. But the lower the charge, the longer the delay. When the energy situation is particularly dire, the Pi might only be turned on every couple of days. With the Pi off and the e-paper not drawing any power, all of the energy produced by the solar panels can be devoted to recharging the frame’s 1,000 mAh battery.

When the Pi does get booted up, it quickly connects to a server to download a new image and update the display. After that, it ascertains the current battery level and determines how long the PiJuice should wait before turning it back on. After these tasks are complete, it will turn itself off until the next scheduled event. All told, [Giacomo] says the Pi is only up and running for about a minute each time the image is refreshed on the e-paper. He says the system has been running for six weeks now, with the battery level occasionally dipping down to 40% or so before it climbs back up.

Admittedly the energy consumption of the frame could be cut drastically by replacing the Raspberry Pi with a simple microcontroller, but we appreciate the creativity. Besides, the power and flexibility afforded by the Pi means this frame could be taught quite a few new tricks with some updated software.

ARM And X86 Team Up In No Compromise Cyberdeck

Over the last couple of years the cyberdeck community has absolutely exploded. Among those who design and build these truly personal computers there are no hard rules, save perhaps making sure the final result looks as unconventional as possible. But one thing that’s remained fairly consistent is the fact that these machines are almost exclusively powered by the Raspberry Pi. Unfortunately, that means they often leave something to be desired in terms of raw performance.

But [MSG] had a different idea. His cyberdeck still has the customary Raspberry Pi inside, but it also has an i7 Intel NUC that can be fired up at the touch of a button. He says it’s the best of both worlds: an energy efficient ARM Linux platform for mobile experimentation, and a powerful x86 Windows box for playing games working from home. It’s the hacker equivalent of business in the front, party in the back.

With a KVM connected to the custom Planck 40% mechanical keyboard and seven inch LCD, [MSG] can switch between both systems on the fly. Assuming he’s got the juice anyway; while the Raspberry Pi 4 and LCD is able to run on a pair of 18650 batteries, the cyberdeck needs to be plugged in if he wants to use the power-hungry NUC. If he ditched the Pi he could potentially load up the case with enough batteries to get the Intel box spun up, but that would be getting a little too close to a conventional laptop.

The whole plurality theme doesn’t stop at the computing devices, either. In addition to the primary LCD, there’s also a 2.13 inch e-paper display and a retro-style LED matrix courtesy of a Pimoroni Micro Dot pHAT. With a little Python magic behind the scenes, [MSG] is able to display things like the system temperature, time, and battery percentage even when the LCD is powered down.

In a post on the aptly-named Cyberdeck Cafe, [MSG] talks about how seeing the VirtuScope built by [bootdsc] inspired him to start working towards his own personal deck, and where he hopes to take the idea from here. The unique USB expansion bay behind the screen holds particular promise, and it sounds like a few add-on modules are already in the works. But of course, it wouldn’t be a true cyberdeck if it wasn’t constantly being improved and redesigned. Come to think of it, that makes at least two rules to live by in this community.

Templateize Your Timetable With EPaper Templates

To date, e-paper technology has been great for two things, displaying static black and white text and luring hackers with the promise of a display that is easy on the eyes and runs forever. But poor availability of bare panels has made the second (we would say more important) goal slow to materialize. One of the first projects that comes to mind is using such a display to show ambient information like a daily summary weather, train schedules, and calendar appointments. Usually this means rolling your own software stack, but [Christopher Mullins] has put together a shockingly complete toolset for designing and updating such parameterized displays called epaper_templates.

To get it out of the way first, there is no hardware component to epaper_templates. It presupposes you have an ESP32 and a display chosen from a certain list of supported models. A quick search on our favorite import site turned up a wide variety of options for bare panels and prebuilt devices (ESP32 and display, plus other goodies) starting at around $40 USD, so this should be a low threshold to cross.

Once you have the device, epaper_templates provides the magic. [Christopher]’s key insight is that an ambient display is typically composed of groups of semi-static data displayed in a layout that never changes. The only variation is updates to the data which is fully parameterized: temperature is always integer Fahrenheit, train schedules are lists of minutes and hours, etc. Layouts like this aren’t difficult to make, but require the developer to reimplement lots of boilerplate. To make them easy to generate, epaper_templates provides a fully featured web UI to let the user freely customize a layout, then exports it as JSON which the device consumes.

The sample layout configured in the video below

The web UI is shockingly capable, especially for by the standards of the embedded web. (Remember it’s hosted on the ESP32 itself!) The user can place text and configure fonts and styles. Once placed, the text can be set to static strings or tied to variables, and if the string is a timestamp it can be formatted with a standard strftime format string.

To round out the feature set, the user can place images and lines to divide the display. Once the display is described, everything becomes simple to programmatically update. The ESP can be configured to subscribe to certain MQTT topics from which it will receive updates, or if that is too much infrastructure there is a handy REST API which accepts JSON objects containing variables or bitmaps to update on device.

We’re totally blown away by the level of functionality in epaper_templates! Check out the repo for more detail about its capabilities. For a full demo which walks through configuration of a UI with train arrival times, weather, both instant temperature and forecast with icons, and date/time check out the video after the break. Source for the example is here, but be sure to check out examples/ in the repo for more examples.

Continue reading “Templateize Your Timetable With EPaper Templates”

Repurposing Large Electronic Price Tags

If you’ve recently braved the pandemic long enough to make a trip to a big box retailer, you may have spotted a few massive e-paper price tags affixed to large items like appliances. These seven inch displays were likely designed to be used in e-readers such as the Kindle, but through some surplus deal, are now shouting out clearance savings on last year’s washing machine. After checking out a particularly good price for a Samsung refrigerator at the local Home Depot, [YodaLogic] got to wondering if they could be bent to the hacker’s will.

Now to be clear, [YodaLogic] didn’t steal any of these tags. It turns out you can pick them up on eBay for less than $15 a pop, or at least that’s what they cost before this article went out. It’s an exceptionally good price when you realize that these displays are actually capable of color…albeit only two. Apparently when the retailer orders the so-called “Chroma 74” tags, they can pick between either yellow or red as the secondary color. While not quite as exciting as a full-color display, it certainly sets them apart from most of the e-paper panels we’ve seen used in DIY projects thus far.

The panel gets mighty close to the HaD color scheme

We’d like to tell you that [YodaLogic] cracked one of these things open and was able to wire it right up to a Pi or microcontroller, but the truth is a bit more complicated. Connecting the Chroma 74’s panel to the control board intended for a similar Waveshare 7.5 inch display didn’t seem to do anything. After some poking and prodding, it became clear that the WFD0750BF19 e-paper panel used in the Chroma needed a custom software profile to bring it to life. Unfortunately, there doesn’t seem to be a datasheet available for this particular panel.

By combining what could be gleaned from the datasheets of similar displays with a bit of experimentation, [YodaLogic] came up with a configuration profile that mostly works. It doesn’t seem like the yellow is as vibrant as it should be, and a refresh can take as long as 20 seconds, but it’s certainly a start. Perhaps the code can be tightened up with some input from the community, or even better, maybe somebody out there knows where we can get our hands on the datasheet for this panel.

While we’ve started to see more projects use e-paper displays, their high price still keeps many hackers away. Being able to repurpose cheap hardware like this could really spur some interesting development, so we’re excited to see [YodaLogic] put the finishing touches on this project and opened it up to a wider audience.

E-Paper Weather Display Is A Great Base To Build From

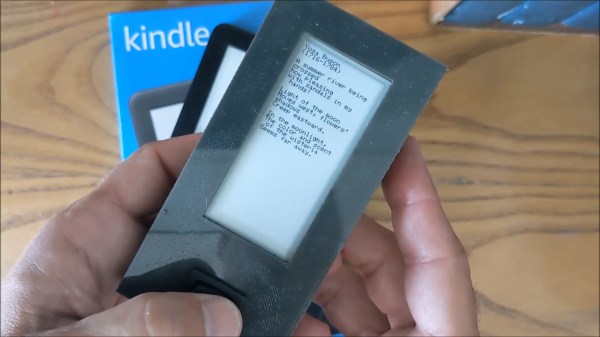
As e-paper modules have become more affordable, we’ve started to see them pop up more and more in hacker projects. It used to be that you had to force a second-hand Kindle to do your bidding, but now you can buy just the screen itself complete with a header to plug right into your Raspberry Pi. It will still cost you as much as a used Kindle…but at least it comes with some documentation and there are Python libraries to talk to it.

But where to start? If you need some inspiration, and perhaps a little source code, this very slick weather display put together by [James Howard] is a great as baseline. Not that it really needs any additional refinement, as we think it already looks gorgeous. But rather than starting from scratch for your own project, it would be much easier to graft some additional functionality onto his code.

A lot of that has to do with how concise and well commented his code is. We’ve seen enough of these projects to know the kind of spaghetti that’s often running on the backend, but there’s none of that here. [James] assembles the display using the powerful Pillow graphics library, which lets you draw primitives and drop in text and icons with just a couple lines of code.

Once all the data is plugged in, the entire screen is saved as an image file which is then opened up on the e-paper display. Even if you aren’t a Python expert, you should be able to understand what’s happening and how to bend it to your will.

We’ve always had high hopes for electronic paper, and it seems the technology might finally be hitting critical mass. While it’s still a bit expensive, we’ve started seeing it pop up in unexpected places to great effect. Hopefully projects like this one will inspire others to take the B&W plunge.

Color E-Ink Display Photo Frame Pranks [Mom]

As a general rule, it’s not nice to prank your mother. Moms have a way of exacting subtle revenge, generally in the form of guilt. That’s not to say it might not be worth the effort, especially when the prank is actually wrapped in a nice gesture, like this ever-changing e-paper family photo frame.

The idea the [CNLohr] had was made possible by a new generation of multicolor e-paper displays by Waveshare. The display [Charles] chose was a generous 5.65″ unit with a total of seven colors. A little hacking revealed an eighth color was possible, adding a little more depth to the images. The pictures need a little pre-processing first, of course — dithering to accommodate the limited palette — but look surprisingly good on the display. They have a sort of stylized look, as if they were printed on a textured paper with muted inks.

The prank idea was simple — present [Mrs. Lohr] with a cherished family photo to display, only to find out that it had changed to another photo overnight. The gaslighting attempt required a bit more hacking, including some neat tricks to keep the power consumption very low. It was also a bit of a squeeze to get it into a frame that was slim enough not to arouse suspicion. The video below details some of the challenges involved in this build.

In the end, [Mom] wasn’t tricked, but she still seemed pleased with the final product. These displays seem like they could be a lot of fun — perhaps a version of the very-slow-motion player but for color movies would be doable.

Continue reading “Color E-Ink Display Photo Frame Pranks [Mom]”

Internet Connected E-Paper Message Board

Are you still writing notes on paper and sticking them to the fridge like it’s the ’80s? Well, if you are, and you read this site, you’d probably like to upgrade to something a bit more 21st century. And, thanks to robot maker [James Bruton], you can leave your old, last century, message taking behind as he has a tutorial up showing you how to build an internet connected e-paper message display board. And, if you have a Raspberry Pi, an e-paper display and adapters just lying around doing nothing, then this project will cost you less than the buck that paper and a magnet will cost you.

Sarcasm aside, this is a pretty nice project. As mentioned, the base of this is a Raspberry Pi – [James] uses a Pi 4, but you could get away with an older, lower powered model as well. This powers the cheap(-ish) e-paper display he found online, which comes with the necessary adapters for the Pi, as well as a python library to write to the display. [James] uses a Google Sheet as the cloud storage for the message board, and there is some python code to access the cells in the Sheet and print them on the display if anything has changed. A cron job runs the script every 5 minutes to catch changes in the messages.

As with most of the projects that [James] does, he gives a good overview in the video and goes over the process of finding the hardware and writing and updating the script. He’s put the script and details as well as the CAD file for the frame he created for the project up on GitHub. [James] has been featured several times on the site before, check out some of his projects.

Continue reading “Internet Connected E-Paper Message Board”