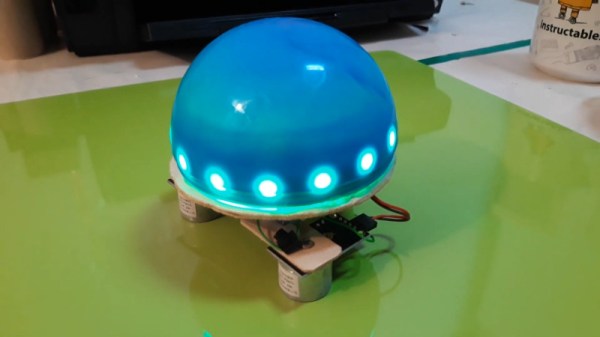
One of the joys of browsing secondhand shops is the possibility of finding old, perhaps restorable or hackable, electronics at low prices. Admittedly, they usually seem to be old flat-screen TVs, cheap speakers, and Blu-ray players, but sometimes you find something like the Dash, an educational toy robot. When [Jonathan] came across one of these, he decided to use it as a turtle robot. However, he found the available Python libraries insufficient, and improving on them required some reverse-engineering.
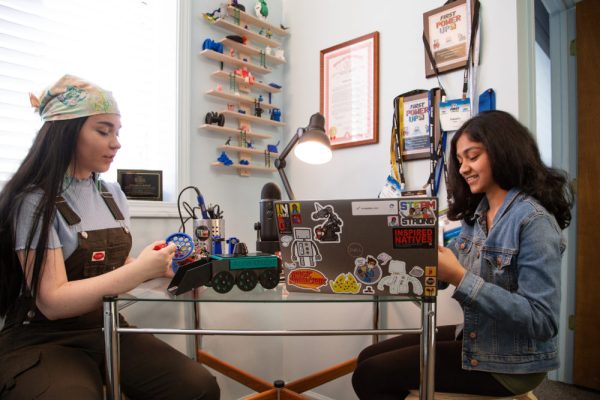
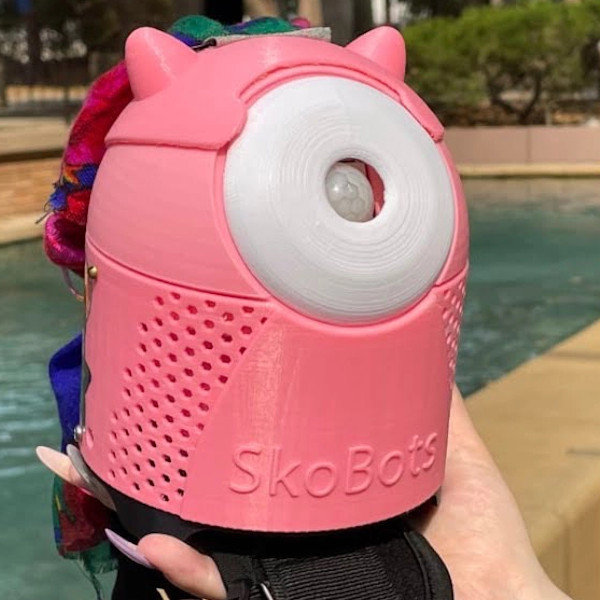
[Danielle Boyer] is Ojibwe: Sault Ste Marie Tribe and passionate about preserving vanishing indigenous languages. She’s invented a shoulder-worn talking companion, called a SkoBot, to teach STEAM to children through building robots programmed with indigenous language lessons and founded the STEAM Connection to give them away.
Through her Every Kid Gets a Robot program, more than 8,000 ESP32-based kits have been distributed to students. With a total cost of less than $20 USD, the 3D printed bots help democratize access to robotics. As many rural areas lack access to high-speed internet, they are designed to be controlled locally by the student’s phone.
During an interview on WBUR in Boston, [Danielle] recalled that one of her students once said that she was the first Native person they’d seen in robotics, and she inspired them to get into it. “That really made me emotional and inspired to see the power that us being ourselves has and being authentic to ourselves, to our community, I just think that’s such a beautiful thing.”
Learn more about the impactful and fun work [Danielle] is doing at the STEAM Connection that scored her an invite to the White House, see a preview in the GMA video after the break, and watch for her plant-based BioBotz coming later this year.
This isn’t the first time we’ve seen robots invade the classroom: from student-built “Battle Bots” to the modular 3D printed SimpleSumo project, these educational initiatives can help teach the basics of electronics and software development in a more engaging way than simply reading theory from a textbook.
Teaching kids about robotics gives them valuable skills for their futures, and is generally pretty darn fun for all involved, too. However, teaching children often involves taking a bit of a different tack to educating college students, and more of a hand-holding approach is often needed. This robot project is an attempt to do just that, using some classic time-honored techniques and a unique method of propulsion.
The Magnetic Motion Robot, or MMR, is very much a DIY project. Built out of hand-cut plywood and assembled by lacing together individual modules, it’s a low-cost entry into the world of educational robotics. Rather than wheels or motors, it instead uses electromagnets mounted on servo arms to get around. Switching the magnets on and off, and moving the servos in time, allows the robot to pull itself along a ferromagnetic surface.
The robot is outfitted with buzzers and LEDs, and using these features creates further programming challenges for students. Naturally, there’s also a line-following program, which is a great way to begin educating kids about autonomous robot operations. It’s all run from an Arduino Nano, programmed with Makeblock’s special building-block programming software.
While its DIY nature makes assembly a little more involved than the average off-the-shelf kit, it does present its own learning opportunities such as soldering and the integration of hardware. Educational robots will continue to be popular and fun long into the future; we’re a particular fan of sumobots ourselves. Video after the break.
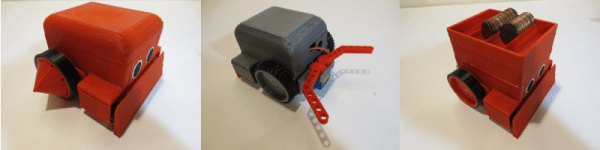
[Mike] was inspired by a video of some kids building mini-sumo bots who were doing anything and everything to personalize them. He vowed to make his own affordable, easy-to-build bots with education firmly in mind. His other major requirement? They had to be as easily customizable as that one potato-based toy that eventually came with a bucket of parts. As of this writing, there are 34 interchangeable accessories.
[Mike]’s first idea was to build the bots out of custom 3D-printed building blocks. He soon found it was too much work to print consistent blocks and switched to a modular cube-like design instead. SimpleSumo bots can do much more than just fight each other. [Mike] has written programs to make them flee from objects, follow lines, find objects and push them out of the ring, and beep with increasing frequency when an object is detected.
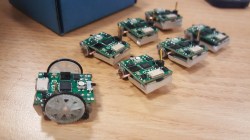
[Joshua Elsdon] and [Thomas Branch] needed a educational hardware platform that would fit into the constrained spaces and budgets of college classes. Because nothing out there that was cheap, simple and capable enough to fit their program, the two teachers for robotics at the Imperial College Robotics Society set out to build their own – and entered the Hackaday Prize with a legion of open source Micro Robots.
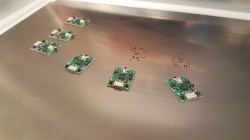
These small robots have a base area of 2 cm2 and a price tag of about £10 (about $14) each, once they are produced in quantities. They feature two onboard stepper motors, an RGB-LED, battery, a line-following sensor, collision-sensors and a bidirectional infrared transmitter for communicating with a master system, the ‘god bot’. The master system is based on a Raspberry Pi with little additional hardware. It multiplexes the IR-communication with all the little robots and simultaneously tracks their position and orientation through a camera, identifying them via their colored onboard LED. The master system also provides a programming interface for the robots, so that no firmware flashing procedure is required for students to get their code running. This is a well-designed, low-cost multi-robot system, and with onboard sensors, stepper motor odometry, and absolute positioning feedback, these little robots can be taught quite a few tricks.
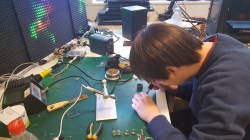
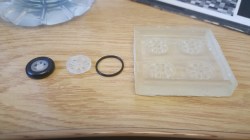
Building tiny robots comes with a lot of regular-sized challenges, and we’re delighted to follow [Joshua Elsdon] and [Thomas Branch] on their journey from assembling the tiny PCBs over experimenting with 3D printing and casting techniques to produce the tiny wheels to the ROS programming. The diligent duo is present in the Hackaday prize twice: With their own Micro Robots project and with their contribution to the previously covered ODrive – an open source BLDC servo controller. We are already curious about their next feat! The below video shows a successful test of the camera feedback integration into the ROS.
Bringing women into technical education at times seems to be an insurmountable challenge. As a counter, a small drawing robot created by [MakersBox] might help. The robot was used in a ChickTech workshop for teen girls.
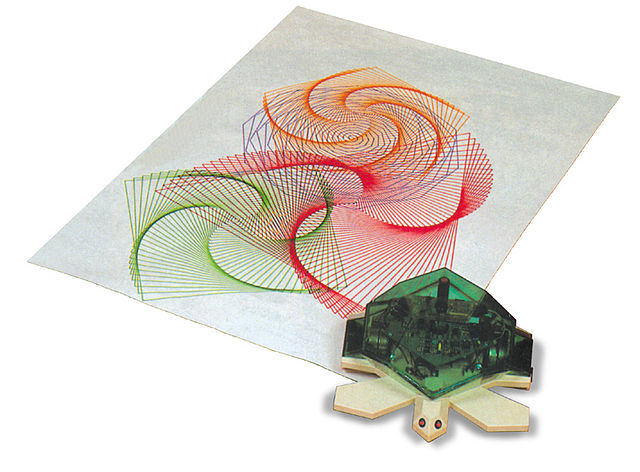
“Turtle draw” by Valiant Technology Ltd..
The goals for the robot were to have an easy to build, easy to program robot that did something interesting, and was also low-cost so the workshop participants could take it home and continue to learn. These requirements led [MakersBox] to the Adafruit Pro Trinket 3V, stepper motors for accuracy, and a 3d printed chassis to allow for customization.
Another version of the Arduino should work without any problems and even possibly a Raspberry Pi, suggests [MakersBox]. With the latter’s more diverse programming environment opening up a lot of possibilities
Drawing robots like this for education are not new. [Seymour Papert] created one of the first turtle robots, seen at the left, in the 1980s. He even created the Logo programming language and adapted it for use with the turtle. An interesting similarity between [MakersBox’s] and the original turtle is the drawing pen is in the center of both.
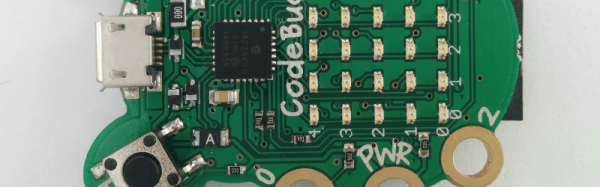
What has six legs, 25 LEDs, a Microchip CPU, can be sewn into clothing, and even plugged into a Raspberry Pi? The answer, it turns out, is the CodeBug–a low cost computer board aimed at the educational market. These board were crowdfunded and are now available for general purchase. [Mike Redrobe] took one of the boards, connected a few servos and used the CodeBug’s Scratch-like language to create a small robot.
You can see the robot in the video below. Programs download via USB (the board looks like a USB drive). You can also send commands over USB to operate in tether mode, or you can directly plug the board into a Raspberry Pi.