Give Your Animal Crossing Villagers The Gift Of Linux

If you’ve played any of the versions of Nintendo’s Animal Crossing over the years, you’ll know that eventually you get to the point where you’ve maxed out your virtual house and filled it with all the furniture you could possibly want — which is arguably as close to “winning” the game as you can get.

But now thanks to the work of [decrazyo] there’s a piece of furniture that you can add to your Animal Crossing house that will never get old: an x86 emulator that boots Linux. As explained in the video below, this trick leverages the fact that Nintendo had already built a highly accurate Nintendo Entertainment System (NES) emulator into Animal Crossing on the GameCube, which could be used to run a handful of classic games from within the player’s virtual living room. But it turns out that you can get that emulator to load a user-provided ROM from the GameCube’s memory card, which opens the doors to all sorts of mischief.

Continue reading “Give Your Animal Crossing Villagers The Gift Of Linux”

Game Bub Plays ROMs And Cartridges

With today’s technology, emulating video game consoles from the 90s or before is trivial. A Raspberry Pi and a controller of some sort is perhaps the easiest and simplest way to go to get this job done, but to really impress the masses some extra effort is required. This handheld from [Eli] called the Game Bub not only nails the appearance and feel of the first three generations of Nintendo handhelds but, thanks to its FPGA, can play not only ROMs but the original game cartridges as well.

As [Eli] notes, the FPGA is not strictly necessary for emulation, but does seem to be better at interfacing with physical hardware like controllers and game cartridges. For this task an Xilinx XC7A100T with integrated memory was chosen, with a custom PCB supporting the built-in controller, speaker, a rechargeable lithium battery, and a 480×320 display (that had to be rotated out of portrait mode). An SD Card reader is included for any ROM files, and there’s also a ESP32-S3 included to give the handheld WiFi and Bluetooth capabilities, with future plans to support the communications protocol used by the Game Boy Advance Wireless Adapter.

There are a few other features with the Game Bub as well, including the ability to use an authentic link cable to communicate with the original Game Boy and Game Boy Color, and a Switch-like dock that allows the Game Bub to be connected to an external monitor. It’s also open source, which makes it an even more impressive build. Presumably it doesn’t include the native ability to dump cartridges to ROM files but you don’t need much more than a link cable to do that if you need to build your ROM library.

Continue reading “Game Bub Plays ROMs And Cartridges”

Homebrew Retro Console Runs On PIC32

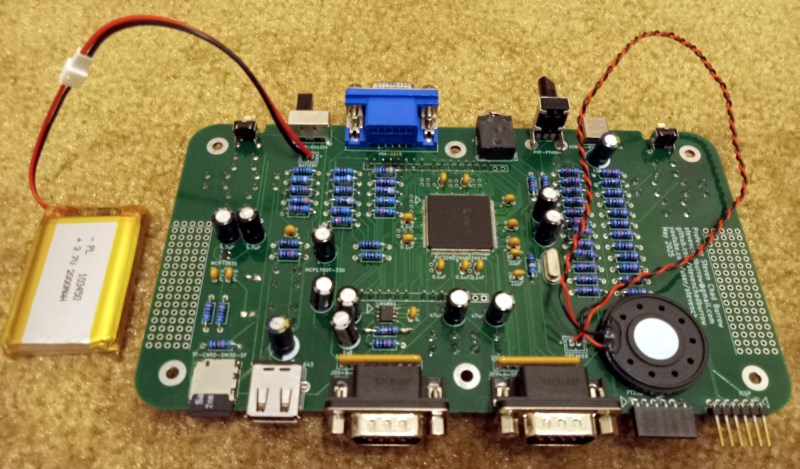
[Chad Burrow] decided to take on a noble task—building a “retro” style computer and video game console. Only, this one is built using somewhat modern hardware—relying on the grunt of the PIC32MZ2048EFH144 to get the job done. Meet the Acolyte Hand PIC’d 32.

It’s name might be a mouthful, but that chip can pull off some great feats! With a clock speed of 200 MHz, it’s not  short on processing power, though RAM and flash storage are somewhat limited at just 512 KB and 2MB respectively. [Chad] was able to leverage those constraints to get a VGA output working at a resolutions up to 800 x 600, with up to 65,000 colors—though 256 colors is more practical due to memory concerns. The Acolyte Hand also rocks two 8-bit audio channels. It has a pair of Genesis-compatible controller ports as well as PS/2 and USB for keyboards and mice, along with more modern Xbox 360 controllers.

[Chad] cooked up some software to put it through its paces, too. It’s got a Tetris clone on board, and can also run Game Boy games at full speed via the Peanut-GB emulator. That provides for a pretty rich game library, though [Chad] notes he plans to develop more native video games for his system to demo at his local college. Design files are on Github for the curious.

This project is a great example of just how powerful modern microcontrollers have become. Once upon a time, just driving a simple black-and-white graphical LCD might have taken some real effort, but today, there are pixels and clock cycles to spare in projects like these. Truly a wonderous world we live in!

ESP32 Powers Single-PCB ZX Spectrum Emulator

When word first got out that the Chinese board houses were experimenting with full color silkscreens, many in our community thought it would be a boon for PCB art. Others believed it would be akin to cheating by removing the inherent limitations of the medium. That’s not a debate that will be solved today, but here we have an example of a project that’s not only making practical application of the technology, but one that arguably couldn’t exist in its current form without it: a single-PCB ZX Spectrum emulator developed by [atomic14].

There basics here are, well, they’re pretty basic. You’ve got an ESP32-S3, a TFT display, a micro SD slot, and the handful of passives necessary to tie them all together. What makes this project stand out is the keyboard, which has been integrated directly into the PCB thanks to the fourteen pins on the ESP32-S3 that can be used as touch sensor input channels. There are issues with detecting simultaneous keypresses, but overall it seems to work pretty well.

Continue reading “ESP32 Powers Single-PCB ZX Spectrum Emulator”

Making Intel Mad, Retrocomputing Edition

Intel has had a deathgrip on the PC world since the standardization around the software and hardware available on IBM boxes in the 90s. And if you think you’re free of them because you have an AMD chip, that’s just Intel’s instruction set with a different badge on the silicon. At least AMD licenses it, though — in the 80s there was another game in town that didn’t exactly ask for permission before implementing, and improving upon, the Intel chips available at the time.

The NEC V20 CPU was a chip that was a drop-in replacement for the Intel 8088 and made some performance improvements to it as well. Even though the 186 and 286 were available at the time of its release, this was an era before planned obsolescence as a business model was king so there were plenty of 8088 systems still working and relevant that could take advantage of this upgrade. In fact, the V20 was able to implement some of the improved instructions from these more modern chips. And this wasn’t an expensive upgrade either, with kits starting around $16 at the time which is about $50 today, adjusting for inflation.

This deep dive into the V20 isn’t limited to a history lesson and technological discussion, though. There’s also a project based on Arduino which makes use of the 8088 with some upgrades to support the NEC V20 and a test suite for a V20 emulator as well.

If you had an original IBM with one of these chips, though, things weren’t all smooth sailing for this straightforward upgrade at the time. A years-long legal battle ensued over the contents of the V20 microcode and whether or not it constituted copyright infringement. Intel was able to drag the process out long enough that by the time the lawsuit settled, the chips were relatively obsolete, leaving the NEC V20 to sit firmly in retrocomputing (and legal) history.

Using Kick Assembler And VS Code To Write C64 Assembler

YouTuber [My Developer Thoughts], a self-confessed middle-aged Software Developer, clearly has a real soft spot for the 6502-based 8-bit era machines such as the Commodore 64 and the VIC-20, for which he has created several video tutorials while travelling through retro-computing. This latest instalment concerns bringing up the toolchain for using the Kick Assembler with VS Code to target the C64, initially via the VICE emulator.

The video offers a comprehensive tutorial on setting up the toolchain on Windows from scratch with minimal knowledge. While some may consider this level of guidance unnecessary, it is extremely helpful for those who wish to get started with a few examples quickly and don’t have the time to go through multiple manuals and Wikis. In that regard, the video does an excellent job.

VS Code is a great tool with a large user base, so it’s not surprising that there’s a plugin for using the Kick Assembler directly from the IDE. You can also easily launch the application onto the emulator with just a push of a button, allowing you to focus on learning and working on your application. Once it runs under emulation, there’s a learning curve for running it on native hardware, but there are plenty of tutorials available for that. While you could code directly on the C64 itself, it’s much more pleasant to use modern tools, revision control, and all the conveniences and not have to endure the challenges.

Once you’ve mastered assembly, it may be time to move on to C or even C++. The Oscar64 compiler is a good choice for that. Next, you may want to show off your new skills on the retro demo scene. Here’s a neat C64 demo with a twist. There is no C64.

Continue reading “Using Kick Assembler And VS Code To Write C64 Assembler”

Emulate A KIM-1 With A Commodore 64

When you think about virtualization, you usually think about making some CPU pretend to be another CPU. However, there are sometimes advantages to making a computer pretend to be the same computer.

That’s the case with [oldvcr]’s KIMplement, which emulates a KIM-1 with a 6502 using a Commodore 64, which also uses a 6502.The reason this makes sense is that you have total control over an emulated CPU. If a program, for example, writes to a critical memory location or tries to take over the screen or keyboard, you can easily make the emulator do something more appropriate. Things like breakpoints and single stepping also become trivial.

The virtual machine at the heart of it is 6o6 (6502 on 6502), and it seems to perform well. By virtualizing, you can easily protect the system from programs that try to, for example, take over an interrupt vector. This is similar to how x86 protected mode can run old real-mode code in a virtual environment and intervene for certain instructions. The emulation is good enough that the emulator can run the emulator, which then runs the emulator to actually run the real target. That’s wasteful, of course, but it does speak to the completeness of the pretend CPU.

If you want a KIM-1 (and an 1802 Elf) but only have an Arduino, you can emulate a different way. At least an emulated KIM-1 doesn’t develop bad memory chips.