Hone Your Skills By Building Control Modules

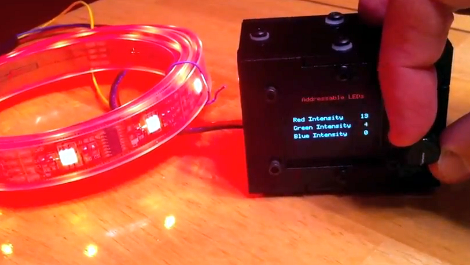
If you ask us, there’s no substitute for learning by doing. But often the hardest part of acquiring new skills is coming up with the idea for a project that utilizes them. [Mike Rankin] wanted to develop a project using laser cut acrylic, and settled on building a control box for an RGB LED strip. He got some practice modeling objects in SolidWorks and seeing the process through to the final build. But it also let him explore an area of microcontroller programming in which he had little experience.

The LED strip he’s using depends on the HL1606. This is an SPI addressable chip that we see popping up in a lot of projects these days. It’s pretty simple to send red, green, and blue values through the data bus, and it allowed [Mike] to try his hand at programming menus and sub-menus. The controller takes input from a clickable rotary encoder. The settings are displayed on an OLED screen, with all the hardware nestled comfortably in his custom-cut enclosure.

Don’t miss the demo video embedded after the break.

Continue reading “Hone Your Skills By Building Control Modules”

Making The Case For Cool Project Enclosures

luna_mod_case

Quite often, we see project boxes that seem to be constructed more as an afterthought than anything else. That’s not to say there is anything wrong with stuffing your latest creation into a nondescript black box, or even cardboard if it happens to fit your needs. Sometimes however, an enclosure embodies the spirit of a project, making it all that much cooler.

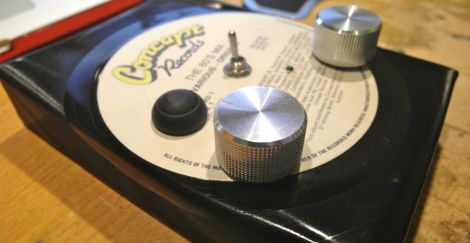
[Adam] recently picked up a copy of Make magazine and decided to build their “Luna Mod”, a sound effects generator and looper based on a PICAXE-08M. Aside from the micro controller the Luna Mod includes a couple of pots, a switch, and a few LEDs – nothing incredibly striking. Once he had everything assembled on a strip of protoboard, he started working on his enclosure.

The enclosure is made from an old record, which after some trial and error, [Adam] got just right. The record was heated and cut, then bent into shape. While it’s not necessarily a hack, we think it looks pretty slick. It really fits the theme of the Luna Mod and is far more attractive than a plain plastic box.

Stick around to see his sound generator in action.

Continue reading “Making The Case For Cool Project Enclosures”

Stirring Plate From USB Enclosure

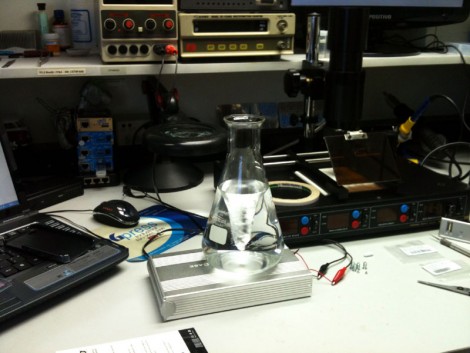
[Loreno Minati] built his own stir plate out of a hard drive enclosure. It’s the exact same hack as the one we saw a few weeks ago. A magnet was glued to the center of a computer fan, which causes the magnetic capsule inside the beaker to spin. This creates a vortex, evenly mixing the liquid.

Using a hard drive enclosure is a brilliant idea. It’s designed to sit in plain sight so you get a very nice finished look. It’s also exactly the right size for the fan itself. A potentiometer mounted in the cap of the enclosure allows for variable speeds, and the DC barrel jack is being used for the power source. Now that we think of it, this may be the best use of an external HDD enclosure we’ve ever seen (even eclipsing its original purpose). Check out a video and image gallery of the project after the break.

We’ve categorized this as a beer hack since stir plates are often built by hobbyists for growing yeast starters used in home brewing.

Continue reading “Stirring Plate From USB Enclosure”

Copper-clad Enclosures

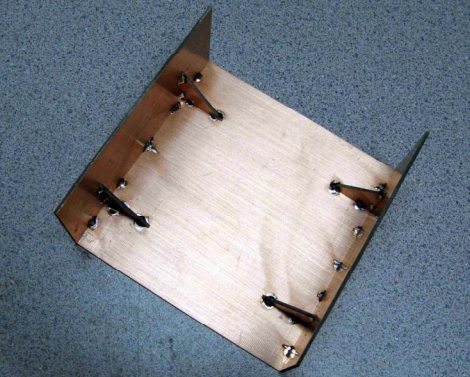
Building a great looking box for your projects can be a challenge. [Ken] boils down his process of building enclosures out of copper clad (PDF) circuit board material into an illustrated guide in case you want to try this for yourself. Why would you want to use PC board? The fiberglass substrate makes for a strong and lightweight material. Also, [Ken] is a ham radio operator and the copper coating acts as an electrical shield for delicate components inside.

As you can see above he uses solder to tack the pieces together. There’s some important considerations that go along with this method. First, he cuts the pieces just a bit oversized and then sands them flat and square before assembly. Next, he uses some 20 gauge wire as a shim between a ninety-degree joint and a right angle jig. This shim compensates for the shrinking that occurs as the solder cools, making sure the joint gets pulled to a right angle. He even solders nuts in place so that screws can be used to attach the case cover to the chassis.

Yesterday we saw toner transfer used to make labels on an ABS case. If you make your enclosure out of copper clad, using toner transfer for panel labels will be a snap!

Project Enclosures The Right Way

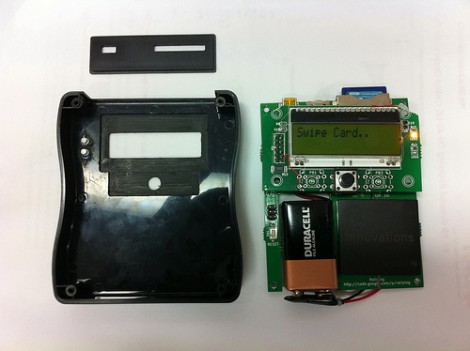
[Stephen Eaton] created an enclosure and shared his process in a pair of blog post. We thought is was amusing that he remarks on how rarely his projects get the to point that you’d want to make an enclosure for them. We’ve certainly got a lot of bare-PCB creations lying around. But when it does come time, we think his fabrication method is a good way to go.

First of all, he didn’t start from scratch. He already had a SparkFun project case sitting around. The problem is figuring how to make it work for your situation. We’ve used a drill, a Dremel, and a file in the past and that yields passable results but nothing that would be mistaken for anything other than a carefully mangled project box. [Stephen] decided to mill the openings he needed from the box, which yielded professional looking results. He started by emailing SparkFun and asking if they could give him a 3D model of the project box and the obliged. He then modeled the LCD screen, LED light pipes, button, USB port, and SD socket. From there it was off to the mill with a custom jig and a few tricks we think you’ll appreciate. The end result is just another reason to build the CNC mill you’ve had on your mind for so long.

Server Enclosure From 22 Rolls Of Tape

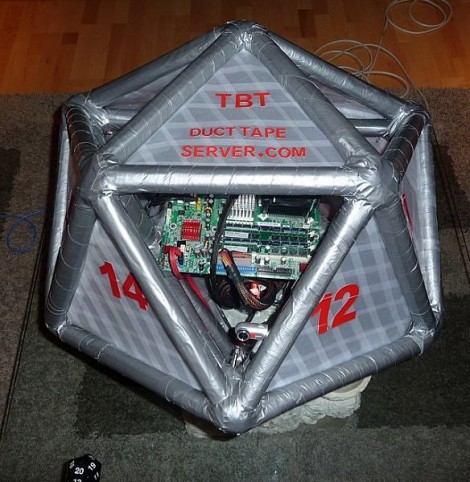
Who needs metal, wood, or acrylic if you are talented with duct tape? This server is housed in a 20-sided enclosure made entirely of duct tape, 22 rolls of it. A team of seven completed the project after eight build session over the course of about ten days. It’s currently in use at this year’s MillionManLan 9 as confirmed by this incredibly boring live feed.

However whimsical, we do appreciate the build process. Tubes are rolled until they reach the specified thickness, then cut to length on a chop saw. More sticky stuff is applied to the joints and piece by piece the frame comes together. From the diagram laying off to the side in one of the pictures it looks like they did the smart thing by designing this in CAD before getting their hands dirty sticky.

On-the-go Prototyping

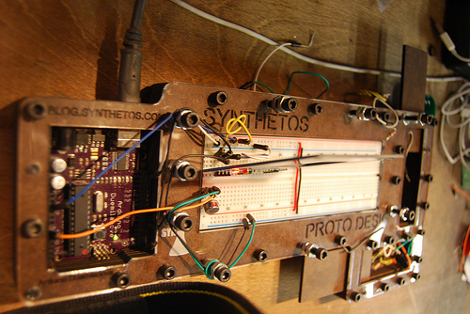
[Riley Porter] has been working on several different custom enclosure designs. Above, you can see his Proto Desk which holds a breadboard, Arduino, and has two recessed boxes with sliding tops for components and patch wires. He’s got a miniature version that gets rid of the breadboard, as well as slick-looking cases for the Bus Pirate, tinyISP, and face plates for word clocks.

Well, if you’ve got a laser cutter you should be using it right? We’ve seen [Riley’s] wares in the past; he wrote the guide for laser cutting solder stencils.

[Thanks Brian]