Arduino IDE Support For The ESP8266

Despite a wealth of tutorials for setting up and writing code for the ESP8266 WiFi module, there has not been much of anything on programming this cheap wireless module with the Arduino IDE. Finally, this has changed. After many months of coding, the Arduino IDE supports the ESP8266 module.

The Arduino IDE support was announced on the ESP8266 community forum. Setup is fairly simple with downloads for Linux, OS X, and Windows. This isn’t an ESP8266 shield, either: you can write code for the ESP module, connect the serial pins, and hit the program button.

The basic functions of the Arduino IDE – pinMode, digitalRead, digitalWrite, and analogRead – are available. Most of the WiFi functions work just like the WiFi shield library.

There are a few things that aren’t written yet; PWM doesn’t work, as the ESP8266 only has one hardware PWM source. SPI and I2C slave mode aren’t done yet, and uploading sketches via WiFi needs a little bit of thought. That said, this is a great introduction to programming the ESP module. If the Arduino IDE isn’t your thing, you could always do it the cool way with [CNLohr]’s programming tutorial we featured last week.

Hackaday Links Column Banner

Hackaday Links: March 1, 2015

The somewhat regular Hardware Developers Didactic Galactic was a few days ago in San Francisco. Here’s the video to prove it. Highlights include [James Whong] from Moooshimeter, the two-input multimeter, [Mark Garrison] from Saleae, and a half-dozen other people giving talks on how to develop hardware.

[Taylor] made a portable NES with a retron, a new-ish NES clone that somehow fits entirely in a glop top IC. The controllers sucked, but [Taylor] made a new one with touch sensors. All that was required was eight transistors. The enclosure is an Altoid tin, and everything works great.

Here’s a YouTube channel you should subscribe to: Ham College. The latest episode covers the history of radio receivers and a crystal radio demonstration. They’re also going through some of the Technical class question pool, providing the answers and justification for those answers.

[Prusa] just relaunched prusaprinters and he’s churning out new content for it. Up now is an interview with [Rick Nidata] and his awesome printed container ship.

The tip line is overflowing with ESP8266 breakout boards. Here’s the simplest one of them all. It’s a breadboard adapter with stickers on the pin headers. Turn that into a right-angle breadboard adapter, and you’ll really have something.

Here’s something that’s a bit old, but still great. [Dillon Markey], one of the stop-motion animators for Robot Chicken modified a Nintendo Power Glove for animation duties. It seems to work great, despite being so bad. Thanks [Nicholas] for the link.

[David] the Swede – a consummate remote control professional we’ve seen a few times before – just flew his tricopter in a mall so dead it has its own Wikipedia page. Awesome tricopter, awesome location, awesome video, although we have to wonder how a few really, really bright LEDs would make this video look.

Here’s an item from the tip line. [Mark] wrote in with an email, “Why do you put names in [square brackets] in the blog entries? Just curious.” The official, [Caleb]-era answer to that question is that sometimes people have bizarre names that just don’t work in text. Imagine the sentence, “[12VDC] connected the wires to the terminal” without brackets. The semi-official answer I give is, “because.”

A Haptic Bracelet For Physical Computing

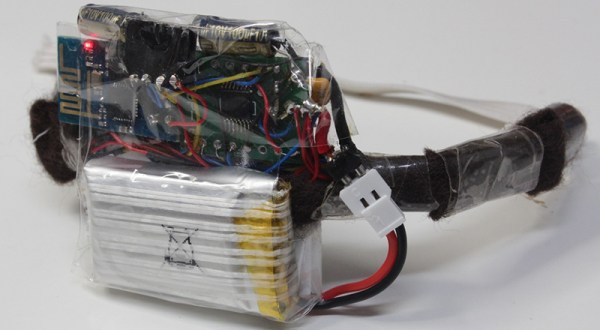
[Tinkermax] has been reading about the Internet of Things and wearable computing and decided it was time for him to have a go at building a device that turned computing physical. The result is a vibrating wristband that connects his sense of touch to the Internet.

The electronics for this haptic wristband are a mix of old and new technology. The radio and microcontroller come from an ESP-8266 module that was programmed with [Mikhail Grigorev]’s unofficial SDK. The mechanics for the wrist-mounted computer consist of six pager motors mounted around the wrist. These are driven somewhat ingeniously by a TLC5917 LED driver chip. This meant the ESP would only need to use two of its GPIOs to control six motors.

Right now the software is simple enough; just a web page, a few buttons, and the ability to buzz any of the pager motors on the wrist band over the Internet. Now it’s just a question of making this wearable useful, but connecting each pager motor to different notifications – a new email, a new SMS, or some emergency on the Internet – should be pretty easy.

Video below.

Continue reading “A Haptic Bracelet For Physical Computing”

Flashing The ESP8266 In Windows

It’s only been a few months since the ESP8266 rolled out of some factory in China, and already the community is moving from simply getting custom firmware to work on the device to making the development tools easy to use. That’s huge – the barrier to entry is lowered, getting even more people on board with this very cool Internet of Things thing.

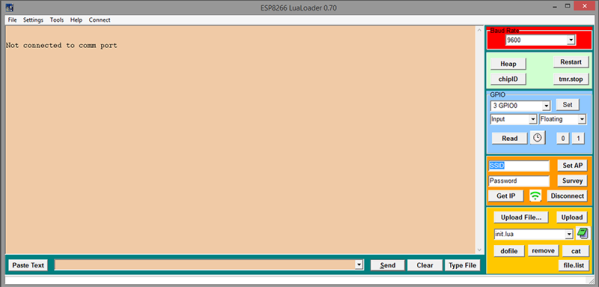
While the majority of the community is settling on using the Lua interpreter firmware, there’s still the matter of getting this firmware uploaded to the ESP. [Peter Jennings] of Microchess fame has been working on a Windows app to upload firmware to the ESP via a serial interface. There’s not much to it, but this will allow you to upload the community-created Lua firmware, set the WiFi credentials, toggle GPIO pins, and give you the ability to write a little bit of Lua in the same window.

If you’re looking for something that isn’t designed exclusively for Windows, there’s an alternative firmware flasher over on the nodemcu Github. This flasher also connects the ESP8266 to a network and uploads firmware. It’s a stripped-down programmer without a serial terminal or the ability to toggle pins, but there are plans for making this programmer cross-platform.

Making Something Useful With The ESP8266

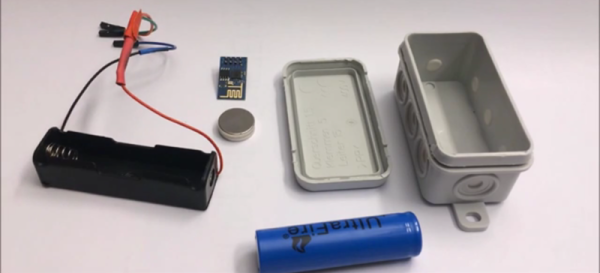
The ESP8266 is the latest and greatest way to get a project connected to the Internet, but so far we haven’t seen many projects that actually do something with this very cool chip. Yes, there are a few people pinging away with AT commands, and there is a thriving community building interpreters and flashing new code on this chip, but not much in the way of actual projects. [Martin] is the exception. He’s come up with two projects that use the ESP8266.

The first project is one that puts the readings from a DHT22 temperature/humidity sensor up on the Internet. Following the spirit of all the recent development of the ESP8266, [Martin] isn’t using an external microcontroller. Instead, he’s using the SDK to run an HTTP daemon using [Sprite_TM]’s code. This web server provides an interface to turn an LED on and off, and reports the temperature and humidity readings from the DHT22. It’s simple, but it’s easy to see how this tiny chip could become the basis for a smart thermostat.

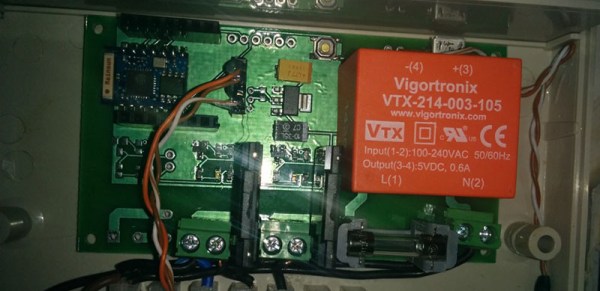
If lighting up LEDs isn’t enough, [Martin] has another project that includes three solid state relays. This one is a bit more complex with MQTT support, a fancy jQuery interface, and support for network time. [Martin] isn’t quite ready to publish the complete code for this project, but that’s only because there are a few features he’d like to implement before making it public. These include dynamic DNS, scheduling functionality, and support for an I2C status display. Even without these fancy features, it’s still a great project that’s still extremely capable for an Internet of Things thing. You can check out [Martin]’s video demo of this board below.

Continue reading “Making Something Useful With The ESP8266”

ESP Gets FCC And CE

The ESP8266 Internet of Things module is the latest and greatest thing to come out of China. It’s ideal for turning plastic Minecraft blocks into Minecraft servers, making your toilet tweet, or for some bizarre home automation scheme. This WiFi module is not, however, certified by the FCC. The chipset, on the other hand, is.

Having a single module that’s able to run code, act as a UART to WiFi transceiver, peek and poke a few GPIOs, all priced at about $4 is a game changer, and all your favorite silicon companies are freaking out wondering how they’re going to beat the ESP8266. Now the chipset is FCC certified, the first step to turning these modules into products.

This announcement does come with a few caveats: the chipset is certified, not the module. Each version of the module must be certified by itself, and there are versions that will never be certified by the FCC. Right now, we’re looking at the ESP8266-06, -07, -08, and -12 modules – the ones with a metal shield – as being the only ones that could potentially pass an FCC cert. Yes, those modules already have an FCC logo on them, but you’re looking at something sold for under $5 in China, here.

Anyone wanting to build a product with the ESP will, of course, also need to certify it with the FCC. This announcement hasn’t broken down any walls, but it has cracked a window.

Compiling Your Own Programs For The ESP8266

When the ESP8266 was first announced to the world, we were shocked that someone was able to make a cheap, accessible UART to WiFi bridge. Until we get some spectrum opened up and better hardware, this is the part you need to build an Internet of Things thing.

It didn’t stop there, though. Some extremely clever people figured out the ESP8266 had a reasonably high-power microcontroller on board, a lot of Flash, and a good amount of RAM. It looked like you could just use the ESP8266 as a controller unto itself; with this chip, all you need to do is write some code for the ESP, and you have a complete solution for your Internet connected blinking lights or WiFi enabled toaster. Whatever the hip things the cool kids are doing these days, I guess.

But how do you set up your toolchain for the ESP8266? How do you build projects? How do you even upload the thing? Yes, it’s complicated, but never fear; [CNLohr] is here to make things easy for you. He’s put together a video that goes through all the steps to getting the toolchain running, setting up the build environment, and putting some code on the ESP8266. It’s all in a git, with some video annotations.

The tutorial covers setting up the Xtensa toolchain and a patched version of GCC, GDB, and binutils. This will take a long, long time to build, but once it’s done you have a build environment for the ESP8266.

With the build environment put together, [CNLohr] then grabs the Espressif SDK from the official site, and puts together the example image. Uploading to the module requires pulling some of the pins high and some low, plugging in a USB to serial module to send the code to the module, standing well back, and pressing upload.

For his example image, [CNLohr] has a few WS2812 RGB LEDs connected to the ESP8266 WiFi module. Uploading the image turns the LEDs into something controllable with UDP packets on port 7777. It’s exactly what you want in a programmable, WiFi chip, and just the beginning of what can be done with this very cool module.

If you’re looking around for some sort of dev board with an ESP8266 on it, [Mathieu] has been playing around with some cool boards, and we’ve been looking into making a Hackaday version to sell in the store. The Hackaday version probably won’t happen because FCC.

Continue reading “Compiling Your Own Programs For The ESP8266”