Sometimes the best you can say about a project is, “Nice start.” That’s the case for this as-yet awful DIY 3D scanner, which can serve both as a launching point for further development and a lesson in what not to do.
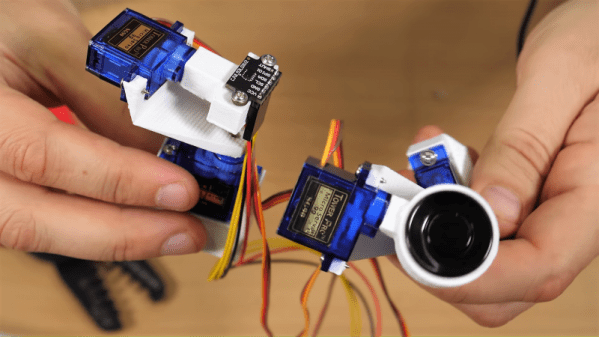
Don’t get us wrong, we have plenty of respect for [bitluni] and for the fact that he posts his failures as well as his successes, like composite video and AM radio signals from an ESP32. He used an ESP8266 in this project, which actually uses two different sensors: an ultrasonic transducer, and a small time-of-flight laser chip. Each was mounted to a two-axis scanner built from hobby servos and 3D-printed parts. The pitch and yaw axes move the sensors through a hemisphere gathering data, but unfortunately, the Wemos D1 Mini lacks the RAM to render the complete point cloud from the raw points. That’s farmed out to a WebGL page. Initial results with the ultrasonic sensor were not great, and the TOF sensor left everything to be desired too. But [bitluni] stuck with it, and got a few results that at least make it look like he’s heading in the right direction.
We expect he’ll get this sorted out and come back with some better results, but in the meantime, we applaud his willingness to post this so that we can all benefit from his pain. He might want to check out the results from this polished and pricey LIDAR scanner for inspiration.
There are plenty of ways to monitor changes in your weight. You can get a vague idea from the fit of your pants or the notch on your belt. But anyone who’s serious about getting or staying in shape must step on the scale to get the cold, hard truth in pounds or kilograms.
Instead of just buying one, [igorfonseca83] decided to burn a few calories and build his own smart scale that uses IFTTT to send weight data to his fitness tracker. It’s made from four 50kg load cells that are sandwiched between two pieces of plywood. An HX711 sensor module reads the load cells, and a FireBeetle ESP8266 uploads the data to Adafruit IO. His weight is simultaneously displayed on a FireBeetle LED matrix.
We applaud [igorfonseca83]’s efforts to make this an easy, educational project that anyone can replicate. The instructions are great, the pictures are clear, and there’s even a CAD animation of all the pieces coming together. Jog past the break to see the build video, and weigh in down below.
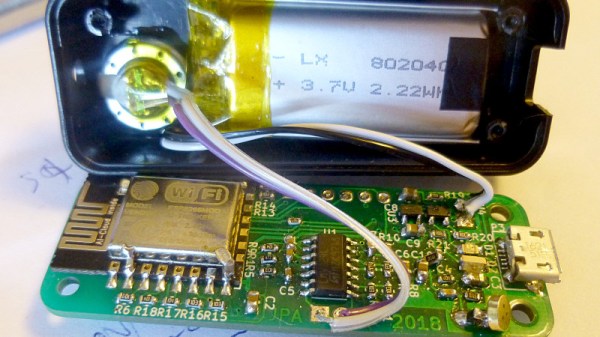
The ESP8266 has become such a staple of projects in our community since it burst onto the scene a few years ago. The combination of a super-fast processor and wireless networking all on the same chip and sold in retail quantities for relative pennies has been irresistible. So when [Petteri Aimonen] needed to make a wireless intercom system for cycling trips it seemed an obvious choice. Push its internal ADC to sample at a high enogh rate for audio, and stream the result over an ad-hoc wi-fi network.
The result was far from satisfactory, as while early results with a signal generator seemed good, in practice it was unusable. Significant amounts of noise were entering the pathway such that the resulting audio was unintelligible. It seems that running a wireless network causes abrupt and very short spikes of power supply current that play havoc with audio ADCs.
He’s submitted it to us as a Fail Of The Week and he’s right, it is a fail. But in a way that’s an unfair description, because we can see there is the germ of a seriously good idea in there. Perhaps with an external ADC, or maybe with some as-yet-to-be-determined filtering scheme, an ESP8266 walkie-talkie is one of those ideas that should be taken to its conclusion. We hope he perseveres.
It’s really hard to overstate how awesome ESP8266 development boards like the Wemos D1 Mini really are. For literally a couple of dollars you can get a decently powerful Wi-Fi enabled microcontroller that has enough free digital pins to do some useful work. Like the Arduino and Raspberry Pi before it, the ESP8266 is a device that’s opening up whole new areas of hacking and development that simply weren’t as practical or cost-effective as previously.
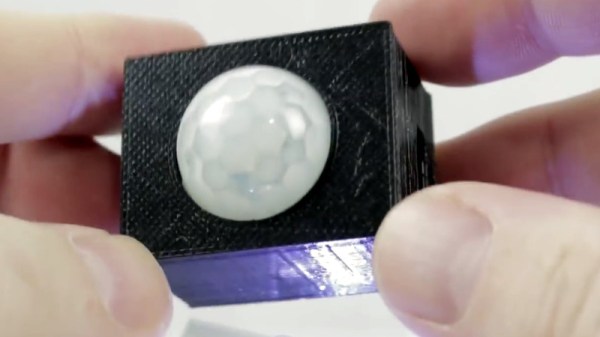
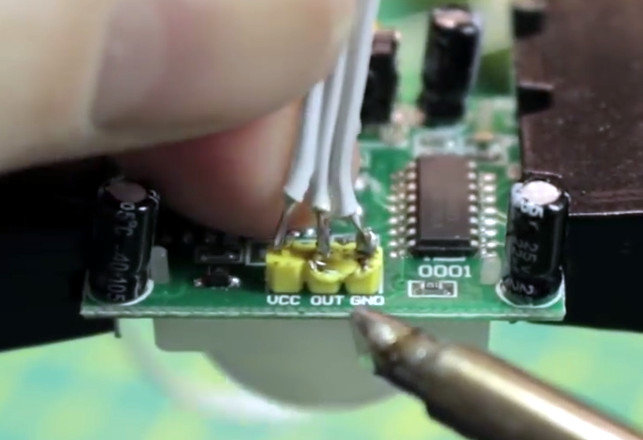
As a perfect example, take a look at this stupendously simple Internet-connected motion detector that [Eric William] has come up with. With just a Wemos D1 Mini, a standard PIR sensor, and some open source code, you can create a practical self-contained motion sensor module that can be placed anywhere you want to keep an eye on. When the sensor picks up something moving, it will trigger an IFTTT event.
It only takes three wires to get the electronics connected, but [Eric] has still gone ahead and provided a wiring diagram so there’s no confusion for young players. Add a 3D printed enclosure from Thingiverse and the hardware component of this project is done.
Using the Arduino Sketch [Eric] has written, you can easily plug in your Wi-Fi information and IFTTT key and trigger. All that’s left to do is put this IoT motion sensor to work by mounting it in the area to be monitored. Once the PIR sensor sees something moving, the ESP8266 will trigger IFTTT; what happens after that is up to you and your imagination. In the video after the break, you can see an example usage that pops up a notification on your mobile device to let you know something is afoot.
In 2017 Spotify finally deprecated their public vanilla C SDK library, libspotify, and officially replaced it with dedicated SDKs for iOS and Android and this new-fangled web thing we’ve all heard so much about. This is probably great for their maintainability but makes writing a native application for a Linux or a hardware device significantly harder, at least without an application process and NDA. Or is it? Instead of using that boring slab of glass and metal in their pocket [Dani] wanted to build a handy “now playing” display and remote control interface but was constrained by the aforementioned SDK limitations. So they came up with a series of clever optimizations resulting in the clearly-named ESP8266 Spotify Remote Control.
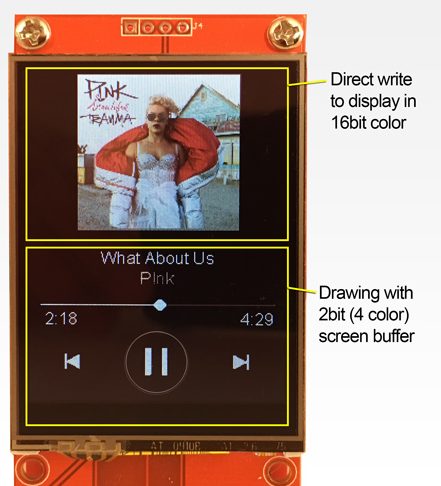
The Spotify Remote Control has a color LCD with a touchscreen. Once attached to a Spotify account it will show the album art of the currently playing track (with a loading indicator!) and let you play/pause/skip tracks from its touch screen, all with impressively low latency. To get here [Dani] faced two major challenges: authorizing the ESP to interact with a user’s Spotify account, and low latency LCD drawing.
2 Bit Cover Art
If you’re not on iOS or Android, the Spotify web API is the remaining non-NDA’d interface available. But it’s really designed to be used on relatively rich platforms such as fully featured web browsers, not an embedded device. To that end, gone are the days of asking a user to enter their username and password in a static login box, the newer (better) way is to negotiate for a per-user token (which is individually authorized per application), then to use that to authenticate your interaction. With this regime 3rd party applications (in this case an ESP8266) never see a user’s password. One codified and very common version of this process is called OAuth and the token dance is called a “workflow”. [Dani] has a pretty good writeup of the process in their post if you want more detail about the theory. After banging out the web requests and exception handling (user declines to authorize the device, etc) the final magic ended up being using mDNS to get the user’s browser to redirect itself to the ESP’s local web server without looking up an IP first. So the setup process is this: the ESP boots and displays a URL to go to, the user navigates there on a WiFi connected device and operates the authorization workflow, then tokens are exchanged and the Remote Control is authorized.
The second problem was smooth drawing. By the ESP’s standards the album art for a given track at full color depth is pretty storage-large, meaning slow transfers to the display and large memory requirements. [Dani] used a few tricks here. The first was to try 2 bit color depth which turned out atrociously (see image above). Eventually the solution became to decompress and draw the album art directly to the screen (instead of a frame buffer) only when the track changed, then redraw the transport controls quickly with 2 bit color. The final problem was that network transfers were also slow, requiring manual timesharing between the download code and the display drawing routing to ensure everything was redrawn frequently.
Check out [Dani]’s video after the break, and take a peek at the sources to try building a Spotify Remote Control yourself.
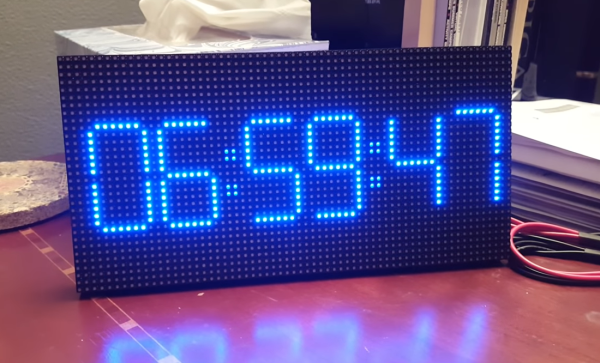
A few weeks ago, [HariFun] set out to emulate a 7-segment display with an LED matrix. Seems easy enough, right? Right. He also wanted to come up with a new way to transition between digits, which is a much harder task. But he did it, and it’s really cool. At a viewer’s suggestion, [Hari] used the transition as the basis for a mesmerizing clock that brings the smooth sweep of an analog second-hand into the digital age.
This is the coolest way to watch the time pass since the hourglass. You can almost hear the light move as one digit slides into the next. Each transition is totally unique, so depending on the digit this involves one or more vertical segments sliding from right to left, or multiple segments moving in a counter-clockwise circle.
You too can watch time glide by with little more than a 64×32 RGB LED matrix, a NodeMCU, and [Hari]’s digit transition code. It only costs about $25 to build, and you really can’t beat the quality of instruction he’s put together. Take a second or two and check it out after the break.
As we all know, sometimes the projects we plan simply never materialize. You have an idea, maybe even buy some of the parts you need, and then…nothing. Maybe you changed your mind, or maybe the idea was never that good to begin with. In any event, time marches on, the parts pile up, and the ideas come and go. Such is the life of the hacker.
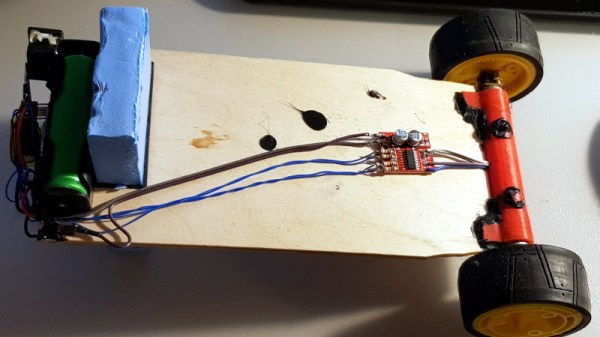
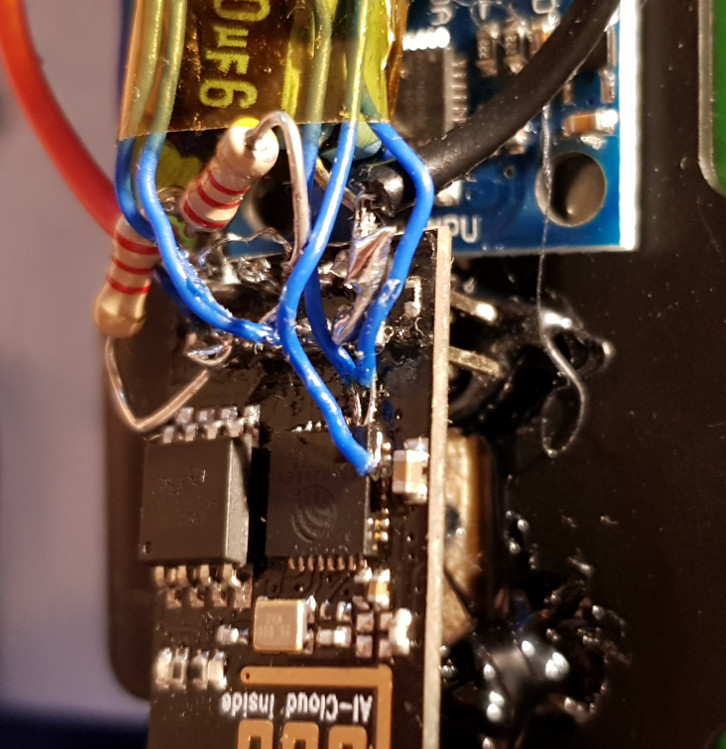
[Andrius Mikonis] writes in to tell us how his graveyard of abandoned projects ended up providing exactly what he needed to embark on a project he’s been fascinated with for years: the two-wheel self balancing robot. He started with a motor and wheel set that was originally intended to be part of a rover, added an accelerometer, and tied the whole thing together with an ESP-01 he had lying around. The final result certainly looks the part, and goes to show that projects don’t always need to be 1000 hour labors of love to accomplish their goals.
The construction of this little bot is simple in the extreme. A piece of plywood makes up the primary structure, with the wheels glued to the bottom and the electronics taking up residence in the top. It’s powered by two lithium battery cells that were salvaged out of an old laptop, with a DC-DC buck converter to provide a stable 3.3 VDC for the ESP-01 and MPU6050 accelerometer. To control the motors themselves, [Andrius] is using a cheap L293 controller that he found on eBay.
For interactive control, [Andrius] is making use of the ESP’s Wi-Fi to provide a web-based interface. This lets you control the bot from essentially any device that has a browser, rather than having to use a dedicated hardware transmitter.


 The second problem was smooth drawing. By the ESP’s standards the album art for a given track at full color depth is pretty storage-large, meaning slow transfers to the display and large memory requirements. [Dani] used a few tricks here. The first was to try 2 bit color depth which turned out atrociously (see image above). Eventually the solution became to decompress and draw the album art directly to the screen (instead of a frame buffer) only when the track changed, then redraw the transport controls quickly with 2 bit color. The final problem was that network transfers were also slow, requiring manual