arduino browser

Web Browser Pushes Arduino’s Limits

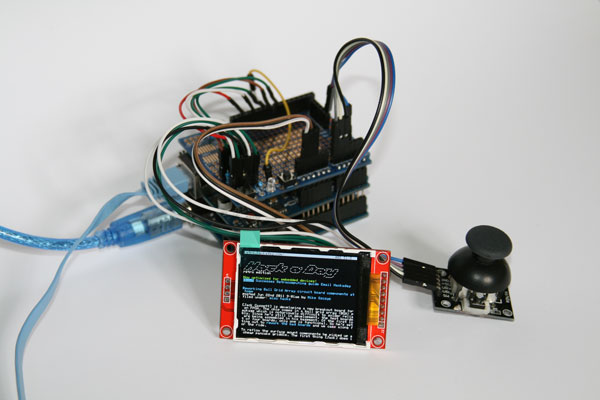
Some projects that we build fulfill a genuine need for a new piece of hardware or software that will make life easier or fix a common problem. Other projects, on the other hand, we do just because it’s possible to do. [Gilchrist] has finished work on a project that fits squarely in the second category: a web browser that runs exclusively on an Arduino Uno with an ethernet shield.

The Arduino can serve plain-text web pages to an attached LCD and can follow hyperlinks. User input is handled by a small joystick, but the impressive part of the build is on the software side. The Arduino only has 2KB of RAM to handle web pages, and the required libraries take up 20KB of memory, leaving only about 12 KB for the HTML parser/renderer and the LCD renderer.

The Arduino browser is a work in progress, and [Gilchrist] mentions that goals for the project include more robustness to handle poor HTML (the Hackaday retro edition loads flawlessly though), a terminal, and WiFi capabilities. To that end, maybe a good solution would be using the new ESP8266 chip to keep things small and inexpensive?

A Different Type Of Arduino Internet Shield

different-arduino-internet-shield

The cost of an Ethernet shield for an Arduino isn’t horrible; generally between $17 and $32 depending on which one you buy. But have you seen the cost of a WiFi shield? Those are running North of $70! [Martin Melchior] has a solution that provides your choice of Ethernet or WiFi at a low-cost and it’ll work for most applications. He’s using a WiFi router as an Arduino Internet shield.

This is the TP-Link WR703N which has been very popular with hackers because of its combination of low price (easy to find at $25 or less) and many features: the USB is super hand and, well, it’s a WiFi router! The Arduino Pro Mini shown dead-bug style is talking to the router using its serial port. [Martin] wires a pin socket to the router, which makes the rest of assembly as easy as plugging the two together. The rest of his post deals with handling bi-directional communications with Arduino code.

If you really just need that direct Ethernet pipe consider building an ENC28J60 chip into your designs.

3D Printed Dispenser Flings Treats At Your Pets

internet-connected-dog-treat-dispenser

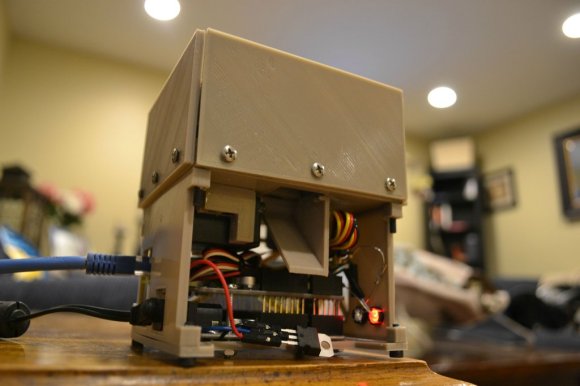
If you’re stuck in the virtual world like [Kevin Flynn] you can still make sure your pup is rewarded for good behavior. Just follow [Jwarp’s] design for this Internet connect dog treat dispenser.

We were actually a bit surprised by the demo video. It shows that the compact unit is more than capable of reliably dispensing one treat at a time. It started as a wood prototype which allowed him to tweak how the servo motors worked before laying out all of the 3D parts in Sketch Up. Two motors cooperate to get the job done. The first allows one treat to exit that shoot coming from the center of the hopper. The other stirs the remaining inventory to both position the next treat and loosen any jams.

Continue reading “3D Printed Dispenser Flings Treats At Your Pets”

Tuitwall Uses PHP-fed Arduino To Display Tweets

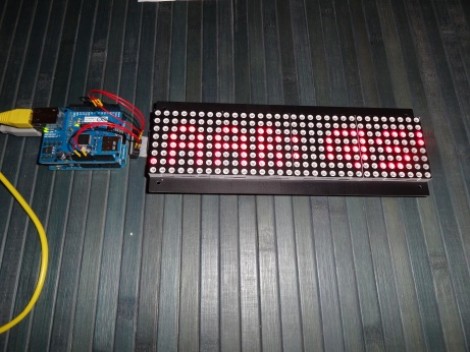
[Santiago] recently completed this project which he calls Tuitwall. It will display your Twitter feed on an LED matrix. The method he used to put it together will come in handy for any project where you need to scrape information from the Internet.

The project does require a server in addition to the Arduino hardware seen above. On the Arduino side [Santiago] uses an Ethernet shield and an LED matrix which is addressed via SPI. The server is running a PHP script which takes advantage of the twitteroauth library to handle authentication.

There’s a little bit of configuration to be done, most of it having to do with how Twitter handles 3rd party applications. But once everything is set up you can take the hardware with you and plug it into any network (as long as it offers DHCP). With this framework as a guide it’s a snap to bend it to your will. It could be used as an RSS reader, time and temperature, server farm status, a prank ticket displaying fake headlines, etc.

arduino-seismic-sensor

Detecting Seismic Waves With A Piezo Element

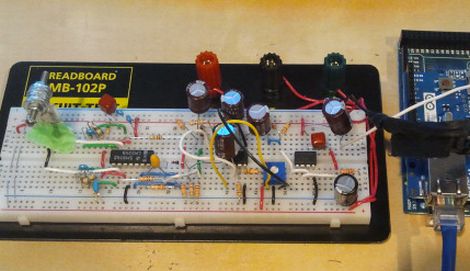
While we normally see piezo elements being used to output audio, [Veedo] thought that they could be used in a more useful manner. He bought way too many piezo film tabs and decided to use them to build a makeshift seismic sensor.

The piezo tabs came with weights attached at one end, though while testing them, he found that they more or less only detected vibrations with frequencies in the KHz range. Since earthquakes tend to produce vibrations in the 30-80 Hz range, he had to tweak his setup to detect the proper frequencies. To do this, he attached a weight made of a screw and washers, checking the output signals on his oscilloscope until the dominant sensed frequencies were in the range of 40 Hz.

The sensor was attached to a breadboard, then wired through a charge amp to create a small AC signal, which floats on 2.5Vdc. The bottom half of the wave is chopped off with a diode, after which it is fed into an Arduino Mega. The seismic data is then pushed up to his Pachube account for storage, though he can view the feeds locally via the a web server programmed into the Arduino.

We’re not sure how much advanced notice this sort of setup would give you in the event of an earthquake, but it seems like a fun project to build either way.

Home Power Monitoring

powermonitor

Reader [john] finished up his home power monitor over the holiday weekend. It uses a pair of current transducers clamped onto the mains. These output 0-3V and are read by the Arduino’s ADC. The Arduino averages samples over a 20 second period, calculates power used, and uploads it using an Ethernet Shield. The shield can’t do DNS lookups, so he uses a WRT54G to negotiate with the remote webserver. He admits that the system could be more accurate; it can’t detect small loads like wall warts. He also says that money could be saved by talking serial to the router instead of over ethernet. Here are the current usage charts.

You can find many power monitor projects like this in out Home Hacks category.

Official Arduino Ethernet Shield

ethernetshield
Arduino has just released an official ethernet shield. It’s based on the same WizNet W5100 chip that was used in the tiny ethernet board we covered earlier. The W5100 handles the full IP stack and can do TCP or UDP with four simultaneous sockets. The board has a power indicator plus six LEDs to debug the connection. It works with the standard ethernet library. The reset button resets the shield and the Arduino. The SD adapter is not currently supported by the Arduino software.