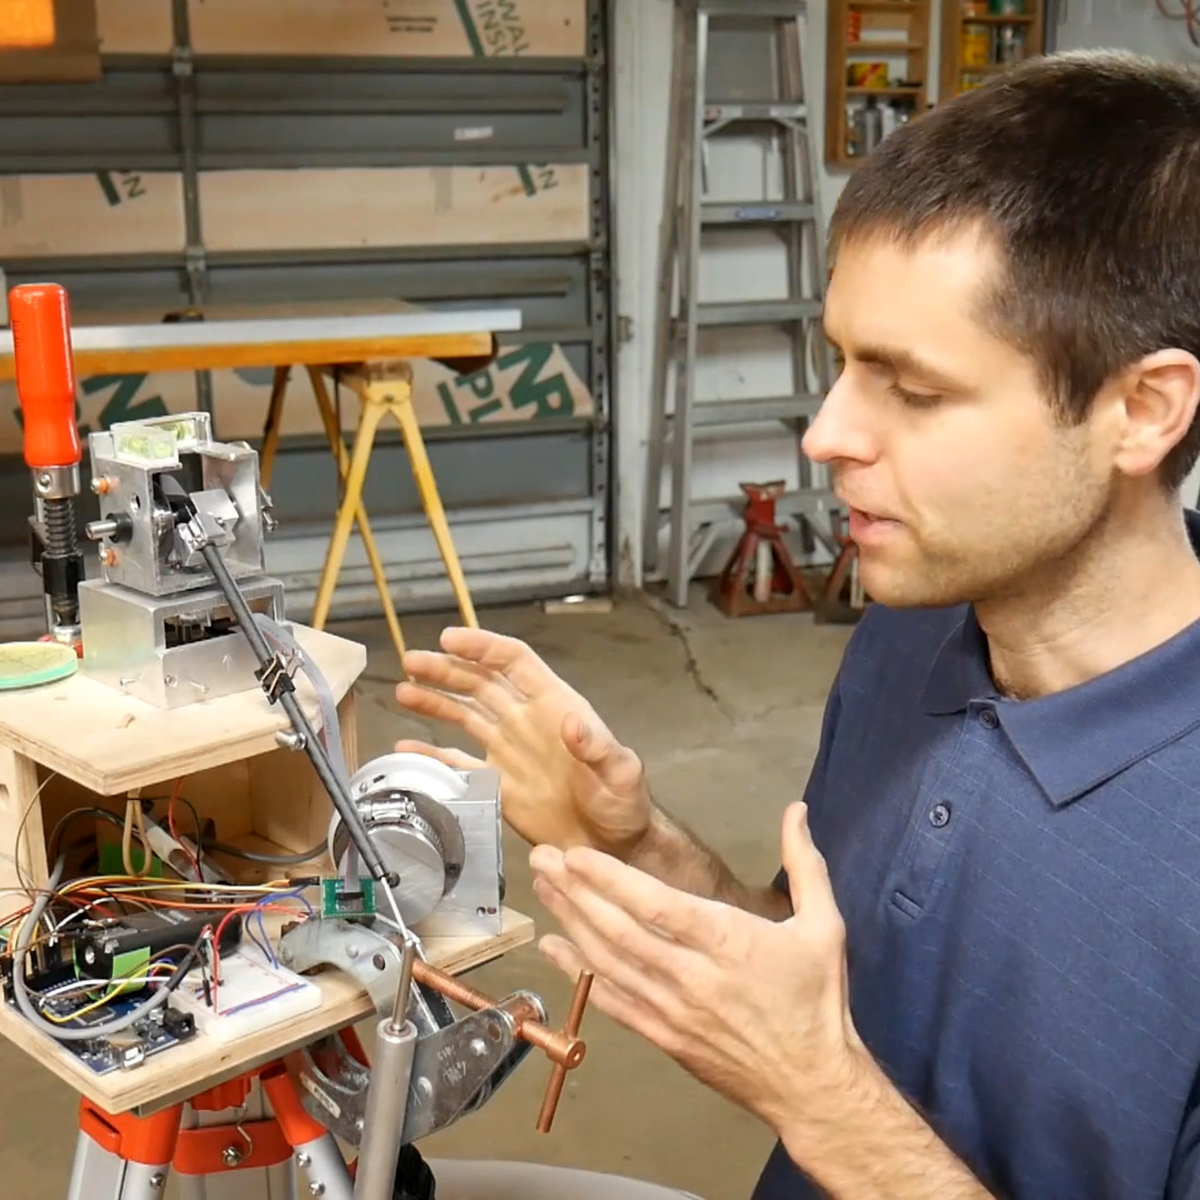
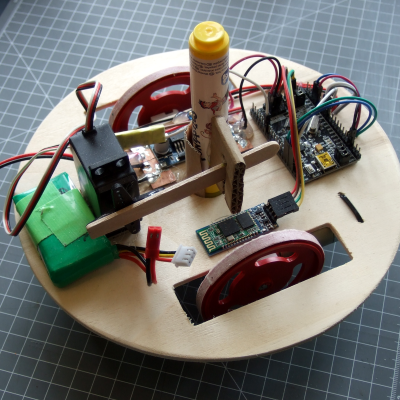
Dream Projects Face Reality

Do you ever get a project stuck in your mind? An idea so good you just keep thinking about it? Going over iterations and options and pros and cons in the back of your mind, or maybe on paper, but having not yet subjected it to the hard work of pulling it into reality? I’ve had one of those lurking around for the last couple weeks, and it’s time for me to get building.

And I’ve got to get started soon, because it’s rare that any project makes the leap from thought to reality unscathed, and when I hold on to the in-thought project too long, I become far too fond of some of the details and nuances that just might not make the cut, or might get in the way of getting a first pass finished. When I really like a (theoretical) solution to a (theoretical) problem, I’ll try to make it work a lot longer than I should, and I can tell I’m getting attached to this one now.

The only cure to this illness is to get prototyping. When the rubber hits the road, and the bolts are tightened, either the solution is a good one or it’s not, and no amount of dreaming is going to change that. Building is a great antidote to the siren song of a dream project. Although it feels now like I don’t want the fantasy to have to adapt to reality, as it inevitably will, I know that getting something working feels a lot better. And it frees me up to start dreaming on the next project… To the workshop!

The Devil Is In The Details

If you’ve taken a physics class, you’ve doubtless heard tales of mythical beasts like the massless string, the frictionless bearing, and the perfect sphere. And if you’re designing something new, it’s not always wrong to start by thinking in terms of these abstractions, just to get the basic framework laid and a first-order handle on the way things go. But once you start building, you’d better be ready to shed your illusions that a 6 mm peg will fit into a 6 mm hole.

Theory and practice are the same thing, in theory. But as soon as you step into practice, your “weekend build” can easily turn into a 500-hour project, full of hurdles, discoveries, experimentation, and eventual success. I’m not going to rehash [Scott Rumschlag]’s project here — you should really watch his detailed video — but suffice it to say that when building a sub-millimeter precision 3D measuring device, bearings do have friction and string does have non-zero mass, and it all matters.

When you start working on a project that “looked good on paper” or for whatever reason just doesn’t turn out as precisely as you’d wished, you could do worse than to follow [Scott’s] example: start off by quantifying your goals, and then identify where every error along the way accumulates to keep you from reaching them. Doing precise work isn’t easy, but it’s not impossible either if you know where all the errors are coming from. You at least have a chain of improvements that you can consider, and if you’ve set realistic goals, you also know when to stop, which is almost as important.

And if anyone out there has an infinite sheet of perfectly conductive material, I’m in the market.

The Imperfect Bipolar Transistor

We like to pretend that our circuit elements are perfect because, honestly, it makes life easier and it often doesn’t matter much in practice. For a normal design, the fact that a foot of wire has a tiny bit of resistance or that our capacitor value might be off by 10% doesn’t make much difference. One place that we really bury our heads in the sand, though, is when we use bipolar transistors as switches. A perfect switch would have 0 volts across it when it is actuated. A real switch won’t quite get there, but it will be doggone close. But a bipolar transistor in saturation won’t be really all the way on. [The Offset Volt] looks at how a bipolar transistor switches and why the voltage across it at saturation is a few tenths of a volt. You can see the video below.

To understand it, you’ll need a little bit of math and some understanding of the construction of transistors. The idea of using a transistor as a switch is that the transistor is saturated — that is, increasing base current doesn’t make much change in the collector current. While it isn’t perfect, it is good enough to switch a relay or do other common switching tasks.

Continue reading “The Imperfect Bipolar Transistor”

Don’t Fret Over The Ukulele

A ukulele is a great instrument to pick to learn to play music. It’s easy to hold, has a smaller number of strings than a guitar, is fretted unlike a violin, isn’t particularly expensive, and everything sounds happier when played on one. It’s not without its limited downsides, though. Like any stringed instrument some amount of muscle memory is needed to play it fluidly which can take time to develop, but for new musicians there’s a handy new 3D printed part that can make even this aspect of learning the ukulele easier too.

Called the Easy Fret, the tool clamps on to the neck of the ukulele and hosts a series of 3D printed “keys” that allow for complex chord shapes to be played with a single finger. In this configuration the chords C, F, G, and A minor can be played (although C probably shouldn’t be considered “complex” on a ukulele). It also makes extensive use of compliant mechanisms. For example, the beams that hit the chords use geometry to imitate a four-bar linkage. This improves the quality of the sound because the strings are pressed head-on rather than at an angle.

While this project is great for a beginner learning to play this instrument and figure out the theory behind it, its creator [Ryan Hammons] also hopes that it can be used by those with motor disabilities to be able to learn to play an instrument as well. And, if you have the 3D printer required to build this but don’t have an actual ukulele, with some strings and tuning pegs you can 3D print a working ukulele as well.

Label Your Shtuff!

Joshua Vasquez wrote a piece a couple of weeks ago about how his open source machine benefits greatly from having part numbers integrated into all of the 3D printed parts. It lets people talk exactly about which widget, and which revision of that widget, they have in front of them.

Along the way, he mentions that it’s also a good idea to have labels as an integrated part of the machine anywhere you have signals or connectors. That way, you never have to ask yourself which side is positive, or how many volts this port is specced for. It’s the “knowledge in the head” versus “knowledge in the world” distinction — if you have to remember it, you’ll forget it, but if it’s printed on the very item, you’ll just read it.

I mention this because I was beaten twice in the last week by this phenomenon, once by my own hand costing an hour’s extra work, and once by the hand of others, releasing the magic smoke and sending me crawling back to eBay.

The first case is a 3D-printed data and power port, mounted on the underside of a converted hoverboard-transporter thing that I put together for last year’s Chaos Communication Congress. I was actually pretty proud of the design, until I wanted to reflash the firmware a year later.

I knew that I had broken out not just the serial lines and power rails (labelled!) but also the STM32 SWD programming headers and I2C. I vaguely remember having a mnemonic that explained how TX and RX were related to SCK and SDA, but I can’t remember it for the life of me. And the wires snake up under a heatsink where I can’t even trace them out to the chip. “Knowledge in the world”? I failed that, so I spent an hour looking for my build notes. (At least I had them.)

Then the smoke came out of an Arduino Mega that I was using with a RAMPS 1.4 board to drive a hot-wire cutting CNC machine. I’ve been playing around with this for a month now, and it was gratifying to see it all up and running, until something smelled funny, and took out a wall-wart power supply in addition to the Mega.

All of the parts on the RAMPS board are good to 36 V or so, so it shouldn’t have been a problem, and the power input is only labelled “5 A” and “GND”, so you’d figure it wasn’t voltage-sensitive and 18 V would be just fine. Of course, you can read online the tales of woe as people smoke their Mega boards, which have a voltage regulator that’s only good to 12 V and is powered for some reason through the RAMPS board even though it’s connected via USB to a computer. To be honest, if the power input were labelled 12 V, I still might have chanced it with 18 V, but at least I would have only myself to blame.

Part numbers are a great idea, and I’ll put that on my list of New Year’s resolutions for 2021. But better labels, on the device in question, for any connections, isn’t even going to wait the couple weeks until January. I’m changing that right now.

A Turing-Complete CPU From RAM

Building a general-purpose computer means that you’ll have to take a lot of use cases into consideration, and while the end product might be useful for a lot of situations, it will inherently contain a lot of inefficiencies. On the other hand, if you want your computer to do one thing and do it very well, you can optimize to extremes and still get results. This computer, built from RAM, is just such an example.

The single task in this case was to build a computer that can compute the Fibonacci sequence.  Since it only does one thing, another part of the computer that can be simplified (besides the parts list) is the instruction set. In this case, the computer uses a single instruction: byte-byte-jump. Essentially all this computer does is copy one byte to another, and then perform an unconditional jump. Doing this single task properly is enough to build every other operation from, so this was chosen for simplicity even though the science behind why this works is a little less intuitive.

Of course, a single instruction set requires a lot of clock cycles to work (around 200 for a single operation). The hardware used in this build is also interesting and although it uses a Raspberry Pi to handle some of the minutiae, it’s still mostly done entirely in RAM chips, only cost around $15, and is a fascinating illustration of some of the more interesting fundamentals of computer science. If you’re interested, you can build similar computers out of 74-series chips as well.