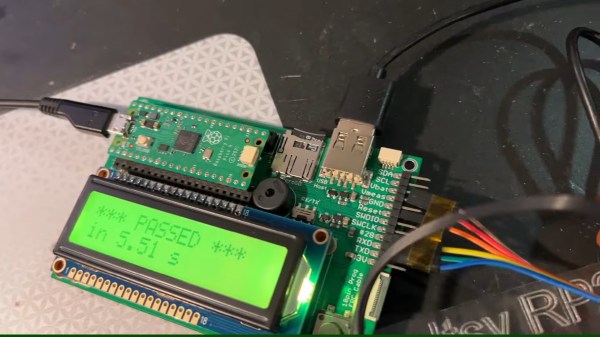
Showing a board with a Pi Pico plugged into it, a USB-A socket marked "USB host", and a character display that says "PASSED" referring to the board being the brains of a testing jig.

USB Host On RP2040 – With PIO

Folks from [Adafruit] are showing off a neat hack – USB host on RP2040, using the now-famous PIO peripheral. [Adafruit] builds a lot of RP2040 boards, and naturally, you gotta test them before you ship them to customers. They’ve been using very specific Teensies for that, and at some point, those became unobtainium. Based on the work of [sekigon-gonnoc] and with help of [Thach], they’ve made their TinyUSB library support bitbanging of USB over PIO, and successfully ported their test jig firmware to it!

The base Pico-PIO-USB repo by [sekigon-gonnoc] shows a pretty impressive state of affairs – with low-speed and full-speed USB host and full-speed USB device modes supported, and quite a few examples to get you started. [Adafruit]’s work integrates this code into their TinyUSB stack, specifically focusing on MST (mass storage) features – as this is what you need to program a RP2040. Of course, they also provide a mass storage example to boot!

Test jigs are pretty important to have when making multiple pieces of a board, and with RP2040 supporting more and more interfaces thanks to PIO, it sounds like the perfect chip for your next production testing-intended PCB. With the jig brains taken care of, you’ll want to look into building no less important mechanical part, and we’ve covered quite a few ways to sort that out – here’s an OpenSCAD script that generates lasercutting files out of KiCad boards, or a jig built out of scrap copperclad FR4, and a pretty extensive tutorial on making your own lasercuttable jigs, to boot.

Continue reading “USB Host On RP2040 – With PIO”

Building A New Commodore 64 In 2022 With All New Components

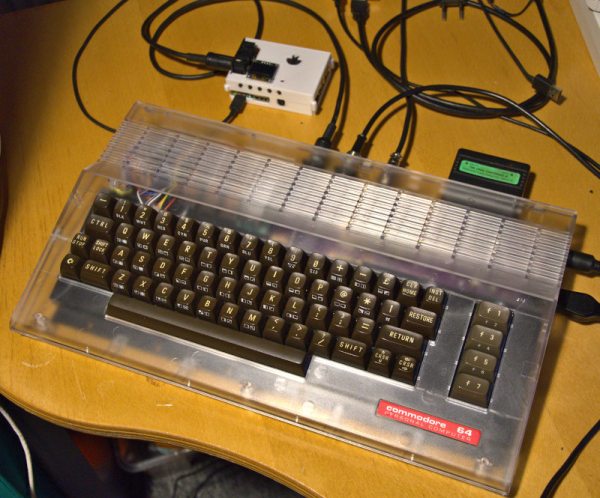
Call it fake or simply new, but when [DusteD] set out to build a brand-new Commodore 64 with only new parts, it resulted in Project MaxFake64 that is electrically and binary compatible with any genuine C64 out there. While not really ‘fake’ in the sense that a C64 emulator is fake, it is in the sense that it uses no parts produced before this millennium. This might actually be easier than getting a used C64 in fully working condition these days.

In total, the project contains an aftermarket C64 power supply by Electroware, a brand new C64C case, a C64 (ASSY NO 250407) mainboard based on the genuine board, a generic RF modular module, an FPGA-based Kawari VIC-II replacement, a 6502 MPU using a 6502-to-6510 adapter by Monotech PCs, a dual-GAL-based PLA replacement, EPROMs for the kernal, character and BASIC ROMs (with in-socket hacks), and a SinSID Nano as (temporary) SID replacement.

Issues discovered during the process include some cracking on the (transparent) C64C case and lack of availability on CIA replacements like the J6526. The keyboard will also be replaced at some later point, and items like the joystick ports were salvaged from an old C64 rather than purchased brand new. None of which are fundamental problems, and might actually make financial sense when it comes to finding replacement parts in the future.

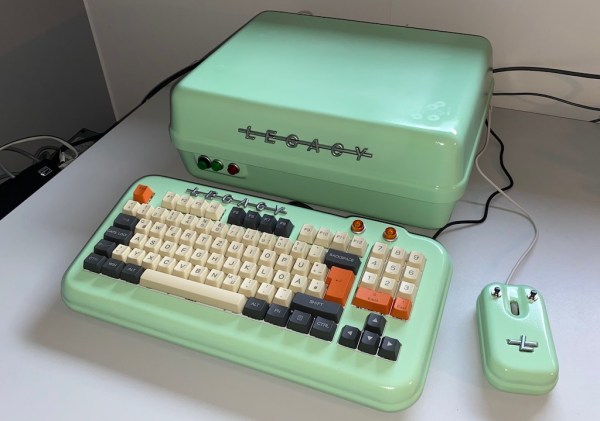
Showing the vintage PC, painted in 50s color scheme, matching custom-built keyboard and mouse next to it

Workbench PC With A 50s Twist

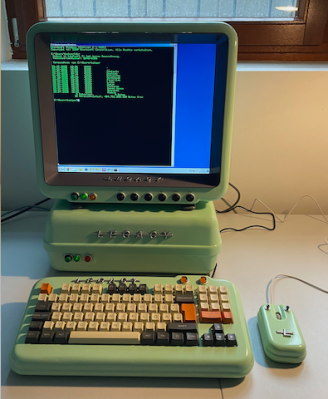
[HolGer71] had a Mini-ITX Intel Atom-powered mainboard that he found useful for its vintage interfaces like COM and LPT. On a whim, he decided to give it even more vintage of a look – transforming it into a device more akin to a 50s home appliance, complete with a fitting monitor, mouse and keyboard. The project, dubbed Legacy-PC Computer Case, imitates the sheet metal construction masterfully in its 3D-printed design. That’s not all there is to it, either – everything is open-source, and there is enough documentation that you can build your own!

[HolGer71] starts with general printing and finishing advice, and goes through every part of the setup from there. The mainboard-holding case builds around a small miniITX case frame, enclosing it and adding extensions for connectors and lightbulbs. For the monitor, he built a new frame around an old VGA-equipped 17″ desktop screen – most certainly easy to find. The keyboard‘s an inexpensive one yet equipped with mechanical switches, and the mouse‘s an old Fujitsu-Siemens, but of the kind you’d see manufactured under different labels. All in all, this combines quite generic components into a trusty and stylish device for your workshop needs.

Equipped with Windows 7 as, apparently, the earliest supported version, this machine is now on desk duty – ready to run obscure software for old programming dongles, and look absolutely fabulous while doing so. It’s rare that we see such effort put into creating designs from scratch and sharing them with the community – most of the time, we see PCs built into already existing devices, like this vintage radio, or a benchtop logic analyzer.

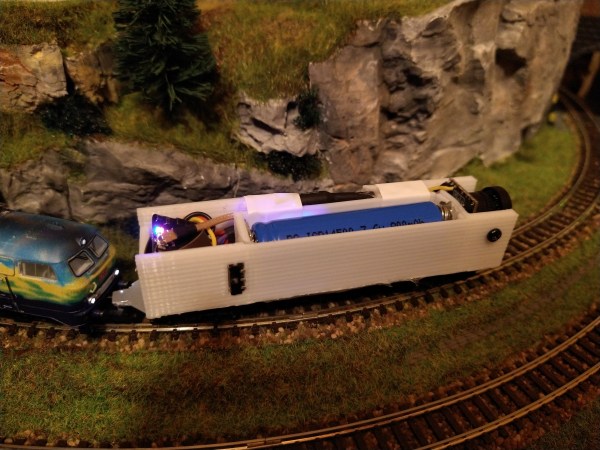
A model train car carrying a camera

2022 FPV Contest: Get The Train Driver’s View In Your N-Scale Railway

Model railroaders typically observe their project from high above. It would be neat to see what the world looks like to the residents of your little town, but getting down to their point of view is difficult, especially if you’re working in one of the smaller scales. For those working in the N scale, there’s now an easy way of observing your project as the train driver would see it: [Vassily98] managed to squeeze a wireless camera into an N-scale railcar.

The main challenge here was the extremely limited space available: the track in N-scale layouts is 9 mm wide, meaning that the whole system had to fit in just 23 x 20 mm2, the frontal area of a typical train car. One of the few cameras that fit within that profile was the RunCam Nano 4, which [Vassily98] connected to an ultra-tiny Team BlackSheep 5.8 GHz video transmitter.

Continue reading “2022 FPV Contest: Get The Train Driver’s View In Your N-Scale Railway”

Decentralized Chaos In Germany

When you’re planning an event with 15,000 hackers in a tight space these days, the COVID logistics can take the wind right out of your sails. And so the Chaos Computer Club decided, for one more year, to put aside plans for the traditional year-end Chaos Communications Congress. In it’s place this year? Everyone is doing their own thing, together but apart, for the “Dezentrale Jahresendveranstaltungen”.

Some local clubs are putting on local events, some of them have talk streams, and it’s all happening everywhere and at once. If you’re not near one of the roughly 30 locations in Europe that are doing something live – check out the streams. But be warned, there’s a lot to process!

Maybe it’s best to start with the schedule, where you can see what’s coming up next. Live streams are going on throughout, until Dec 30. If you missed a talk, you can check out the pre-release versions on Relive, but note that start times and end times are approximate, so you might need to seek around. And once they’re edited and polished up, they’ll show up on the permanent event playlist, which is still just getting started as we write this.

Right now, we’re watching a talk in German about how to program laser shows, but yesterday there were some great talks on subjects as varied as the history of the C language, how perimeter cybersecurity is dead, how to find the Norwegian prime minister in an “anonymous” dataset, and how Hackaday friend [Dave Darko] made his LED dodecahedron that he was showing off at Supercon.

In short, there’s a lot going on. Check it out.

Supercon 2022: Mooneer Salem Goes Ham With An ESP32

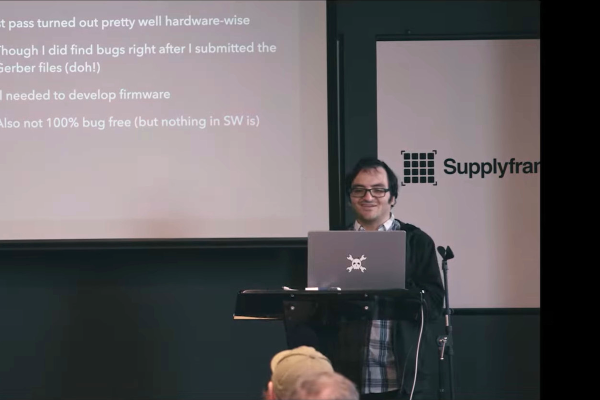
After being licensed as a ham radio operator since the early 2000s, you tend to start thinking about combining your love for the radio with other talents. In a 20-minute talk at Hackaday Supercon 2022, [Mooneer Salem] tells the story of one such passion project that combined software and radio to miniaturize a digital ham radio modulator.

[Mooneer] works as a software developer and contributes to a project called FreeDV (free digital voice), a digital voice mode for HF radio. FreeDV first compresses the digital audio stream, then converts it into a modulation scheme sent out over a radio. The appeal is that this can be understandable down to very low signal-to-noise ratios and includes metadata and all the other niceties that digital signals bring.

Traditionally, this has required a computer to compress the audio and modulate the signal in addition to two sound cards. One card processes the audio in and out of your headset, and another for the audio coming in and out of the radio. [David Rowe] and [Rick Barnich] developed the SM1000, a portable FreeDV adapter based around the STM32F4 microcontroller. However, flash space was running low, and the cost was more than they wanted. Continue reading “Supercon 2022: Mooneer Salem Goes Ham With An ESP32”

Giving Stable Diffusion Some Depth

You’ve likely heard quite a bit of buzz over the last few months about Stable Diffusion. The new version (v2) has come out, and in addition to the standard image-to-image and text-to-image modes, it also has a depth-image-to-image that can be incredibly useful. [Andrew] has a write-up that guides you on using this mode.

The basic idea is that you can take both an image and depth into the model, which allows you to control what gets put where. Stable Diffusion is a bit confusing, but we already have some great resources to wrap your head around it. In terms of input, you can use a depth map from a camera with lidar (many recent phones include this) or have another model (like MiDaS) estimate it from a 2D picture. This becomes powerful when you can preserve a specific composition, such as an iconic scene from a well-known movie. You can keep the characters’ poses on the screen but transform the style of the scene into whatever you wish (as seen above).

We have already covered a technique to generate textures right in blender, but this new depth information has already been implemented to provide better accuracy of the textures.

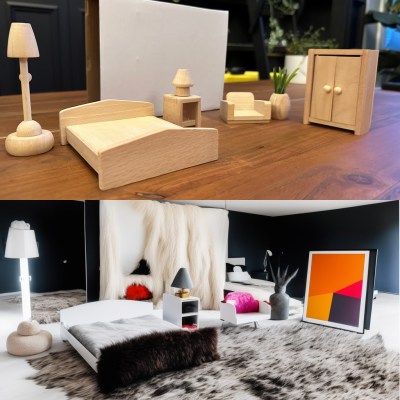
[Justin Alvey] used it to create architectural photos from dollhouse furniture. Using the MiDaS model, he estimated the depth and threw away the RGB aspects by setting the denoising strength to maximum. The simplified dollhouse furniture was easily recognizable to the model, which helped produce great results.

However, the only downside is that the perspective produces a rather dollhouse feel. Changing the focal length and moving farther away helps. Overall, it’s a clever use of what the new AI model can do. It’s a fast-moving space, so this will likely be out of date in a few months.