Trinteract, a small space mouse, operating in Blender.

Trinteract Mini Space Mouse Does It In 3D

We’re not sure how we managed to miss this one, but better late than never, right? This is Trinteract, a 3-DOF input device that’s both open-source and Arduino compatible. There’s even a neat 3D-printed clip to add it to the side of your laptop.

Imagine navigating 2D and 3D environments, or flying around in Minecraft with ease. [Görkem]’s custom PCB features a Hall effect sensor which picks up readings from the magnet embedded in the bottom of the joystick. You can use any magnetic object as input. In the video below the break, [Görkem] shows a 3D-printed sphere with a disc magnet trapped inside as an alternative. The super-neat part is that the thing moves around entirely on flexures. You know how much we love flexures around here.

[Görkem] has written up a fantastic guide for those who must have one of their own. As a bonus, the guide details the background and thought process behind the design, which we love to see.

Don’t like magnets? This space mouse uses an accelerometer and a spring.

Continue reading “Trinteract Mini Space Mouse Does It In 3D”

Bottoms Up: Soda Can Help With Almost Any Project

If there’s any one thing that the average hacker is short on at a given moment (besides chips), it’s transient small part storage. Just as new projects are built from small parts, diagnostics and teardowns of commercial equipment invariably result in small parts. We think [amenjet] may have the answer — small parts holders made from the bottoms of soda cans.

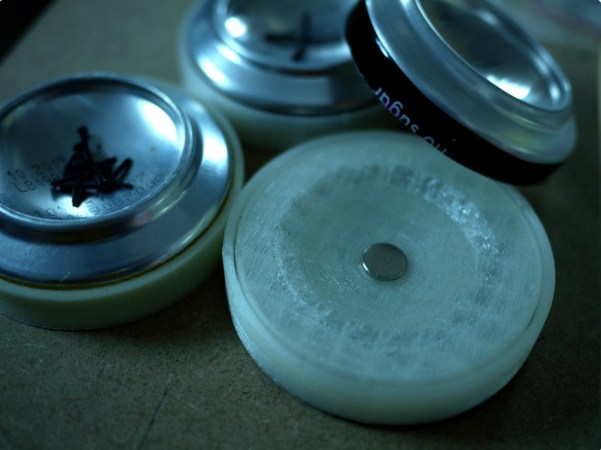
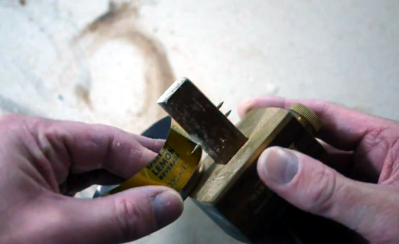
You start by cutting the bottom off of an empty can however you like. In the first video after the break, [amenjet] scores the can on what could be a purpose-built jig before cutting along the line with tin snips, but you could use regular scissors if that’s all you have. Then it’s just a matter of shoving it into the circle around the perimeter of the print to secure the sharp edge.

The underside of the print is graduated and ends with a small hole fit for a disc magnet. To keep the prints from scratching the table, [amenjet] covered the bottoms with crushed velvet. After making about a dozen of these things, they CNC’d a tray to hold three of them, which you can see in the second video. Each cavity in the tray is lined with more crushed velvet for elegance and stability.

Between the concavity of the can bottom and that little lip, it should be particularly easy to actually retrieve a tiny part from the pile and grab on to it. Between the utility and the recycled aspect, this could easily be an entry into the second Challenge of the 2022 Hackaday Prize, which runs now until Sunday, June 12th. This round is all about reusing, recycling, and revamping anything and everything to keep it out of the landfill. Start your entry today!

Continue reading “Bottoms Up: Soda Can Help With Almost Any Project”

Sisyphean Ball Race Robot Toils Gracefully, Magnetically

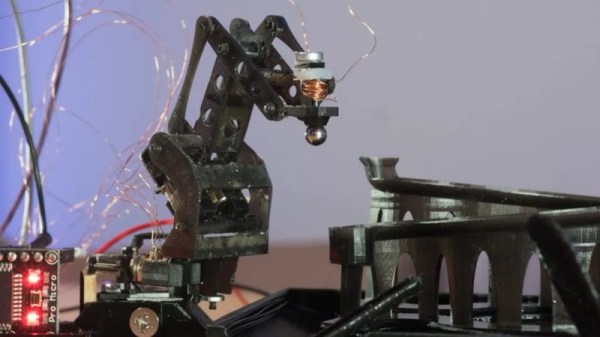
Aren’t ball races and marble runs fun? Wouldn’t they be so much more enjoyable if you didn’t have to climb back up the ladder each time, as it were, and reset the thing? [Johannes] wrote in to tell us about a wee robot with the Sisyphean task of setting a ball bearing on a simple but fun course, collecting it from the end, and airlifting it back to the start of the track.

[Johannes] built this ‘bot to test small-scale resin printing strength as well as the longevity of some tiny linear actuators from Ali that may or may not be available at a moment’s notice. The point was to see how these little guys fared when connected directly to an Arduino or other microcontroller, rather than going the safer route with a motor driver of some kind.

Some things worked well, like the c-clips that keep the axles together, and using quick pulses to release the magnetically-linked ball from the gripper. Other aspects didn’t work out so well. Tiny resin parts do not respond well to force, for starters. And then there’s the actuators themselves. The connections are fragile and the motors are weak, but they vary wildly in quality from piece to piece, so YMMV. Some lose steps, and others occasionally seize. But you wouldn’t know any of that from the graceful movement capture in the video below. Although it appears to be automated, the bot is under remote control because of the motor issues.

Not into ball runs? There are other Sisyphean tasks available, such as moving sand around in the name of meditation.

Continue reading “Sisyphean Ball Race Robot Toils Gracefully, Magnetically”

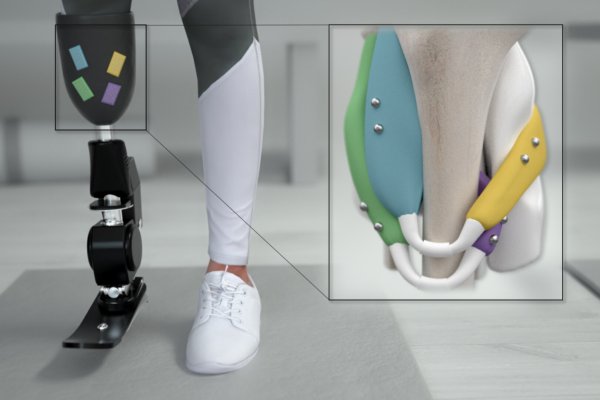
Tiny ball magnets implanted in muscles could provide much better control over prosthetics.

Magnets Could Give Prosthetic Control A Leg Up

Today, prostheses and exoskeletons are controlled using electromyography. In other words, by recording the electrical activity in muscles as they contract. It’s neither intuitive nor human-like, and it really only shows the brain’s intent, not the reality of what the muscle is doing.

Researchers at MIT’s Media Lab have figured out a way to use magnets for much more precise control, and they’re calling it magnetomicrometry (MM). By implanting pairs of tiny ball magnets and tracking their movement with magnetic sensors, each muscle can be measured individually and far more accurately than with electromyography.

After embedding pairs of 3mm diameter ball magnets into the calves of turkeys, the researchers were able to detect muscle movement in three milliseconds, and to the precision of thirty-seven microns, which is about the width of a human hair. They hope to try MM on humans within the next couple of years. It would be a great solution overall if it works out, because compared with the electromyography method, MM is cheaper, less invasive, and potentially permanent. Couple MM with a new type of amputation surgery called AMI that provides a fuller range of motion, less pain overall, and finer control of prosthetics, and the future of prostheses and rehabilitation looks really exciting. Be sure to check out the video after the break.

There’s more than one way to control prostheses, such as deep learning and somatosensory stimulation.

Continue reading “Magnets Could Give Prosthetic Control A Leg Up”

Minimalist Magnetic Minute Minder Mesmerizes

Timepieces are cool no matter how simplistic or granular they are. Sometimes its nice not to know exactly what time it is down to the second, and most of the really beautiful clocks are simple as can be. If you didn’t know this was a clock, it would still be fascinating to watch the bearings race around the face.

This clock takes design cues from the Story clock, a visual revolution in counting down time which uses magnetic levitation to move a single bearing around the face exactly once over a duration of any length as set by the user. As a clock, it’s not very useful, so there’s a digital readout that still doesn’t justify the $800 price tag.

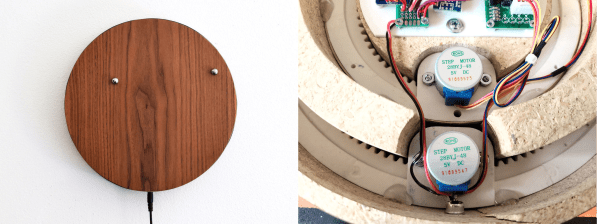
[tomatoskins] designed a DIY version that’s far more elegant. It has two ball bearings that move around the surface against hidden magnets — an hour ball and a minute ball. Inside there’s a pair of 3D-printed ring gears that are each driven by a stepper motor and controlled with an Arduino Nano and a real-time clock module. The body is made of plywood reclaimed from a bed frame, and [tomatoskins] added a walnut veneer for timeless class.

In addition to the code, STLs, and CAD files that birthed the STLs, [tomatoskins] has a juicy 3D-printing tip to offer. The gears had to be printed in interlocked pieces, but these seams can be sealed with a solution of acetone and plastic from supports and failed prints.

If you dig minimalism but think this clock is a bit too vague to read, here’s a huge digital clock made from small analog clocks.

Magnets Make Prototyping E-Textiles A Snap

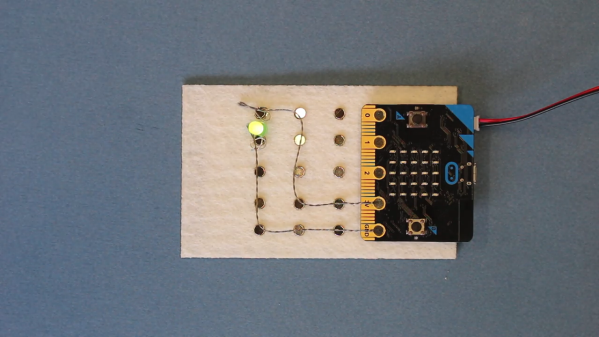
How do you prototype e-textiles? Any way you can that doesn’t drive you insane or waste precious conductive thread. We can’t imagine an easier way to breadboard wearables than this appropriately-named ThreadBoard.

If you’ve never played around with e-textiles, they can be quite fiddly to prototype. Of course, copper wires are floppy too, but at least they will take a shape if you bend them. Conductive thread just wants lay there, limp and unfurled, mocking your frazzled state with its frizzed ends. The magic of ThreadBoard is in the field of magnetic tie points that snap the threads into place wherever you drape them.

The board itself is made of stiff felt, and the holes can be laser-cut or punched to fit your disc magnets. These attractive tie-points are held in place with duct tape on the back side of the felt, though classic double-stick tape would work, too. We would love to see somebody make a much bigger board with power and ground rails, or even make a wearable ThreadBoard on a shirt.

Even though [chrishillcs] is demonstrating with a micro:bit, any big-holed board should work, and he plans to expand in the future. For now, bury the needle and power past the break to watch [chris] build a circuit and light an LED faster than you can say neodymium.

The fiddly fun of e-textiles doesn’t end with prototyping — implementing the final product is arguably much harder. If you need absolutely parallel lines without a lot of hassle, put a cording foot on your sewing machine.

Continue reading “Magnets Make Prototyping E-Textiles A Snap”

Print A Sacrificial Magnet Square

Here’s your quick and dirty hack for the day. Sometimes you just need something that will work for what you’re trying to do, and you don’t want to go through the motions of doing what’s prescribed. When this happens, it’s a cheap, disposable tool that fits the bill. No, we’re not talking about Harbor Freight—we mean those need-driven tools you make yourself that get the job done without fuss. If you’re really lucky, you can use them a couple of times before they break.

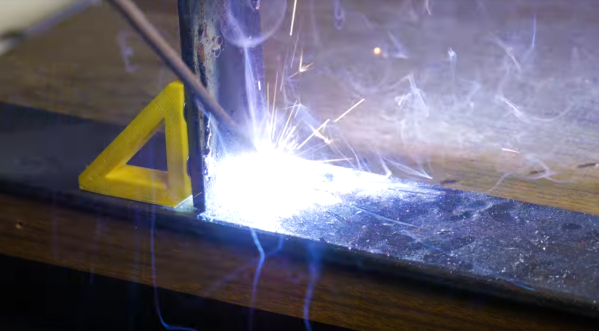
This is one of those tools. [Jake’s Workshop] wanted to be able to quickly tack a corner weld without getting out the clamps, so he thought, why not print some magnet squares? [Jake] hollowed out the triangle to save filament, but this also gives it a nice advantage over store-bought magnet squares: instead of grasping and pulling it off,  you can hook your finger through it and then hang it on the pegboard for next time.

[Jake] got lucky with the pocket sizes and was able to press fit the magnets in place, but it would be worth it to add a drop of CA glue to help with strain. He seems to have forgotten to upload the files for his various styles, but a hollow triangle with chamfers and magnet pockets should be easy enough to replicate in OpenSCAD or  SolidWorks, which he used in the video below.

There’s something special about a cheap tool you make yourself. Even though you know it won’t last forever, it’s just more meaningful than some cheap, rage-inducing tchotchke or assemblage from a place where the air is ~85% offgasses. We love necessity-driven self-built tools around here so much that we gave them their own Hacklet.

Continue reading “Print A Sacrificial Magnet Square”