Game Boy Macro Build Retains DS Compatibility

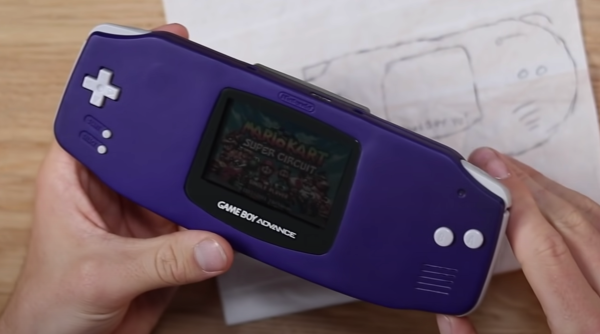
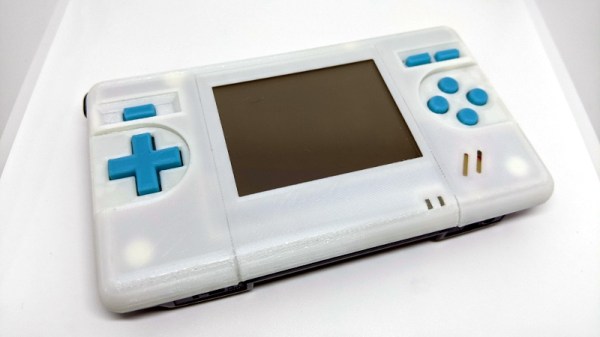
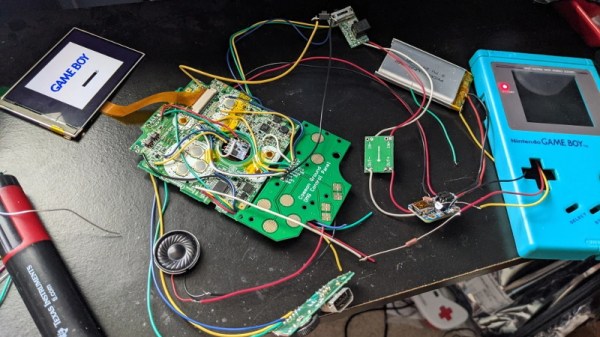
Building a so-called “Game Boy Macro” is a great way to salvage a Nintendo DS that has a broken hinge or top screen, as the system only needs the lower display to play Game Boy Advance games. Naturally, DS games that were designed to use both screens would no longer be playable. Or at least, that’s what we thought. But as [Facelesstech] shows, it’s actually possible to play DS games on a Game Boy Macro if you do a little extra soldering.

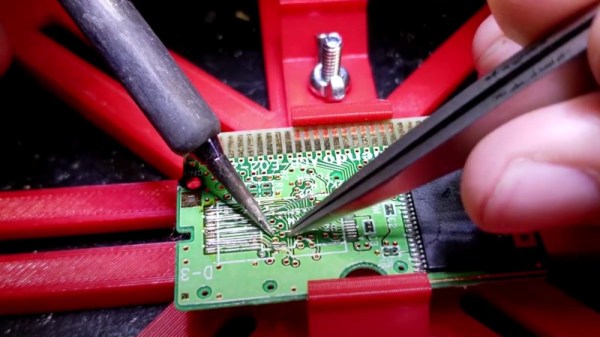
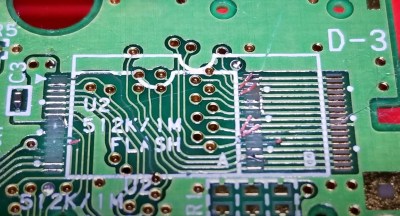
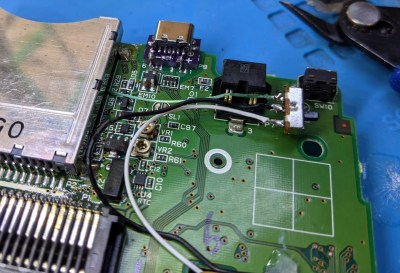
It turns out that there are two test points on the original DS motherboard where you can pick up the signal for the top and bottom screens respectively. With just three wires and a simple switch, you can select which signal gets fed into the bottom screen in real-time with no image degradation. Now, this won’t do you any good on games that make constant use of both the top and bottom DS displays, but for many titles, the bottom screen was used for little more than a map or inventory display that you only need to glance at occasionally.

Installed screen switch. Note USB-C upgrade module.

With the ability to switch between them at will, a large number of DS games are perfectly playable with just one screen. Interestingly, the touch panel still works the same regardless of which video feed is being pipped in; so if you memorize which areas need to be touched to perform different actions, you don’t even need to flip the images. In the video below, [Facelesstech] demonstrates the concept with New Super Mario Bros, which would otherwise be unplayable as the action usually is shown on the top screen.

This hack is only possible because the two displays on the DS are identical beyond the touch overlay, which as we learned during a previous deep-dive into the technology behind this revolutionary handheld, was a trick Nintendo used to squeeze as much performance as they could out of its relatively meager 3D hardware. Unfortunately, it seems like the modification is much harder to pull off on the DS Lite, so it wouldn’t be compatible with the slick Game & Watch styled Game Boy Macro we covered recently. Continue reading “Game Boy Macro Build Retains DS Compatibility”

Original Game Boy Powered Up With GBA Motherboard

The Game Boy DMG-01 is about as iconic as a piece of consumer electronics can get, but let’s be honest, it hasn’t exactly aged well. While there’s certainly a number of games for the system that are still as entertaining in 2021 as they were in the 80s and 90s, the hardware itself is another story entirely. Having to squint at the unlit display, with its somewhat nauseating green tint, certainly takes away from the experience of hunting down Pokémon.

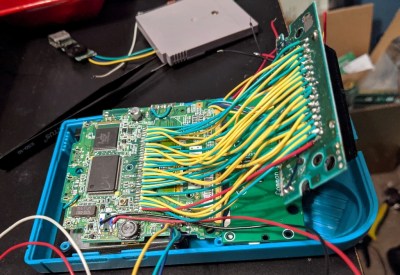
Which is precisely why [The Poor Student Hobbyist] decided to take an original Game Boy and replace its internals with more modern hardware in the form of a Game Boy Advance (GBA) SP motherboard and aftermarket IPS LCD panel. The backwards compatibility mode of the GBA allows him to play those classic Game Boy and Game Boy Color games from their original cartridges, while the IPS display brings them to life in a way never before possible.

Relocating the cartridge connector took several attempts.

Now on the surface, this might seem like a relatively simple project. After all, the GBA SP was much smaller than its predecessors, so there should be plenty of room inside the relatively cavernous DMG-01 case for the transplanted hardware. But [The Poor Student Hobbyist] made things quite a bit harder on himself by deciding early on that there would be no external signs that the Game Boy had been modified; beyond the wildly improved screen, anyway.

That meant deleting the GBA’s shoulder buttons, though since the goal was always to play older games that predated their addition to the system, that wasn’t really a problem. The GBA’s larger and wider screen is still intact, albeit hidden behind the Game Boy’s original bezel. It turns out the image isn’t exactly centered on the physical display, so [The Poor Student Hobbyist] came up with a 3D printed adapter to mount it with a slight offset. The adapter also allows the small tactile switch that controls the screen brightness to be mounted where the “Contrast” wheel used to go.

An incredible amount of thought and effort went into making the final result look as close to stock as possible, and luckily for us, [The Poor Student Hobbyist] did a phenomenal job of documenting it for others who might want to make similar modifications. Even if you’re not in the market for a rejuvenated Game Boy, it’s worth browsing through the build log to marvel at the passion that went into this project.

Some would argue [The Poor Student Hobbyist] should have just put a Raspberry Pi into a Game Boy case and be done with it, but where’s the fun in that? Sure it might have been a somewhat better Bitcoin miner, but there’s something to be said for playing classic games on real hardware.

GBA Gets Homebrew USB Charging Upgrade

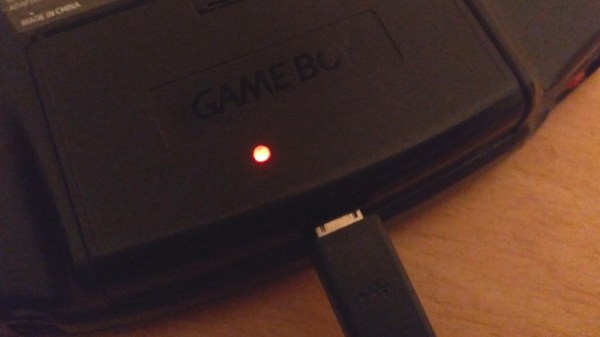
Sure there are pre-made kits to add a rechargeable battery and USB-C compatibility to Nintendo’s venerable Game Boy Advance, but [HorstBaerbel] thought he could throw together something similar for a fraction of the price. Plus, he wouldn’t have to wait on shipping. The end result might not be quite as polished, but it’s certainly impressive for what’s essentially a junk bin build.

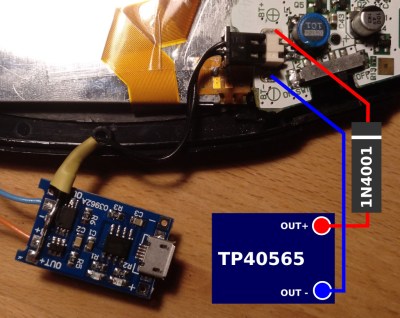
The star of the show is the popular TP4056 lithium-ion charger module. [HorstBaerbel] went with the more common micro USB version, but these boards are also available with USB-C should you want to embrace the future. The module fits nicely inside the original battery compartment while while still leaving room for a 1,000 mAh pouch cell. The 4.2 V output of the fully charged battery is a bit too high for the Game Boy’s liking, so he used the forward voltage drop of a diode to bring it down to a more acceptable 3.5 V.

Naturally this does waste a good deal of energy, especially compared to the DC-DC converters used in commercial offerings like the CleanJuice, but it still delivers a respectable seven hours of runtime. The only issue with this modification seems to be that you’ve got just five minutes to save your progress and shut down when the GBA’s low-battery light goes on; but what’s life without a little excitement?

While not nearly extreme as some of the other GBA modifications we’ve seen over the years, this project is yet another example of the seemingly unlimited hacking potential of Nintendo’s iconic Game Boy line.

Nintendo’s GBA Dev Board Could Pass For Modern DIY

When the Game Boy Advance came on the scene in 2001, it was a pretty big deal. The 32-bit handheld represented the single biggest upgrade the iconic Game Boy line had ever received, not only in terms of raw processing power, but overall design. It would set the state-of-the-art in portable gaming for years, and Nintendo was eager to get developers on board.

Which could explain why the official GBA development kit, recently shown off by [Hard4Games], looks like something that was built in a hackerspace. It’s pretty common for console development systems to look more like boxy 1990s computers than the sleek injection molded units that eventually take up residence under your television, but they don’t often come in the form of a bare PCB. It seems that Nintendo was in such a rush to get an early version of their latest handheld’s guts out to developers that they couldn’t even take the time to get a sheet metal case stamped out for it.

The development board doesn’t like later GBA games.

All of the principle parts of the final GBA are here, and as demonstrated in the video after the break, the board even plays commercially released games. Though [Hard4Games] did find that some titles from the later part of the handheld’s life had unusual graphical glitches; hinting that there are likely some low-level differences that don’t manifest themselves unless the developer was really digging deep to squeeze out all the performance they could.

The board also lacks support for Game Boy and Game Boy Color games, though this is not wholly surprising. When an older game was inserted into a GBA, the cartridge would physically depress a switch that enabled a special 8080-based coprocessor that existed solely for backwards compatibility. Adding that hardware to a development board would have made it more expensive and added no practical benefit. That said, [Hard4Games] does point out that there appears to be a unpopulated area of the board where the backwards compatibility switch could have been mounted.

Hackers have always been enamored with the Game Boy, so it’s fitting to see that the official development kit for the final entry into that storied line of handhelds looked a lot like something they could build themselves. If anyone feels inclined to build their own “deconstructed” GBA in this style, you know where to find us.

Continue reading “Nintendo’s GBA Dev Board Could Pass For Modern DIY”

ESP32 Refines Game Boy Bluetooth Adapter

Last year we brought word of a project from [Shyri Villar] that turned a stock Game Boy Advance into a Bluetooth controller by exploiting the system’s “multiboot” capability. The prototype hardware was a bit ungainly, but the concept was certainly promising. We’re now happy to report that the code has been ported over to the ESP32, making the project far more approachable.

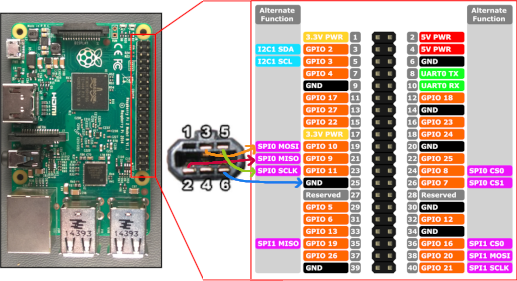
To clarify, the ESP32 is now the only component required for those who want to play along at home. Just five wires connect the microcontroller to the GBA’s Link Cable connector, which is enough to transfer a small ROM over to the system and ferry user input to the Bluetooth hardware. Even if you aren’t interested in using it as a game controller, this project is an excellent example of how you can get your own code running on a completely stock GBA.

While the original version of the hardware was a scrap of perfboard dangling from the handheld’s expansion connector, reducing the part count to one meant [Shyri] was able to pack everything into a tidy enclosure. Specifically, a third party GBA to GameCube link cable. This not only provides a sleek case for the microcontroller that locks onto the handheld with spring loaded tabs, but also includes a male Link Cable connector you can salvage. It looks as though there’s a bit of plastic trimming involved to get the ESP32 to fit, but otherwise its a very clean installation.

The GBA will be 20 years old soon, but that doesn’t mean the hardware and software exploration is over. The original Game Boy is over 30, and people are still giving talks about it.

RuneScape GBA Controller Is A Nostalgic Mash-Up

For gamers, the early 2000s certainly stand out as a memorable era. The dawn of the 21st century ushered in the sixth generation of home video game consoles, with Sony, Nintendo, and Microsoft all releasing their systems within a few years of each other. Nintendo also released their Game Boy Advance at around the same time, representing a minor revolution for mobile gaming. On the PC front, a free-to-play MMORPG called RuneScape was redefining people’s expectations of browser-based software.

Now, thanks to modern technology and the expert guidance of [TiKevin83], these varied bits of video game history can be used in conjunction for maximum rose-tinting effect. Using homebrew software on the GameCube and a healthy collection of wires and adapters, the GBA can be used as a controller for your adventures through the realm of Gielinor. After nearly two decades, the dreams of gamers everywhere have come true.

Well, that might be a stretch. In fact, we’d wager that nobody in human history has ever looked at the GBA and thought it would be a particularly good controller for an MMORPG. Watching the video after the break, it’s not hard to see why. Using the handheld system’s digital pad to control the mouse in RuneScape looks to be precisely as clunky as you’d imagine. But of course, that’s hardly the point.

So how is it accomplished? A homebrew tool for the GameCube’s “Game Boy Player” accessory allows the GBA, when connected to the console via the appropriate adapter cable, to mimic a standard controller. Once the GBA is running in this mode, it can then be connected to the computer using a Wii U to USB adapter. Finally, the program JoyToKey is used to map the GBA’s buttons to mouse and keyboard input for “Old School” RuneScape.

If you’d like to do something similar but aren’t quite committed enough to collect up all the Nintendo-branded ephemera this method requires, you may be interested in this DIY adapter that allows the venerable GBA to be used as a standard Bluetooth controller.

Continue reading “RuneScape GBA Controller Is A Nostalgic Mash-Up”

Booting The Game Boy Advance Into Bluetooth

While it might not be quite as revered as its predecessor, the Game Boy Advance is arguably the peak of “classic” handheld gaming, before things got all 3D and dual screen on us. One of its best features is the so-called multiboot mode, which allows the GBA to download a program from its link port. Officially this feature was introduced so you could play multiplayer with your friends even if they didn’t have the game cartridge, but naturally it didn’t take long for hackers to realize you can use it to run arbitrary code on an unmodified system.

[Shyri Villar] has put this capability to excellent use with a plug-in board that allows a stock GBA to be used as a general purpose Bluetooth HID controller. Now you can emulate GBA games on your computer while using the real thing as your input device. Or if that’s a bit too redundant for you, then any 2D game you think could benefit from the classic Game Boy control layout.

An ATmega328P on the board initiates the multiboot sequence when the system powers up, and feeds it the GBA program that’s stored on a W25Q32 chip. Once the code is running on the GBA, it communicates with a common HC-05 Bluetooth module through the same link port. To perform this handoff, [Shyri] uses a HCF4066 switch IC to literally change the pin assignments in the connector from the SPI used to upload the ROM to the UART lines of the Bluetooth module.

With everything powered from the 3.3 V provided by the GBA’s link port, and some software niceties like the ability to store Bluetooth pairing information for subsequent device connections, this is actually a very practical gadget. The fact that you can do this on a completely stock GBA is very compelling, especially considering some of the previous Bluetooth Game Boy modifications we’ve seen. Granted the market might be somewhat limited, but with a custom PCB and a 3D printed enclosure, we could see this potentially being a popular accessory for the classic handheld. It’s not like it can be any more niche than using the GBA as a remote display for your multimeter.