Pen-Plotter Firmware Written Completely In Ada

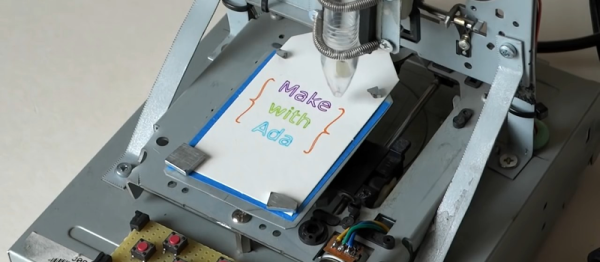
[Fabian Chouteau] built a plotter out of CD-ROM parts. Yawn, you say? Besides being a beautiful physical build, this one has a twist. He wrote the software and firmware for the entire project himself, in Ada.

Ada is currently number two on our list of oddball programming languages that should be useful for embedded programming. It’s vaguely Pascal-y, but with some modern object-oriented twists. It was developed for safety-critical, real-time embedded systems (by the US Department of Defense), and is used in things like airplanes, rockets, and the French TGV trains. If that sounds like overkill for your projects, [Fabian]’s project shows that it’s still very tractable.

In his GitHub, he re-implements the GRBL G-code generator and then writes a GUI front-end for it. In his writeup, he mentions that the firmware and its simulator for the front-end use exactly the same code which is quite a nice trick, and guarantees no (firmware) surprises when moving from the modelled device to the real thing.

We looked quickly around for Ada resources and came up with: GNAT, the GNU Ada compiler, and its derivatives: GNAT for ARM (STM32-flavor), ARM-Ada (LPC21xx flavor), AVR-Ada, and MSP430-Ada.

Any of you out there use Ada in embedded work? We’d love to hear your thoughts.

Continue reading “Pen-Plotter Firmware Written Completely In Ada”

Hackaday Prize Entry: The Green Machine

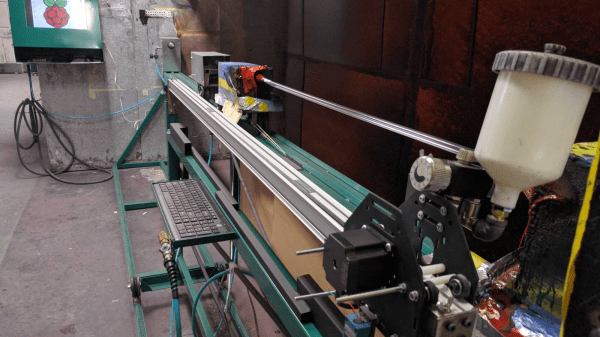
For Hackers, rapid prototyping is made easier using basic building blocks such as the Raspberry Pi, Arduino and the huge variety of add on shields for home brew projects. But we don’t see too many real world Industrial applications or machines built using these off-the-shelf electronics. [SlyScience] built The Green Machine – an industrial grade, automated spray painting device to help coat polycarbonate tubes consistently.

The Green Machine is essentially a linear drive that can move a spray gun across a spinning clear tube and coat it evenly with the desired color. These tubes are used as color filters – they slide over standard T5, T8 or T12 fluorescent lamps – and are used in advertising, special effects, films and similar applications. For almost 10 years prior to this machine, the task was done manually. The HPLV (high pressure, low volume) spray gun used for this process needed skilled hands to get consistent results. It was easy to ruin a tube and cleaning them was not possible. [SlyScience] figured things out on the go – teaching himself and figuring out all of the software and hardware pieces of the puzzle. The welded steel frame is about the only “custom” part in this build. Everything else is COTS. Check out the video of The Green Machine in action below, and if you have any tips to help improve the build, chime in with your comments.

Continue reading “Hackaday Prize Entry: The Green Machine”

A Wooden Based, CD Stepper Scribbler

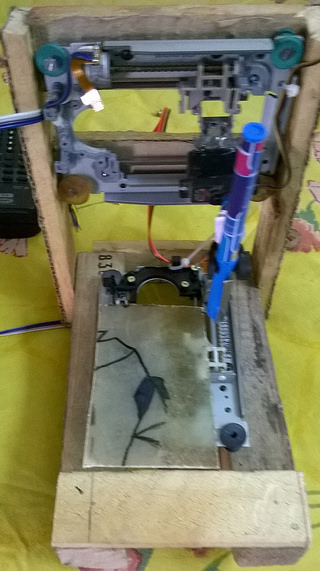
[Rohit Gupta] is back with a plotter made from scrap CD drives and an old RC servo. [Rohit] is working on hacks to create CNC machines and sharing his activities with the world. His CNC design calls for salvaged stepper motors so he first built a device for testing them. You’ve got to admire his use of the language. He named his plotter project ‘Sketchy’ and his motor tester is called ‘Easy Peasy’.

sketchyAfter finding some CD drives at the scrap pile he tore them down to test with Easy Peasy. The raw materials for the frame came from a wooden crate for an AC unit but he didn’t just start cutting it up. Nope, first he created plans with CAD; now that’s a hack you have to admire.

With the steppers tested working, and the base build under way he moved onto the control system. Originally the hardware was demonstrated using an MSP430. This worked, but a flaw in the hardware design was found. With the pen attached directly to the servo horn, it would draw a long line when being rotated away from the drawing position.

The fix is a replacement servo setup which lifts the pen up instead of rotating it. But that showed that the drawing surface wasn’t smooth. The pen kept missing places or getting caught and destroyed. The use of a spring loaded pen solved this issue. Success!

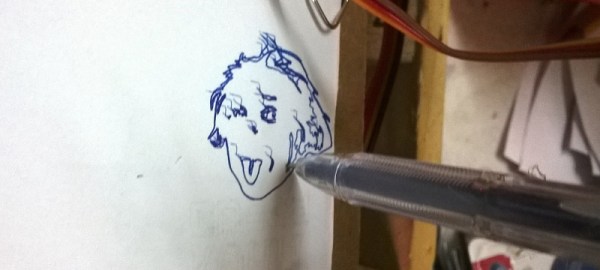
One further change migrated away from the MSP430 in favor of an Arduino Pro Mini in order to use a GRBL library instead of the g-code generator which was performing questionably. Since he likes Hackaday so much one of his first attempts with the final version of Sketchy was our logo, shown in the video after the break.

When we last saw [Rohit] he had created a fancy PCB ruler to measure components.

Continue reading “A Wooden Based, CD Stepper Scribbler”

PVC CNC

PVC CNC Machine Build Results In A Great Learning Experience

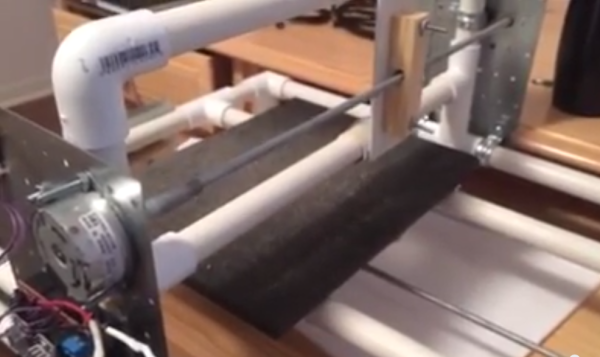
Hobby level CNC machines are fun to use and are a great tool to make your projects with. So how does a CNC newb get started? Our opinion is that it’s best to jump right in and get doing. [WTH] wanted to learn more about CNC machines and decided to build his own using parts that were kicking around his house.

As you can see, the frame is made from PVC pipe. In addition, the linear rails are also PVC and the linear bearings….. larger diameter PVC. Scavenged stepper motors and threaded rod are responsible for moving the X and Y axes. Electronics-wise, an Arduino Uno running GRBL and a Protoneer CNC Shield outfitted with StepSticks drive the motors. Here’s a test drawing completed by the machine:

PVC CNC

Admittedly, this CNC machine won’t be milling out steel parts any time soon but that is not the point. [WTF] has learned the mechanics, electronics and software associated with CNC machines and that was the point of the project. We are looking forward to seeing how his next machine comes out.

This isn’t the first PVC CNC machine we’ve seen on Hackaday, check out this unorthodox one.

USB-Parallel-GRBL

USB To DB25 Adapter Uses GRBL For Parallel Port CNC Communication

With the continuing manufacture of new computers, there is a clear and obvious trend of the parallel port becoming less and less common. For our younger readers; the parallel port is an interface standard used for bi-directional communication between a computer and a variety of peripherals. The parallel port’s demise is partially due to the invention of the USB standard.

If tinkering with CNC Machines is one of your hobbies then you are familiar with the parallel port interface being fairly popular for CNC control board connections. So what do you do if your new fancy computer doesn’t have a parallel port but you still want to run your CNC Machine? Well, you are certainly not stuck as [Bray] has come up with a USB to Parallel Port Adapter solution specifically for CNC use.

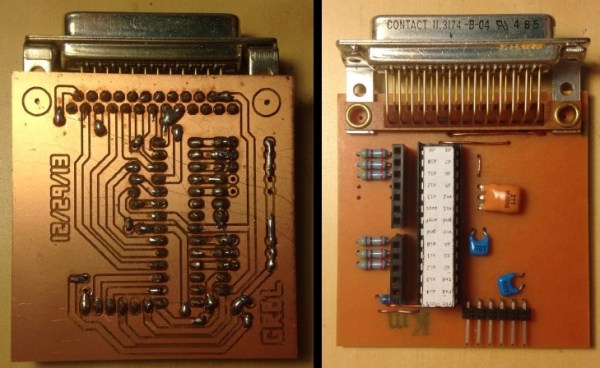
A cheap off-the-shelf USB to DB25 adapter may look like a good idea at first glance but they won’t work for a CNC application. [Bray’s] adapter is Arduino-based and runs GRBL. The GRBL code is responsible for taking the g-code commands sent from the computer, storing them in a buffer until they are ready to be converted to step and direction signals and sent to the CNC controller by way of the parallel port DB25 connector. This is a great solution for people needing to control a CNC Machine but do not have a parallel port available.

[Bray] is using a Raspberry Pi running GRBLweb to control his adapter board. However, there are other programs you can use to communicate with GRBL such as Universal G-Code Sender and GRBL Controller.

The board has been created in Eagle PCB Software and milled out using [Bray’s] CNC Router. The design is single-sided which is great for home-brew PCBs. He’s even made a daughter board for Start, Hold and Reset input buttons. As all great DIYers, [Bray] has made his board and schematic files available for others to download.

The Pi CNC Controller

pi

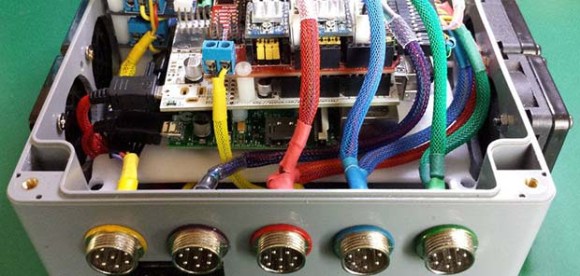
Back in the olden days, the latest and greatest CNC machines had minicomputers bolted onto their frames, replete with paper tape readers and seven segment displays. For the home CNC machinist of today, these hulking electronic brains are replaced with something a little more modern – desktop computers with parallel ports. Having a box filled with computers and motor drivers is just too cool though, and this tiny Raspberry Pi CNC controller fits the bill quite nicely.

The controller uses a Raspberry Pi as the brains of the device, but there aren’t too many options out there for stepper motor control in Pi land. There are, however, dozens of CNC shields or the Arduino. The Pi AlaMode board is able to provide voltage level conversion between the CNC shield and the pi, and also has the nice bonus of a battery-backed real time clock.

With some proper connectors, lighted buttons, and a beautiful cable sleeving job, this Pi CNC controller would be well suited for any of the desktop CNC  or engraving builds we see from time to time.


GRBL Compatible Arduino CNC Shield

By the time you get to the point in a home CNC build where you’re adding control electronics you may be ready for the simplest means to an end possible. In that case, grab your Arduino and heat up that etching solution to make your own GRBL compatible shield.

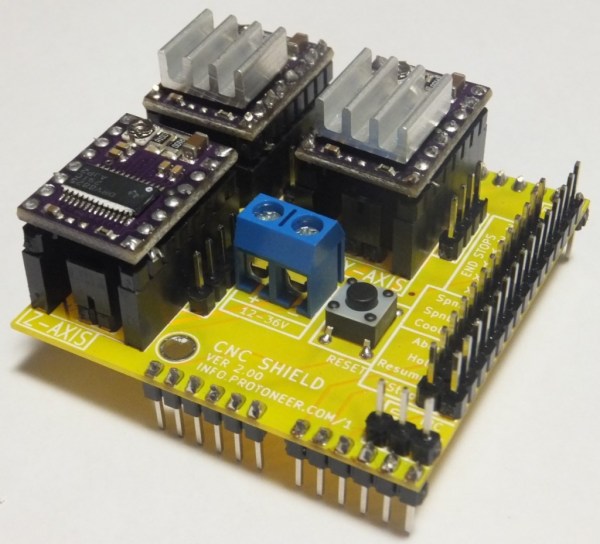
This familiar footprint manages to contain everything you need for a three-axis machine. The purple boards slotted into the pairs of SIL headers are Pololu Stepper motor drivers. Going this route makes replacing a burnt out chip as easy as plugging in a new module. The terminal block in the center feeds the higher voltage rail necessary for driving the motors. The DIL header on the right breaks out all of the connections to the limiting switches (two for each axis), spindle and coolant control, as well as three buttons for pause, resume, and abort. There’s even a header for SPI making it easier to add  custom hardware if necessary.

This is a dual-layer board which may not be ideal for your own fabrication process. [Bert Kruger] posted his Gerber files for download if you want to put in a small run with OSH Park or a similar service.