Multitouch Tower Defense Uses Physical Towers

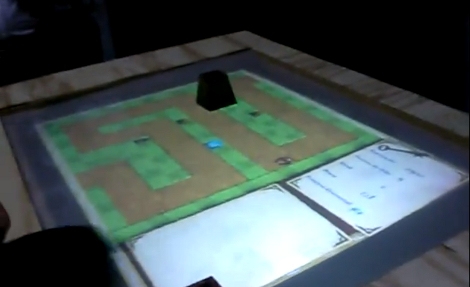
If you’re tired of playing flash games with a mouse, perhaps you’ll draw inspiration from this project. Arthur built a multitouch interface that uses objects as part of the control scheme. In the image above you can see that the game board for a tower defense game is shown on the display. There is a frustum-shaped game piece resting on the surface. Just place that piece where you want to build your next tower, and then select the tower type from the list.

The controller itself is pretty straight-forward. The surface is a piece of acrylic topped with some light diffusing material. A projector shines through another acrylic window on the side of the unit, reflecting on a mirror positioned at a 45 degree angle. As for the multitouch detection, the hardware uses a series of UV LEDs along with a modified PS3 eye camera. [Arthur] chose the reacTIVision software package to process the input from the camera. Check out a couple of videos after the break to see the hardware, and some game play.

Continue reading “Multitouch Tower Defense Uses Physical Towers”

Mini IR Theremin

[Chris] at PyroElectro sent in a great 8-part write-up of a miniature infrared theremin.

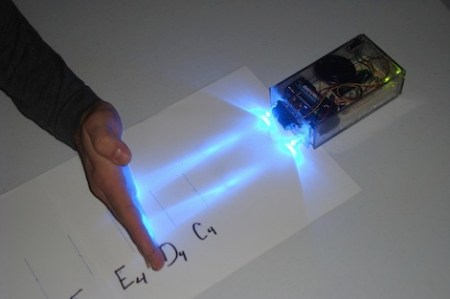
The theremin is based on a PIC microcontroller and an infrared distance sensor.  The build log goes through the theory of operations for the IR sensor and tone generation. [Chris] definitely does a great job showing the math that went into the design.

Although this project isn’t a true theremin because it operates on light like a few other projects we’ve covered in the past, it’s easier to play because of the hard-coded notes. The build does show some promise though – he could likely expand it to use more accurate ultrasonic sensors or use, “two proximity sensors, one for treble and one for bass like an accordion.”

The theremin is usually played with both hands providing a continuous pitch and volume. This project features hard-coded, discrete notes, so we’re wondering about the possibility of implementing MIDI on this IR theremin. The original MIDIbox was based on the same microcontroller as this project, so it’s definitely a possibility.

Check out the video of the theremin in action below.

Continue reading “Mini IR Theremin”

Infrared Control For Appliances

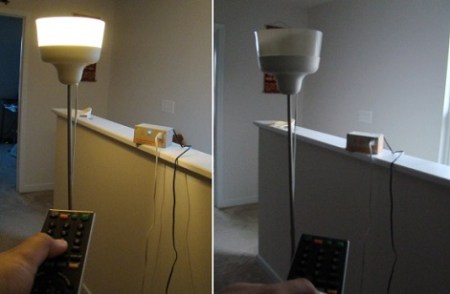
[RB] at Embedded Lab sent in a great guide on how to control appliances with a remote control using a really clever implementation of a decade counter and IR receiver.

The build itself is very simple – just a relay connected to mains power and a handful of resistors and transistors. The device is controlled with a decade counter and an infrared module usually found tucked away in the bezel of a TV.

When everything is plugged in, the first pulse from the remote switches the relay on, providing power to the outlet. When a second pulse is received, the reset pin on the decade counter is activated, setting the device back to its original off state. It’s a pretty clever build, and could be built with parts lying around the bench.

The project is powered through wall power with the help of a transformer and a 7805 regulator, but we think the size could be reduced with a pass-through power enclosure – the circuit certainly is small enough. In all, a very nice, low component count build.

Measuring RPM With Reflective Sensors

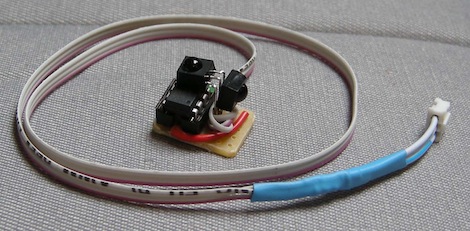
[Arao] wanted to measure the RPM of a spinning wheel using parts that he could scavenge from his junk box. A bit of thought led him to build a reflective sensor which can measure the spinning of a wheel (translated).

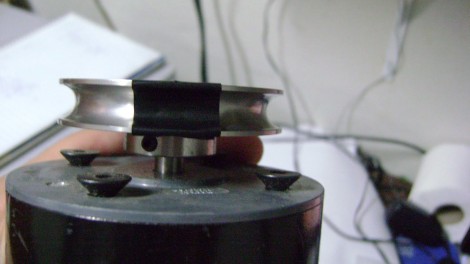
He got his hands on an infrared phototransistor which had been used as part of the remote control for some consumer electronics. Snooping around with his multimeter helped him establish the pin out of the device. By positioning an IR LED inside of a shroud, yet adjacent to the phototransistor, he can measure the intensity of the LED’s light as it is reflected off of nearby surfaces. The pulley seen above has a piece of electrical tape on it. When this passes by the LED, less of the infrared light is reflected and the drop in intensity is picked up by the phototransistor. [Arao] made the system rock-solid by rolling an LM358 op-amp into the circuit. He’s posted the schematic as well as some screen shots from an oscilloscope during testing.

The Infrared Graduation Cap

It’s graduation time for many high schoolers, and while many students would love to decorate their caps, administration generally looks down upon this practice. [Victor], however, thought of a way around this.

The human eye cannot see infrared light, but camcorders generally can. Putting these two concepts together with a couple of infrared LEDs, [Victor] was able to make a cap that displayed his decoration in everyone’s “digital memory”, but wouldn’t be detected until the video of the offense was displayed. Hopefully by the time the prank is detected, [Victor] will have successfully graduated and presumably gone on to other pursuits.

An ATmega 168 controls this hat to display his message, “Congratulations Class of 2011,” in Morse code. What a creative use of both old and new technology to pull off an awesome graduation prank. Be sure to check out the video after the break to see how everything was put together. Continue reading “The Infrared Graduation Cap”

Electronic Bird House Monitoring Goes A Few Steps Further

[Stephen Albers] offers his avian friends a lot of extras with this electronically monitored bird house. This will not only give you a look at what’s going on inside, but provide a source for several other bits of data as well.

First off, a camera has been mounted to the underside of the roof. This looks down on the nesting area and features night vision so that you can peek in any time day or night. He used a WiFi webcam that operates separately from the other electronics.

With the remainder of the setup he is able to harvest temperature and humidity data inside, temperature outside, force on the bottom of the house (although this turned out to be less useful than anticipated), and a in-and-out count for the doorway provided by an IR transmitter/receiver pair.

This offers quite a bit more than the last bird house project we saw. That one also left a lot to be desired as far as protecting the electronics. [Stephen] didn’t skip on that kind of protection. Most of the electronics are housed in an acrylic chamber in the base of the house. The sensors find themselves nestled in plastic enclosures, although some work needs to be done to ensure that the temperature and humidity sensors will still function correctly with this setup.

DSLR Infrared Camera Conversion

ir_conversion

[Jerry] recently got a shiny new DSLR camera and was looking to do something with the old Pentax DSLR it replaced. Having performed a few point and shoot IR conversions in the past, he was pretty confident he could tackle this conversion without too much trouble.

He located the service manual for the camera and got busy taking it apart. He had to desolder the main board to get to the CCD block, where the sensor, IR cut filter, and the shake reduction motors are all located. The IR cut filter was pried off without too much trouble as it is only secured with a clip and an adhesive foam gasket.

Once things were disassembled, the real work began. He had a little trouble cutting the IR filter he purchased, so it took a little bit of elbow grease to get things exactly the way he wanted. Once he got the filter in place, he carefully re-mounted the sensor block to ensure that it was set at the proper height.

Once things were fully reassembled, he tried taking a few test shots, but found that there were some focus issues due to the IR filter being thicker than the original IR cut filter. A few manual tweaks in the camera’s debug menu and he was in business.

Be sure to check out his photo stream to take a look at some of the pictures he snapped with his new IR camera.