Pen input has never really taken off in the computing mainstream, though it’s had somewhat of a renaissance in the last decade or so. Various smartphones and tablets are shipping with the technology, and some diehard users swear by it as the best way to take notes on the go. Recently, researchers at the Sensing, Interaction and Perception Lab at ETH Zurich have been working on Flashpen, a high-fidelity pen interface for a wide range of applications.
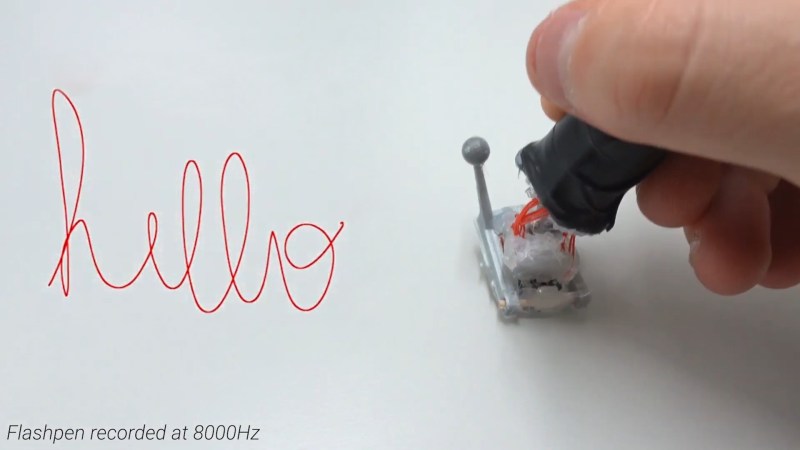
 The fundamental technology behind the pen is simple, with the device using an optical flow sensor harvested from a high-end gaming mouse. This is a device that uses an image sensor to detect the motion of the sensor itself across a surface. Working at an update rate of 8 KHz, it eclipses other devices in the market from manufacturers such as Wacom that typically operate at rates closer to 200Hz. The optical sensor is mounted to a plastic joint that allows the user to hold the pen at a natural angle while keeping the sensor parallel to the writing surface. There’s also a reflective sensor on the pen tip which allows cameras to track its position in space, for use in combination with VR technology.
The team show off the device being used in several ways, primarily in VR tasks, but also in simple handwriting and coloring work. It’s a project that could readily be replicated by any eager experimenter by gutting a gaming mouse and getting down to work; our writers will expect six of your submissions by June 1st to the tipsline. Those eager to learn more can check out the project paper, and may also find the team’s TapID technology interesting. Video after the break. Continue reading “Flashpen Is A High Fidelity Pen Input Device”