For most of human industrial history, the blacksmith was the indispensable artisan. He could fashion almost anything needed, from a simple hand tool to a mechanism as complex as a rifle. Starting with the most basic materials, a hot forge, and a few tools that he invariably made himself, the blacksmith was a marvel of fabrication.
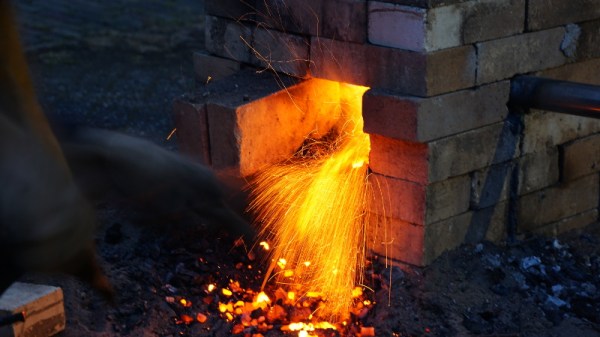
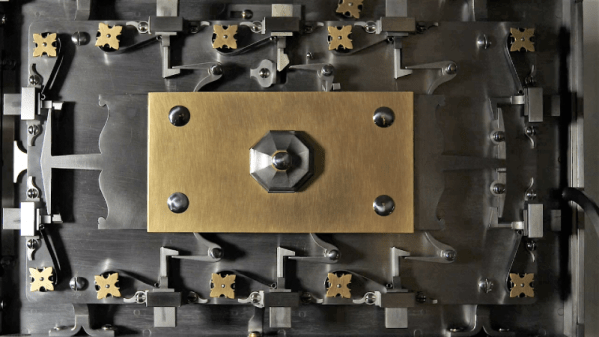
If you have any doubt how refined the blacksmith’s craft can be, feast your eyes on [Seth Gould]’s masterpiece of metalwork. Simply called “Coffer”, [Seth] spent two years crafting the strongbox from iron, steel, and brass. The beautifully filmed video below shows snippets of the making, but we could easily watch a feature-length film detailing every aspect of the build. The box is modeled after the strongboxes built for the rich between the 17th and 19th centuries, which tended to favor complex locking mechanisms that provided a measure of security by obfuscation. At the end of the video below, [Seth] goes through the steps needed to unlock the chest, each of which is filled with satisfying clicks and clunks as the mechanism progresses toward unlocking. The final reveal is stunning, and shows how much can be accomplished with a forge, some files, and a whole lot of talent.
If you’ve never explored the blacksmith’s art before, now’s the time. You can even get started easily at home; [Bil Herd] will show you how.
I grew up with a blacksmith for a parent, and thus almost every metalworking processes seems entirely normal to have as part of everyday life throughout my childhood. There seemed to be nothing we owned that couldn’t be either made or repaired with the application of a bit of welded steel. Children of blacksmiths grow up with a set of innate heavy hardware hacker or maker skills that few other young people acquire at that age. You know almost from birth that you should always look away from the arc when dad is welding, and you also probably have a couple of dictionary definitions ready to roll off the tongue.
The first is easy enough, farrier. A farrier makes and fits horseshoes. Some blacksmiths are farriers, many aren’t. Sorry, my dad made architectural ironwork for upmarket houses in London when he wasn’t making improvised toys for me and my sisters, he didn’t shoe horses. Next question.
The second is a bit surprising. Wrought iron. My dad didn’t make wrought iron.
But… Hang on, you say, don’t blacksmiths make wrought iron? At which point the floodgates open if you are talking to a blacksmith, and you receive the Wrought Iron Lecture.
As with the age-old panic after realizing you have left an oven on, a candle lit, and so on, a soldering tool left on is a potentially serious hazard. Hackaday.io user [Nick Sayer] had gotten used to his Hakko soldering iron’s auto shut-off and missed that feature on his de-soldering gun of the same make. So, what was he to do but nip that problem in the bud?
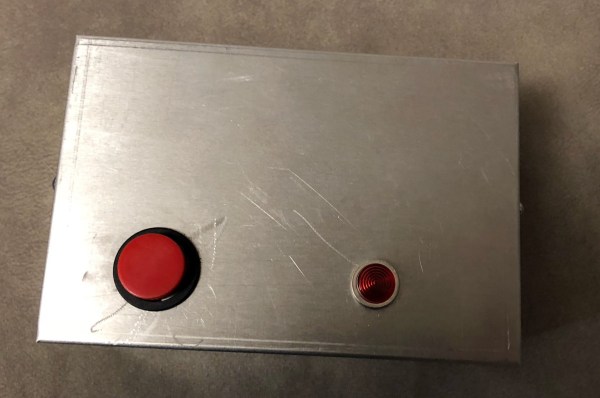
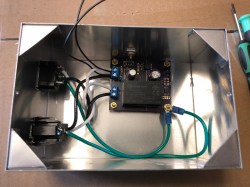
Instead of modding the tool itself, he built an AC plug that will shut itself off after a half hour. Inside a metal project box — grounded, of course — an ATtiny85 is connected to a button, an opto-isolated TRIAC AC power switch, and a ‘pilot’ light indicating power. After a half hour, the ATtiny triggers the opto-isolator and turns off the outlet, so [Sayer] must push the button if he wants to keep working. He notes you can quickly double-tap the button for a simple timer reset.
Seeing the popularity of the TS-100 soldering iron, GitHub user [ole00] found himself desirous of a few of its features, but was put off by its lack of a power supply. What is a hacker to do? Find a cheaper option, and hack it into awesomeness.
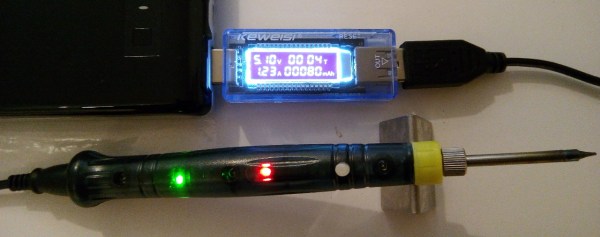
[ole00] stumbled across the inexpensive ZD-20U and — despite a handful (sorry!) of issues — saw potential: it’s compact, lightweight, and powered via a USB power cable. Wanting to use as much of the ZD-20U’s original board as possible, the modifications were restricted to a few trace cuts and component swaps. The major change was swapping out the 555 timer IC controlling the iron with am ATtiny13a MCU to give it a bit more control.
As with many tasks, robots may soon be ironing our clothes for us before we leave for work. Built by a team from the University Carlos III de Madrid’s robotics lab in Getafe, Spain, TEO is a highly articulated robot, that can climb stairs, open doors, and has recently added ironing to its skill set.
Data from a depth-sensing camera in TEO’s head is combed over by an algorithm, breaking it down into thousands of points — 0 being smooth and 1 a defined line in the clothing. Comparing those point values to those of its neighbours allows TEO to identify wrinkles without any preexisting notion of what a freshly-pressed garment looks like.
The nuclear age changed steel, and for decades we had to pay the price for it. The first tests of the atomic bomb were a milestone in many ways, and have left a mark in history and in the surface of the Earth. The level of background radiation in the air increased, and this had an effect on the production of steel, so that steel produced since 1945 has had elevated levels of radioactivity. This can be a problem for sensitive instruments, so there was a demand for steel called low background steel, which was made before the trinity tests.
The production of steel is done with the Bessemer process, which takes the molten pig iron and blasts air through it. By pumping air through the steel, the oxygen reacts with impurities and oxidizes, and the impurities are drawn out either as gas or slag, which is then skimmed off. The problem is that the atmospheric air has radioactive impurities of its own, which are deposited into the steel, yielding a slightly radioactive material. Since the late 1960s steel production uses a slightly modified technique called the BOS, or Basic Oxygen Steelmaking, in which pure oxygen is pumped through the iron. This is better, but radioactive material can still slip through. In particular, we’re interested in cobalt, which dissolves very easily in steel, so it isn’t as affected by the Bessemer or BOS methods. Sometimes cobalt is intentionally added to steel, though not the radioactive isotope, and only for very specialized purposes.
Recycling is another reason that modern steel stays radioactive. We’ve been great about recycling steel, but the downside is that some of those impurities stick around.
Why Do We Need Low Background Steel?
Imagine you have a sensor that needs to be extremely sensitive to low levels of radiation. This could be Geiger counters, medical devices, or vehicles destined for space exploration. If they have a container that is slightly radioactive it creates an unacceptable noise floor. That’s where Low Background Steel comes in.
So where do you get steel, which is a man-made material, that was made before 1945? Primarily from the ocean, in sunken ships from WWII. They weren’t exposed to the atomic age air when they were made, and haven’t been recycled and mixed with newer radioactive steel. We literally cut the ships apart underwater, scrape off the barnacles, and reuse the steel.
Fortunately, this is a problem that’s going away on its own, so the headline is really only appropriate as a great reference to a popular movie. After 1975, testing moved underground, reducing, but not eliminating, the amount of radiation pumped into the air. Since various treaties ending the testing of nuclear weapons, and thanks to the short half-life of some of the radioactive isotopes, the background radiation in the air has been decreasing. Cobalt-60 has a half-life of 5.26 years, which means that steel is getting less and less radioactive on its own (Cobalt-60 from 1945 would now be at .008% of original levels). The newer BOS technique exposes the steel to fewer impurities from the air, too. Eventually the need for special low background steel will be just a memory.
Oddly enough, steel isn’t the only thing that we’ve dragged from the bottom of the ocean. Ancient Roman lead has also had a part in modern sensing.
If your favourite programming language is solder, they you’ve surely worked your way through a bunch of irons and controllers over your hacker existence. It’s also likely you couldn’t pick one single favourite and ended up with a bunch of them crowding your desk. It would be handy to have one controller to rule them all. That’s just what [sparkybg] set out to do by building his Really Universal Soldering Controller. His intent was to design a controller capable of driving any kind of low voltage soldering iron which used either an in-line or separate temperature sensor (either thermocouple or resistive PTC).
This project has really caught on. [sparkybg] announced his build about two years back and since then many others have started posting details of their own Unisolder 5.2 builds. [zed65] built the version seen to the right and [SZ64] assembled the boards shown at the top of this article.
The controller has been proven to work successfully with Iron handles from Hakko, Pace, JBC, Weller, Ersa, as well as several Chinese makes. Getting the controller to identify one of the supported 625 types of iron profiles consists of connecting two close tolerance resistors across the relevant pins on the 9-pin shell connector. This is a brilliant solution to help identify a large variety of different types of irons with simple hardware. In the unlikely situation where you have a really vague, unsupported model, then creating your own custom profile is quite straightforward. The design is highly discrete with an all analog front end and a PIC32 doing all the digital heavy lifting.
To get an idea of the complexity of his task, here is what [sparkybg] needs to do:
“I have around 200 microseconds to stop the power, wait for the TC voltage to come to its real value, connect the amplifier to this voltage, wait for the amplifier to set its output to what I want to read, take the measurement from the ADC, disconnect the amplifier from the TC, run the PID, and eventually turn the power back on. The millivolts to temperature calculation is done using polynomial with 10 members. It does this calculation using 32bit mantissa floating point numbers and completes it in around 20 microseconds. The whole wave shaping, temperature calculation, PID and so on is completed in around 50-60 microseconds. RMS current, voltage and power calculations are done in around 100 microseconds. All this is done between the half periods of the mains voltage, where the voltage is less than around 3 volts.”
The forum is already over 800 posts deep, but you can start by grabbing the all important schematic PDF’s, Gerbers, BoM and firmware files conveniently linked in the first post to build your own Unisolder5.2 controller. This Universal Controller is a follow up to his earlier project for a Hakko T12/T15 specific controller which gave him a lot of insight in to designing the universal version.
[sparkybg] has posted several videos showing the UniSolder5.2 controlling several types of Irons. In the video after the break, he demonstrates it controlling a Weller WSP80.