This Spherical Lamp’s Pieces Ship Flat, Thanks To Math

[Nervous System] sells a variety of unique products, and we really appreciate the effort they put into sharing elements of their design and manufacturing processes. This time, it’s details of the work that went into designing a luxury lamp shade that caught our eye.

Top: Finished lamp. Bottom: Partially-assembled.

The finished lamp shade is spherical, but is made entirely from flat-packed pieces of laser-cut wood that have been specifically designed to minimize distortion when assembled into a curved shape. The pieces themselves are reminiscent of puzzle cells; complex, interlocking cellular shapes found in many plants.

As usual, [Nervous System] applied a hefty dose of math and computational design to arrive at a solution. Each unique panel of the lamp is the result of a process that in part implements a technique called variation surface cutting for the shape of the pieces. They also provide a couple of nifty animations that illustrate generating both the piece boundaries as well as the hole patterns in each of the 18 unique pieces that make up each lamp.

As for making the pieces themselves, they are laser-cut from wood veneer, and assembly by the end user takes an hour or two. Watch a video overview, embedded just below under the page break.

We’re glad [Nervous System] takes the time to share details like this, just like the time they figured out the very best type of wood for laser-cutting their unique puzzles and didn’t keep it to themselves.

Continue reading “This Spherical Lamp’s Pieces Ship Flat, Thanks To Math”

An OpenSCAD Library For All Your CNC Cutting Needs

While there’s always the edge case, there’s a strong likelihood that if you’re using OpenSCAD, you’re probably working on a CAD model that you intend to 3D print at some point. Of course that’s not to say this is all you can do in OpenSCAD, but it’s arguably what it does best. If you wanted to make artistic models, or maybe render what your new kitchen will look like, there are other tools better suited to such tasks.

But thanks to lasercut.scad, a library that [Brendan Sleight] has been working on for the last several years, we might have to reconsider our preconceived dimensional notions. Instead of designing parts for 3D printing, his library is all about creating parts intended for subtractive manufacturing. Originally (as the name implies) it was geared towards laser cutting, but the project has since evolved to support CNC routers, vinyl cutters, and pretty much anything else that can follow a DXF file.

This “clip” joint is great for acrylic.

The library has functions for creating the standard tricks used to build things from laser-cut pieces, like finger joints, captive nuts, and assembly tabs. If it was something you once saw holding together an old wooden 3D printer kit back in the day, you can probably recreate it with lasercut.scad. It even supports a pretty wild piece of rotational joinery, courtesy of [Martin Raynsford].

Don’t have a way of concentrating a sufficient number of angry photons at your workpiece? No worries. The library has since been adapted to take into account a parametric kerf width, which lets you dial in how much of a bite your particular tool will take from the material when it does the business. There are even special functions for dealing with very thin cuts, which [Brendan] demonstrates by assembling a box from sheet vinyl.

Of course, those who’ve used OpenSCAD will know there’s not an “Export for CNC” button anywhere in the stock interface. So to actually take your design and produce a file your cutter can understand, [Brendan] has included a Bash script that will run the necessary OpenSCAD incantations to produce a 2D DXF file.

[Brendan] decided to send this one in after he saw the aluminum enclosure OpenSCAD library we covered recently. If you’ve got your own pet project that bends some piece of hardware or software to your will, don’t be shy to let us know.

a variety of enclosure options

The Many Ways To Solve Your Enclosure Problems

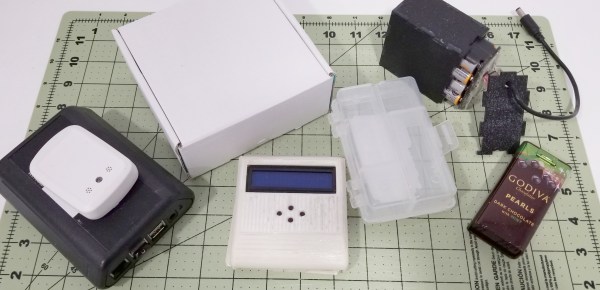
Most projects around here involve some sort of electronics, and some sort of box to put them in. The same is true of pretty much all commercially available electronic products as well.

Despite that, selecting an enclosure is far from a solved problem. For simple electronics it’s entirely possible to spend more time getting the case just right than working on the circuit itself. But most of the time we need to avoid getting bogged down in what exactly will house our hardware.

The array of options available for your housing is vast, and while many people default to a 3D printer, there are frequently better choices. I’ve been around the block on this issue countless times and wanted to share the options as I see them, and help you decide which is right for you. Let’s talk about enclosures!

Continue reading “The Many Ways To Solve Your Enclosure Problems”

See This Hybrid Approach To Folded 3D Printed Mechanisms

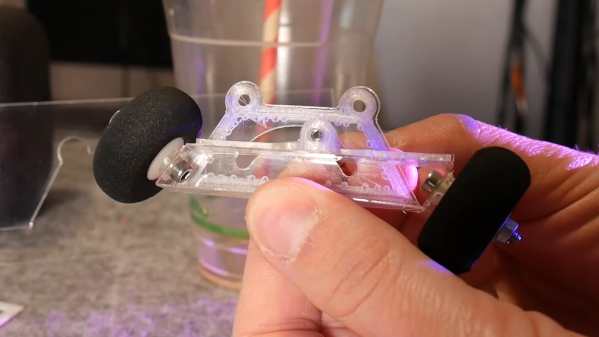
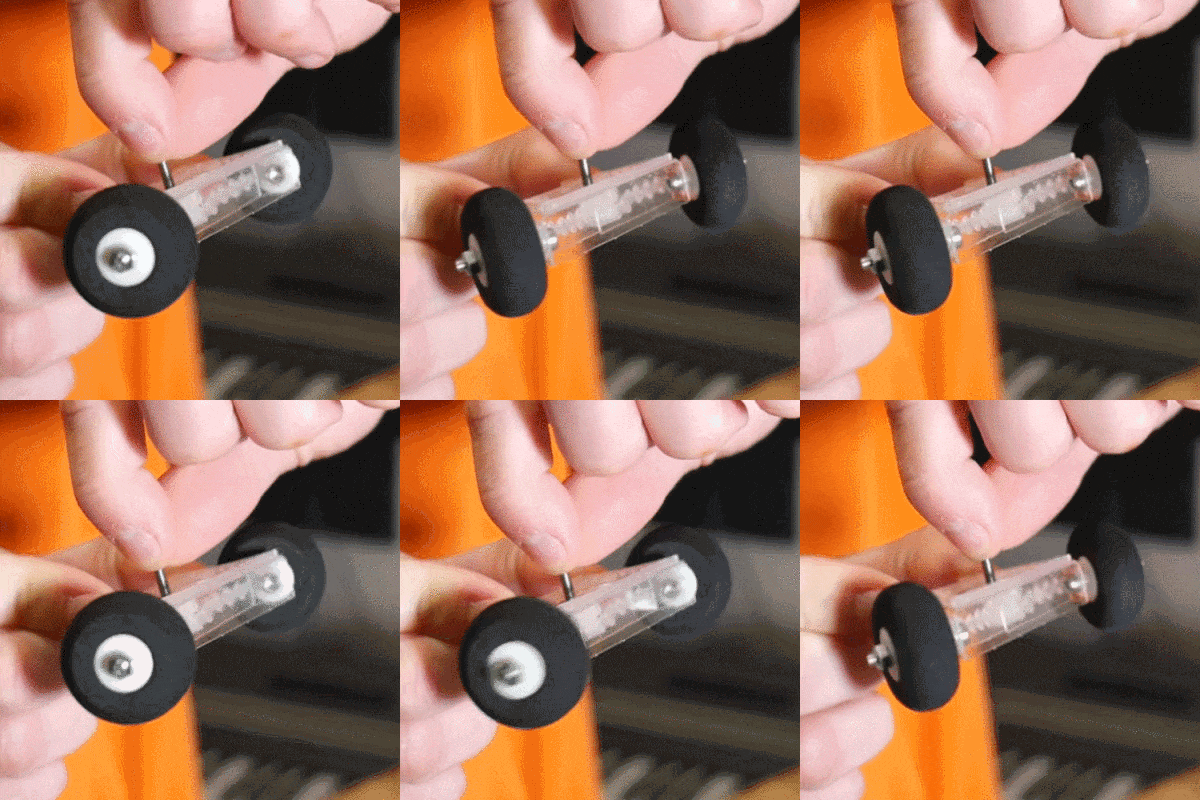
3D printers are quite common nowadays, but we’re still far from exhausting new ideas to try with them. [Angus] of [Maker’s Muse] recently got interested in 3D printing small mechanical assemblies that can be put together by folding them up, and also depend on folding linkages for the moving parts. (Video, embedded below.) The result would be lightweight, functional assemblies that would be simple to manufacture and require very few parts; but how to make the hinges themselves is the tricky part. As a proof-of-concept, [Angus] designed a clever steering linkage that could be printed flat and folded together, and shows his work on trying to make it happen.

[Angus] points out that that 3D-printed hinges have a lot of limitations that make then less than ideal for small and lightweight assemblies. Printing hinge pieces separately and assembling after the fact increases labor and part count, and print-in-place hinges tend to have loose tolerances. A living hinge made from a thin section of material that folds would be best for a lightweight assembly, but how well it works depends a lot of the material used and how it is made.

[Angus] tries many different things, and ultimately decided on a hybrid approach, combining laser cutting with 3D printing to create an assembly that consists of a laser-cut bottom layer with 3D printed parts on top of it to create a durable and lightweight device. He hasn’t quite sorted it all out, but the results show promise, and his video is a fantastic peek at just how much work and careful experimentation can go into trying something new.

Continue reading “See This Hybrid Approach To Folded 3D Printed Mechanisms”

Open Source CAM Software In The Browser

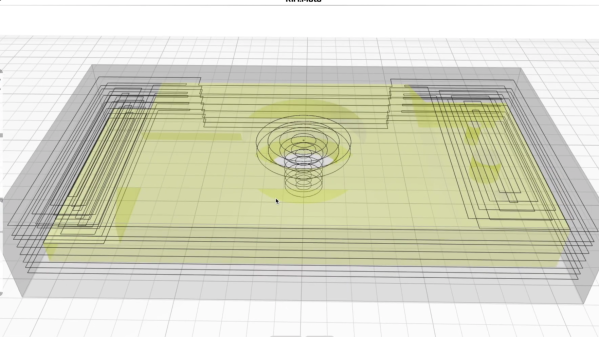
3D printers, desktop CNC mills/routers, and laser cutters have made a massive difference in the level of projects the average hacker can tackle. Of course, these machines would never have seen this level of adoption if you had to manually write G-code, so CAM software had a big part to play. Recently we found out about an open-source browser-based CAM pack created by [Stewert Allen] named Kiri:Moto, which can generate G-code for all your desktop CNC platforms.

To get it out of the way, Kiri:Moto does not run in the cloud. Everything happens client-side, in your browser. There are performance trade-offs with this approach, but it does have the inherent advantages of being cross-platform and not requiring any installation. You can click the link above and start generating tool paths within seconds, which is great for trying it out. In the machine setup section you can choose CNC mill, laser cutter, FDM printer, or SLA printer. The features for CNC should be perfect for 90% of your desktop CNC needs. The interface is intuitive, even if you don’t have any previous CAM experience. See the video after the break for a complete breakdown of the features, complete with timestamp for the different sections.

All the required features for laser cutting are present, and it supports a drag knife. If you want to build an assembly from layers of laser-cut parts, Kiri:Moto can automatically slice the 3D model and nest the 2D parts on the platform. The slicer for 3D printing is functional, but probably won’t be replacing our regular slicer soon. It places heavy emphasis on manually adding supports, and belt printers like the Ender CR30 are already supported.

Kiri:Moto is being actively improved, and it looks as though [Stewart] is very responsive to community inputs. The complete source code is available on GitHub, and you can run an instance on your local machine if you prefer to do so. Continue reading “Open Source CAM Software In The Browser”

3D Printer? Laser Cutter? CNC? Yes, Please

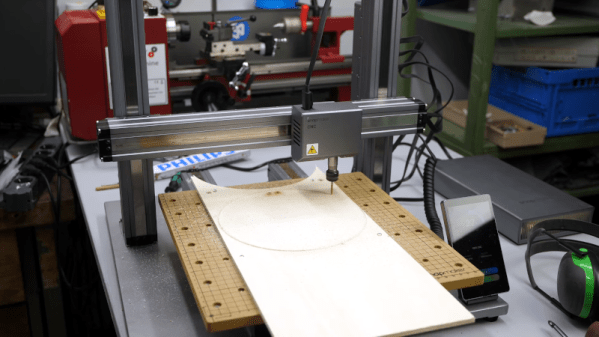
Most of us have, or, would like to have a 3D printer, a laser engraver, and a CNC machine. However, if you think about it naively, these machines are not too different. You need some way to move in the XY plane and, usually, on the Z axis, as well.

Sure, people mount extruders on CNCs, or even lasers or Dremel tools on 3D printers. However, each machine has its own peculiarities. CNCs need rigidity. 3D printers should be fast. Laser engravers and CNCs don’t typically need much Z motion. So common sense would tell you that it would be tough to make a machine to do all three functions work well in each use case. [Stefan] thought that, too, until he got his hands on a Snapmaker 2.0.

As you can see in the video below, the machine uses different tool heads for each function. The motion system stays the same and, curiously, there are three identical linear motion modules, one for each axis.

Continue reading “3D Printer? Laser Cutter? CNC? Yes, Please”

Cleaner Laser Cutting With A 3D-Printed Nozzle

[Nervous System] does a lot of laser cutting, and [Jesse] shared a fascinating experimental improvement to their laser cutter that consists of a 3D-printed nozzle for cleaner cuts. You can see the results for yourself above, where the difference between the two cuts is striking.

[Jesse]’s modification doesn’t affect the laser beam itself; it is an improvement on the air assist, which is the name for a constant stream of air that blows away smoke and debris as the laser burns and vaporizes material. An efficient air assist is one of the keys to getting nice clean laser cuts, but [Jesse] points out that a good quality air assist isn’t just about how hard the air blows, it’s also about how smoothly it does so. A turbulent air assist can make scorch marks worse, not better.

3D-printed nozzle to promote laminar air flow on the left, stock nozzle on the right.

As an experiment to improve the quality of the air flowing out the laser nozzle, [Jesse] researched ways to avoid turbulence by creating laminar flow. Laminar flow is the quality of a liquid having layers flowing past one another with little or no mixing. One way to do this is to force liquid through individual, parallel channels as it progresses towards a sharply-defined exit nozzle. While [Jesse] found no reference designs of laminar flow nozzles for air assists, there were definitely resources on making laminar flow nozzles for water. It turns out that interest in such a nozzle exists mainly as a means of modifying Lonnie Johnson’s brilliant invention, the Super Soaker.

Working from such a design, [Jesse] created a custom nozzle to help promote laminar flow. Sadly, a laser cutter head carries design constraints that make some compromises unavoidable; one is limited space, and another is the need to keep the laser’s path unobstructed. Still, after 3D printing it in rigid heat-resistant resin, [Jesse] found a dramatic improvement in the feel of the air exiting the nozzle. Some test cuts confirmed a difference in performance, which results in a noticeably cleaner kerf without scorching around the edges.

One of the things [Nervous System] does is make their own custom puzzles, so any improvement to laser cutting helps reliability and quality. When production is involved, just about everything matters; a lesson [Nervous System] shared when they discussed making the best plywood for creating their puzzles.