Screwy Math For Super Fine Adjustments: Differential Screws

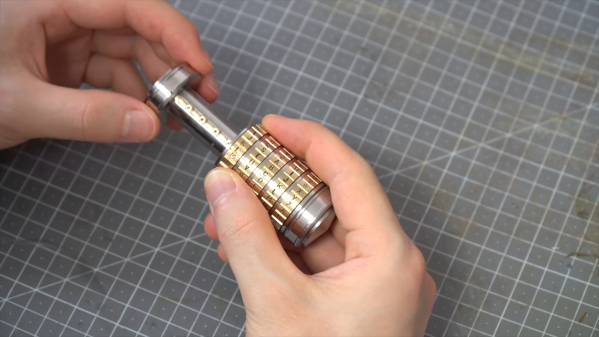
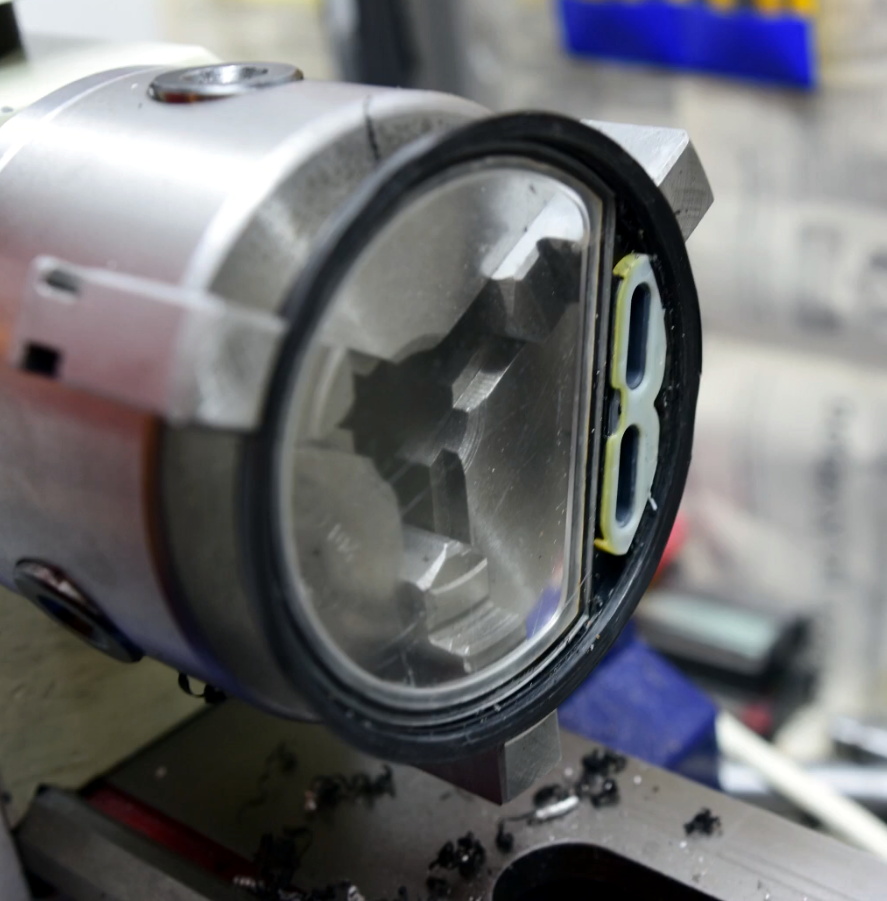
For any sort of precision machine, precision adjustability is required. For the hacker this usually involves an adjustment screw, where the accuracy is determined by the thread pitch. This was not good enough for [Mark Rehorst] who wanted adjustment down to 10 μm for his 3D printer’s optical end-stop, so he made himself a differential adjustment screw.

Tiny adjustment can be made to the green block due to the thread pitch differences

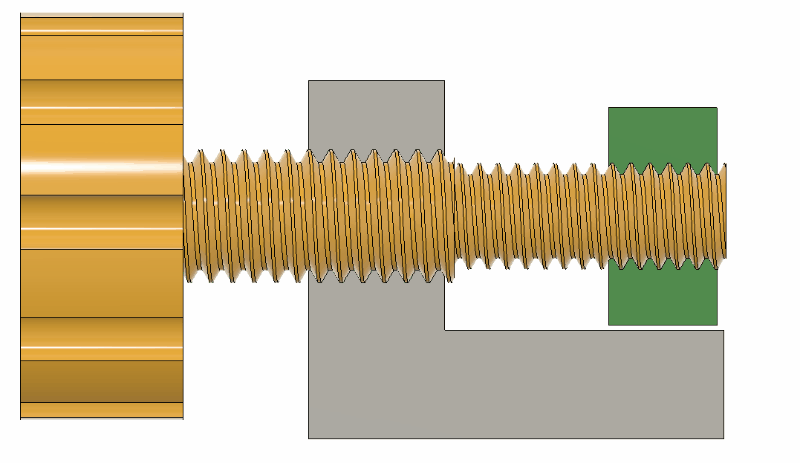
Differential screws work by having two threads with a slightly different pitch on the same shaft. A nut on each section of thread is prevented from rotating in relation to the other, and when the screw is turned their relative position will change only as much as the difference between the two thread pitches.

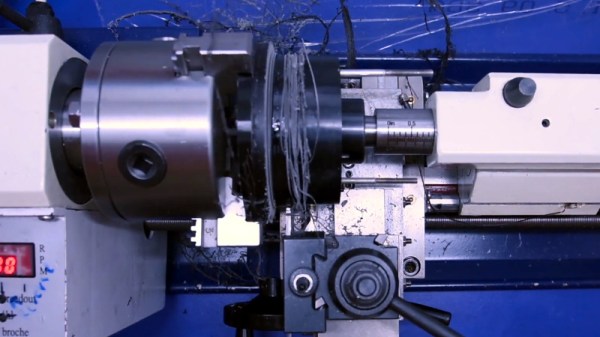
The differential screw in this case started life as a normal M5 bolt with a 0.8 mm thread pitch. [Mark] machined and threaded section of the bolt down to a M4 x 0.7 mm thread. This means he can get 0.1 mm (100 μm) of adjustment per full rotation. By turning the bolt 1/10 rotation, the  relative movement comes down to 10 μm.

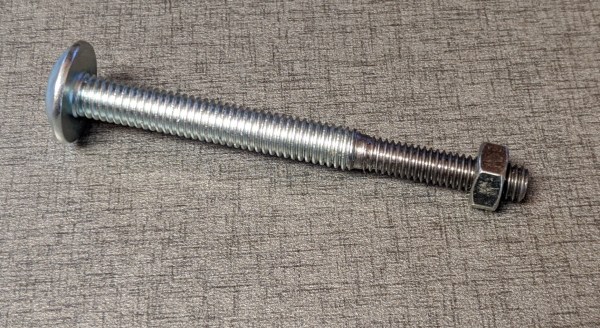
This mechanism is not new, originating from at least 1817. If you need fine adjustments on a budget, it’s a very elegant way to achieve it and you don’t even need a lathe to make your own. You can partially drill and tap a coupling nut, or make a 3D printed adapter to connect two bolts.

Fabricating precision tools on a budget is challenging but not impossible. We’ve seen some interesting graphite air bearings, as well as a 3D printed microscope with a precision adjustable stage.

This V8 Makes A Shocking Amount Of Power

As a work of art, solenoid engines are an impressive display of electromagnetics in action. There is limited practical use for them though, so usually they are relegated to that realm and remain display pieces. This one from [Emiel] certainly looks like a work of art, too. It has eight solenoids, mimicking the look and internal workings of a traditional V8.

There’s a lot that has to go on to coordinate this many cylinders. Like an internal combustion engine, it takes precise timing in order to make sure that the “pistons” trigger in the correct order without interfering with each other through the shared driveshaft. For that, [Emiel] built two different circuit boards, one to control the firing of each solenoid and another to give positional feedback for the shaft. That’s all put inside a CNC-machined engine block, complete with custom-built connecting rods and shafts.

If you think this looks familiar, it’s because [Emiel] has become somewhat of an expert in the solenoid engine realm. He started off with a how-to for a single piston engine, then stepped it up with a V4 design after that. That leaves us wondering how many pistons the next design will have. Perhaps a solenoid version of the Volkswagen W12?

Continue reading “This V8 Makes A Shocking Amount Of Power”

Bolts, Brass, And Machining Chops Make Up This Tiny Combination Safe

Another day, another video that seriously makes us doubt whether eschewing the purchase of a lathe in favor of feeding the family is a value proposition. This time, [Maker B] shows us what the queen of machine tools can do by turning a couple of bolts into a miniature safe.

We’ll state right up front that this build doesn’t source all its material from a single bolt. It’s more like two bolts and a few odd pieces of brass, but that doesn’t detract from the final product one bit. [Maker B] relieves the two chunky stainless steel bolts of their hex heads and their threads on the lathe, forming two nesting cylinders with a satisfyingly tight fit. A brass bar is machined into a key that fits between slots cut in the nesting cylinders, while discs of brass form the combination dials. Each disc is stamped around its circumference with the 26 letters of the alphabet; we thought the jig used for stamping was exceptionally clever, and resulted in neat impressions. The combination, which is set by placing a pin next to a letter in each disc, protects the admittedly limited contents of the tiny safe, but functionality is hardly the point. This is all about craftsmanship and machining skills, and we love it.

If you’ve sensed an uptick in resource-constrained builds like this lately, you’re not alone. The “one bolt challenge” has resulted in this wonderfully machined combination lock, as well as the artistry of this one-bolt sculpture. We’re all in favor of keeping the trend going. Continue reading “Bolts, Brass, And Machining Chops Make Up This Tiny Combination Safe”

Adding A Digital Readout To A Wood Lathe

The benefit of living in the modern era is that there are plenty of affordable machine tools on the market for the budding maker. However, to meet lower price points, products often forgo some of the nice-to-have features that make working easier. Of course, if you’ve got the skills to do it yourself, this needn’t be a problem, as [Zach] demonstrates.

[Zach] enjoyed using his wood lathe, but it didn’t come with a digital readout. Thankfully, retrofitting one was an easy, straightforward project. After a little research, a Hall effect sensor was chosen to detect the rotational speed of the lathe. The spindle was thus fitted with several magnets to trigger the sensor, allowing for higher resolution than just using a single device. An Arduino Nano was then used to monitor the output of the Hall effect sensor, displaying the rotational speed on a set of 7-segment displays. The project was then given its own custom PCB, and a nice 3D printed enclosure to fit it to the body of the lathe.

It’s a project that shows how easy it is to add functionality to basic machine tools using maker components. It also serves to demonstrate the value in giving a project a proper enclosure, to enable it to survive in a workshop environment. We’ve seen other hacky DRO mods before, too. Video after the break.

Continue reading “Adding A Digital Readout To A Wood Lathe”

Lathe And 3D Printer Help Repair Buried Buttons

Usually corroded buttons on a piece of electronic equipment wouldn’t be that big a deal to repair, but as [Haris Andrianakis] recently found out, things can get a little tricky when they are sealed inside a device meant to operate in a marine environment. Figuring out how to get into the case to clean the buttons up is only half the battle, when you’re done you still need to close it back well enough that the elements can’t get in.

The device in question is a tachometer intended for a Yamaha outboard motor, and the buttons are sealed between the guage’s face and the compartment in the rear that holds the electronics. Pulling the guts out of the back was no problem, but that didn’t get [Haris] any closer to the defective buttons. In light of the cylindrical design of the gauge, he decided to liberate the front panel from the rest of the unit with his lathe.

Removing the face was a delicate operation, to put it mildly. The first challenge was getting the device mounted securely in the chuck, but then the cutting had to be done very carefully so as not to damage the housing. Once he cut through the side far enough to get the face off, the actual repair of the buttons was fairly straightforward. But how to get it back together?

After a few missteps, [Haris] finally found a solution that have him the results he was looking for. He 3D printed a ring that fit the front of the gauge tightly, hot glued it into place, and used it as a mould to pour in black epoxy resin. Once the epoxy had cured, the mould was cut off and the gauge went back on the lathe so he could trim away the excess. He had to do some hand sanding and filing to smooth out the bezel, but overall the end result looks very close to factory.

We get it, there’s a lot to consider when you add a lathe to your workshop. But hacks like these are wonderful reminders of how many tricks these versatile machines are really capable of.

Continue reading “Lathe And 3D Printer Help Repair Buried Buttons”

High-Precision Air Bearing CNC Lathe And Grinder

You know you’re in for a treat when you are told that a lathe which can reach a resolution of one micrometer (1×10⁻⁶, a millionth of a meter, or 0.00004″ for people who love zeros) is ‘not hard to build’.  This is one of the opening statements in this video by [Dan Gelbart], as he walks the viewer through the details of a custom CNC lathe which he built. (Video embedded below.)

As it’s a combined CNC lathe and grinder, it uses custom software he had developed specifically for the machine. Much of the high precision of the machine is courtesy of air bearings. All but two of the air bearings were made by [Dan], with the two surplus air bearings he used coming from machines used in the semiconductor industry.

The bed of the machine is formed out of off-the-shelf reference granite, to which the other parts are epoxied, providing a stable base with well-defined dimensions. Though perhaps a few light years beyond most DIY lathe efforts, [Dan]’s videos nevertheless provide a treasure trove of tips and information for lathe builders and users alike. Certainly worth a look.

Thanks [Drew] for the tip in the comments.
Continue reading “High-Precision Air Bearing CNC Lathe And Grinder”