Raspi-controlled RGB LED Strip Display

snake

[4RM4] over at the Stuttgart hackerspace Shackspace ran into a guy selling individually addressable RGB LED strips when he attended the 29th Chaos Communication Congress last December. He had a Raspberry Pi with him, and after a little bit of work he rigged up an LED display that wrapped around a trash can. A respectable hack, but not quite ready for prime time.

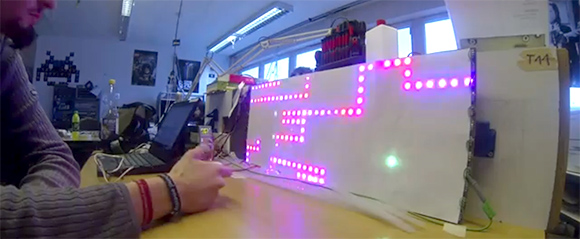
After getting back to the Shackspace, [4RM4] decided to go in a more classic direction by building an RGB Snake clone. A few neat features were implemented like a high score list, a free play bot, and a clock.

To control his pixel-munching snake, [4RM4] used a Wii Nunchuck controller hooked up to the Raspberry Pi’s GPIO pins. It looks like a whole lot of fun, and given the absurdly high scores shown in the video after the break, it looks like this build is getting a lot of use at the Shackspace.

Continue reading “Raspi-controlled RGB LED Strip Display”

Clock Display Taller Than You Is Just What Your Living Room Has Been Missing

huge-countdown-clock

Sure, it’s time to get the countdown clocks ready to ring in the new year, but why limit it to just one night? If you end up building a six-foot digital display you can count down trivial events; like the remaining seconds of freedom before you have to pimp yourself out in that drab cubicle.

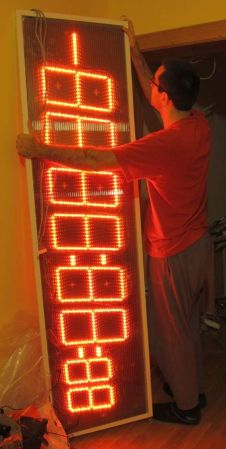
This seven-segment display is homemade and boasts six full-sized digits and two smaller digits with each pair separated by colons. You have probably already guessed that the construction was greatly simplified by using LED strips rather than individual components. This is part of the reason for the size of the display. The strips can be cut, but only down to a minimum of 3 LEDs per segment. That explains the small digits, with their larger siblings doubled in size. But there is a benefit to this constraint, it means that current limiting is already taken care of for you.

The main assembly is a wooden frame surrounding two polycarbonate sheets. The LED strips are sandwiched between those sheets, with segment and digit driver buses exiting a one point on the side. The build doesn’t detail a driver for the display but it shouldn’t be hard to find a multiplexing example that will serve the purpose.

One Dimensional PONG, Take Two

Needing a Christmas present for his 4- and 5-year-old nieces, [John] built a one-dimensional PONG game, sure to be the delight of rosy-cheeked children on a Christmas morn.

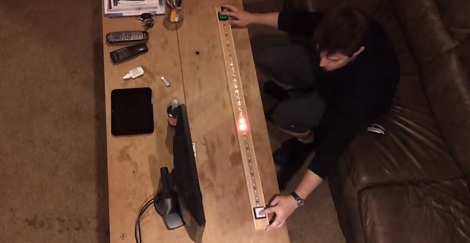
The new and improved 1D PONG game is built around a digital RGB LED strip with an LPD8806 LED controller. The speed of the ‘ball’ is controlled by a pot on one side of the game. With each player pressing their button at the right time, the ball bounces back to the other player. Missing the ball awards a point to the other team and most likely an increase in the player’s frustration, greatly increasing the risk of this game being thrown across the room.

While it’s not an obscenely long 1D PONG game like [Jason]’s previous 5 meter version, it’s more than enough to keep a pair of kids occupied for more than a few minutes, a remarkable achievement for just a microcontroller, buttons, and a piece of LED strip.

You can get [John]’s AVR code in this pastebin or just check out the video after the break.

Continue reading “One Dimensional PONG, Take Two”

Graphing The Efficiencies Of LED Light Strips

After adding a few LED light strips above his desk, [Bogdan] was impressed with the results. They’re bright, look awesome, and exude a hacker aesthetic. Wanting to expand his LED strip installation, [Bogdan] decided to see if these inexpensive LED strips were actually less expensive in the long run than regular incandescent bulbs. The results were surprising, and we’ve got to give [Bogdan] a hand for his testing methodology.

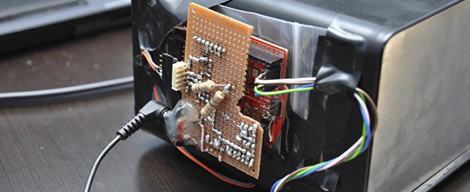
[Bogdan]’s test rig consists of a 15 cm piece of the LED strip left over from his previous installation. A Taos TSL2550 ambient light sensor is installed in a light-proof box along with the LED strip, and an AVR microcontroller writes the light level from the sensor and an ADC count (to get the current draw) of the rig every 6 hours.

After 700 hours, [Bogdan]’s testing rig shows some surprising results. The light level has decreased about 12%, meaning the efficiency of his LED strip is decreasing. As for projecting when his LEDs will reach the end of their useful life, [Bogdan] predicts after 2200 hours (about 3 months), the LED strip will have dropped to 70% of their original brightness.

Comparing his LED strip against traditional incandescent bulbs – including the price paid for the LED strip, the cost of powering both the bulb and the strip, the cost of the power supply, and the time involved in changing out a LED strip, [Bogdan] calculates it will take 2800 hours before cheap LEDs are a cost-effective replacement for bulbs. With a useful life 600 hours less than that, [Bogdan] figures replacing your workshop lighting with LED strips – inexpensive though they are – isn’t an efficient way to spend money.

Of course with any study in the efficiency of new technology there are bound to be some conflating factors. We’re thinking [Bogdan] did a pretty good job at gauging the efficiency of LED strips here, but we would like to see some data from some more expensive and hopefully more efficient LED strips.

LED Wand Brings Ergonomics To Light Painting

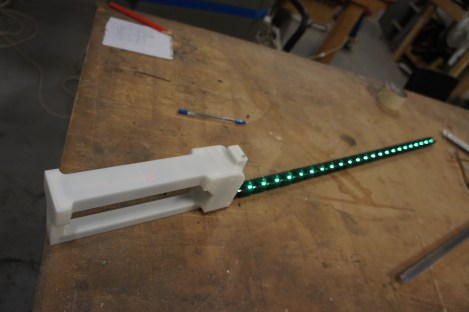
Quit struggling with hastily patched together electronics for your light painting images. Follow [Madox’s] example and build a light painting wand designed with your hand in mind.

You wield it much like a sword, but the only damage it does is to the long-exposure camera pointed its way. The RGB LED strip is controlled by the guts of a tiny little wireless router, a TP-Link TL-WR703N. This lets [Madox] connect using an Android device to upload different images. It also lets you tweak the settings like adjusting the timing between columns to match your exposure settings. The custom handle design provides a home and mounting plan for everything involved. It was 3D printed at the Sydney Hackerspace.

This isn’t the first light painting device running Linux. We’ve actually seen the Raspberry Pi used in much the same way but that final project involved using an entire recumbent tricycle to move the colored lights.

One Dimensional PONG Is A Great Use For LED Strips

[Jason] has had a five meter addressable RGB LED strip lying around for a while, and only recently came up with a good idea of what to use it for. He came up with One Dimensional PONG, and it looks like it’s a blast to play. Instead of moving a paddle up and down, [Jason]’s 1D PONG game requires the players to stomp on a switch to send the ball back to the other player.

The LED strip [Jason] used has an SPI interface, but needed to be PWM clocked to a microcontroller to operate. After whipping up an Arduino library for his LED strip, [Jason] built an ATMega328-based controller board and a pair of seven segment display boards to keep track of the score. There’s a technical overview in another one of [Jason]’s videos.

[Jason] will be taking his 1D PONG game to the Brighton Mini Maker Faire on September 8th. We’re sure his game will be very popular there, so if you see him, tell him Hackaday sent you.

Continue reading “One Dimensional PONG Is A Great Use For LED Strips”

Light Painting With The Raspi

The art of taking long exposure photographs with blinking RGB LEDs has improved greatly over the years, mostly due to the extremely easy to use Arduino and hundreds of tutorials on the web. If there’s one problem with light painting with a ‘duino, it’s that large, full color images take up a ton of storage space, much more than the flash memory on an Arduino can provide. Wanting fancier and more colorful light painted images, [Phil] over at Adafruit used a Raspberry Pi to make some very awesome light painted images.

Like any Adafruit tutorial that uses LEDs, the build begins with a digital RGB LED strip wired to the GPIO pins on the Raspi. After loading up the Adafruit educational Raspi Linux distro for hardware SPI support, the only thing left to do was writing a Python script to display images in the air.

[Phil] says vertical, hand-held LED bars are old hat, so he took a hula hoop and a few bits of PVC pipe, attached the LED strip, and put it on his bike. The results are really impressive – we’re loving the flames in the title pic – and considering the Raspi is a full-fledged computer, light paintings larger than what [Phil] made are very possible.