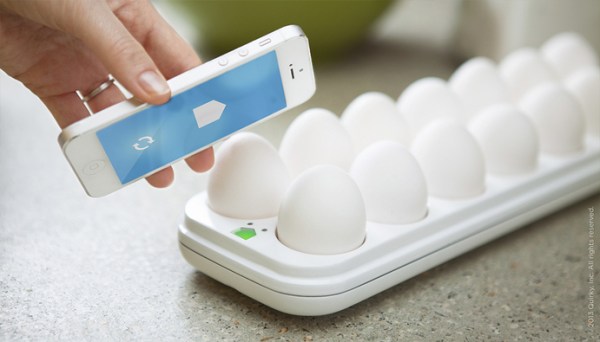
Here’s a concept piece that monitors the eggs in your refrigerator. It’s still in development and we don’t think the general public is ready for digital egg monitoring quite yet. But we love the concept and want to hear from you to see if you could develop your own version.
What we know about the device is that — despite the image which makes smart phone proximity seem important — it connects to the Internet from inside your fridge. It will tell you how many eggs you have left, and even tracks the date at which each entered your refrigerator.
So, what’s inside this thing and who can build their own the fastest? We’ll cover some specs and speculate a bit to get you started: There’s a light sensor to detect when the door opens and an LED below each egg to illuminate the oldest. We think the light sensor triggers a microcontroller that uses each of the egg LEDs as a light sensor as well. If the threshold is too low then there is indeed an egg in that cup. We also like the fact that the tray has fourteen slots; as long as you don’t buy eggs until you have just two left you’ll always have room.
If you build one we want to know. We’re thinking 3D printed cups, low-power microcontroller, but we’re kind of stumped on the cheapest WiFi solution. Leave your thoughts in the comments.
[via Reddit via NY Daily News via Mind of Geek]
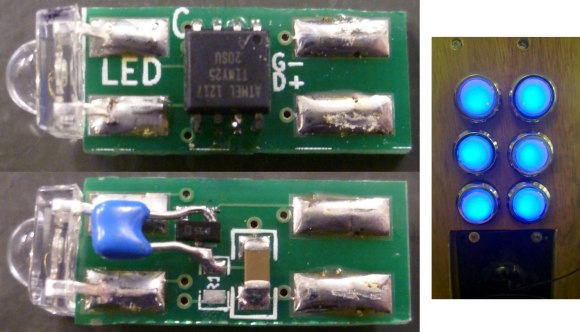
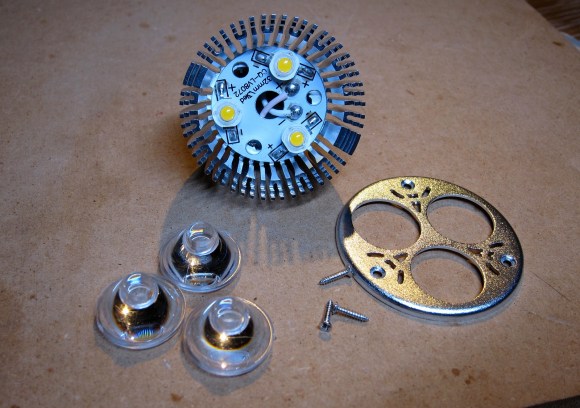 Halogen bulbs put out a lot of focused light but they do it at the expense of burning up a lot of Watts and generating a lot of heat. The cost for an LED replacement like the one seen disassembled above has come down quite a bit. This drove [Jonathan Foote] to purchase several units and he just couldn’t resist tearing them apart to try out a couple of hacks.