Hacking A Cheap Disco Light For UV Effects

Back in the early days of disco, filament bulbs were all the rage. Whether tungsten, halogen, or other obscure types, party lighting involved lots of watts and lots of heat. These days, the efficiency of LEDs makes everything a lot cheaper, lighter, and lower power. [Big Clive] decided to dive into a cheap moonflower-type disco light from China, replacing the insides along the way.
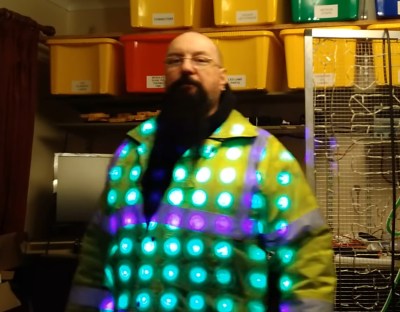
The final effect particularly shines when used on fluorescent materials.

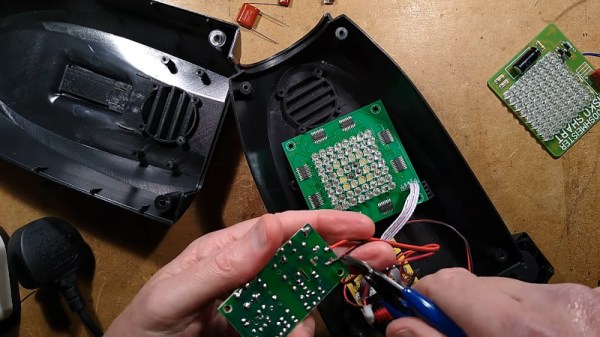
The light originally consisted of an 8×8 grid of LEDs, driven by shift registers for a simple chase effect. Surprisingly, the power supply and other hardware inside seemed to at least make an attempt to meet UK regulations. However, [Big Clive] had other plans, whipping up a replacement PCB packing 64 UV LEDs. The video is informative, showing how with a few simple passive components, it’s easy to drive these LEDs from mains without excessive circuitry required to step down to more usual DC voltages.

The final result is a neat UV grid light that would look excellent through some fog on the dance floor. We’ve seen [Big Clive]’s teardowns before, too – like this nefarious CAN bus interceptor found in a Mercedes. Video after the break.

Continue reading “Hacking A Cheap Disco Light For UV Effects”
Office Status Light Turns “Do Not Disturb” To “Busy”

Open-plan offices with too many desks crammed into them are the scourge of many a tech start-up, and at [Danny Salzman]’s employer, distractions reached an all-time high. His boss instigated a free/busy indicator using coloured cards, but he felt he could do one better and came up with an IoT status light to do the job.

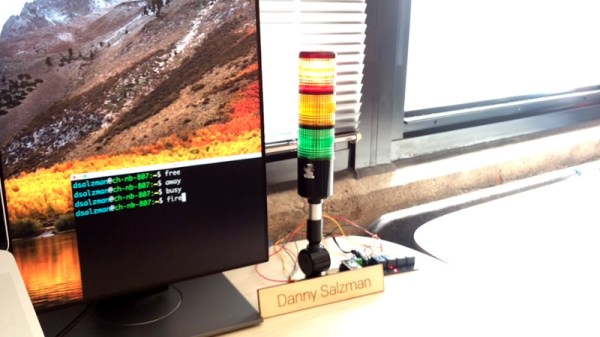
At its heart is a machinery status light of the tri-colour “traffic light” variety, driven by a set of relays under the command of a Particle Photon STM32 ARM Cortex M3 based microcontroller board. The plan to write a super-clever API and integration with Slack or Google Calendar never came together, instead it’s operated by a set of bash shell aliases.

Unfortunately for [Danny] though, it didn’t work as intended. Instead of his colleagues staying away as he had hoped, they flocked to his desk to ask about the new feature, making it not entirely useful as a “Do Not Disturb” light. Still, we like it, and it’s given us ideas about those machinery status lights.

He says he may dig it out for his home during the COVID-19 lockdown. Perhaps he could take some inspiration from this home WiFi status dongle.

Cheap Party Light Gets Arduino Upgrade

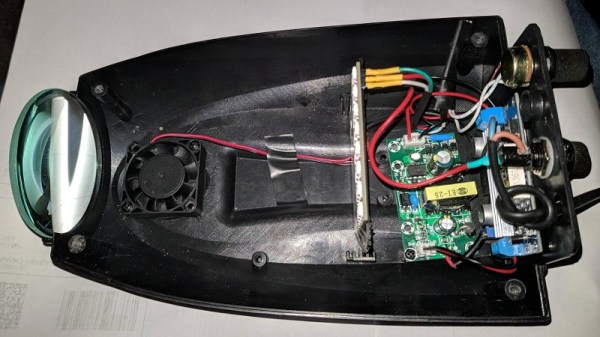
If you’ve got a party coming up and are looking to add a little bit of excitement, you might be interested in this recent project from [Gav Lewis]. The build is based on a commercially available party light, but with some upgraded components the final product is brighter and more dynamic than it was stock.

Realistically, [Gav] has changed out almost every component of this light except for the enclosure and the front lens. The original 5 mm LED array was replaced with a new 8×8 WS2812B panel, and the electronics completely replaced with an Arduino Nano. He’s still using the light’s original power supply, but as it only puts out around 4.2 V, he’s added a boost converter to provide a stable 5 V for the new hardware. He also added a small 12 V cooling fan, which he says is basically silent since it’s only getting half its rated voltage.

[Gav] has developed a number of lighting patterns with FastLED that do a good job of emulating what you might see from a much more expensive laser scanner. In the video after the break, you can see how multiple colored beams of light exit the housing at once, projecting patterns on the opposite wall. He says he’s like to restore the device’s original sound activation mode, but as of yet hasn’t gotten the code sorted out.

This project uses a off-the-shelf 8×8 matrix of WS2812B LEDs, but if you ever find yourself needing to piece together your own array from individual LEDs, we recently covered a great tip for making it a bit easier.

Continue reading “Cheap Party Light Gets Arduino Upgrade”

Tiny Laser Cutter Puts Micro Steppers To Work

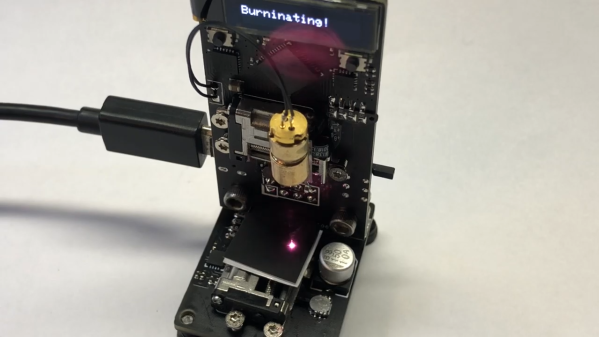
The influx of cheap laser cutters from China has been a boon to the maker movement, if at the cost of a lot of tinkering to just get the thing to work. So some people just prefer to roll their own, figuring that starting from scratch means you get exactly what you want. And apparently what [Mike Rankin] wanted was a really, really small laser cutter.

The ESP32 Burninator, as [Mike] lovingly calls his creation, is small enough to be in danger of being misplaced accidentally. The stage relies on tiny stepper-actuated linear drives, available on the cheap from AliExpress. The entire mechanical structure is two PCBs — a vertical piece that holds the ESP32, an OLED display, the X-axis motor, and the driver for the laser, which comes from an old DVD burner; a smaller bottom board holds the Y-axis and the stage. “Stage” is actually a rather grand term for the postage-stamp-sized working area of this cutter, but the video below shows that it does indeed cut black paper.

The cuts are a bit wonky, but this is surely to be expected given the running gear, and we like it regardless. It sort of reminds us of that resin 3D-printer small enough to fit in a Christmas ornament that [Sean Hodgins] did a while back. We’d suggest not trying to hang this on a tree, though.

Continue reading “Tiny Laser Cutter Puts Micro Steppers To Work”

Dim Hallway Gets Lighting Upgrade

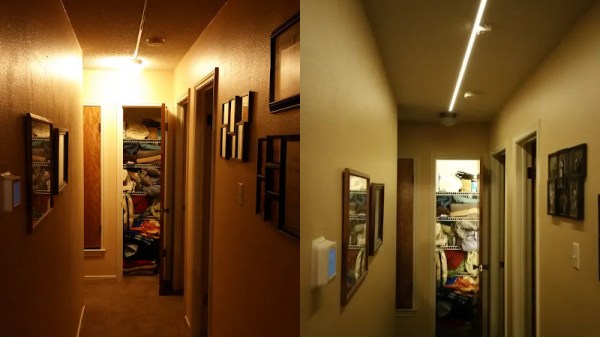
There’s nothing worse than a lightswitch that’s nowhere near where it should be, leaving you fumbling around in the dark. [supersquirrel72] had just this problem, and decided to put an Arduino to work instead.

Rather than using the original mains lighting that was poorly positioned and not enough to light the hall, instead 2 meters of white LED strip was chosen. The form factor is perfect for lighting a long, thin space – far better than running a series of seperate bulbs. The strip was rigged up to an Arduino Uno, that triggers the lights when movement is detected with a simple PIR motion sensor. After some feedback from the other occupants of the house, it was decided to tweak things further. An RTC was implemented to allow the Arduino to keep things dimmer after 9PM, so as to not wake others when making a trip to the kitchen for a midnight snack.

It’s a simple solution which brightens up the hallway nicely. We imagine this could just be the first step to a yet-more-integrated lighting solution in [supersquirrel72]’s house. Whether it’s IOT lights or something more festive, we can’t wait to see what’s next.

From Zero To LED Cube In Less Than Seven Months

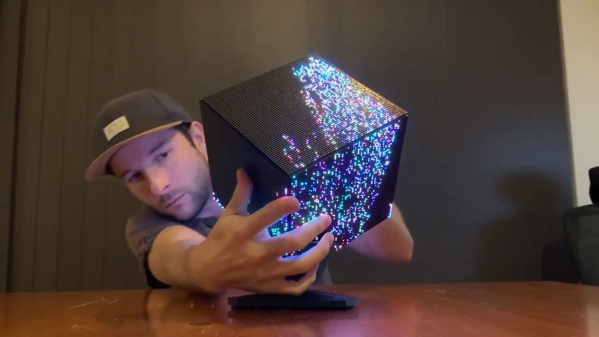
We know that LED video cubes are so last year, but that doesn’t mean we don’t still love to see them. Any project that incorporates over 24,000 LEDs is bound to be impressive, after all. But the more interesting bit about [Mike Cann]’s self-contained LED cube has more to do with the process he chose to get to the finished product.

There are two ways to approach a new project, especially when you’re new to hardware hacking like [Mike] is. One is to jump in with both feet and just see what happens, for good or for ill. The other is is to ease into it with a starter project, to find out where your limitations lay and work around them gradually. [Mike Cann] wisely chose the latter approach with his LED cube project, starting with an LED sand toy. The single 64 x 64 LED panel was a bit easier to work with, and got him up to speed on the care and feeding of such hardware, as well as the code needed to drive it. The video below tells the tale of scaling that project up by a factor of six to make the cube, a process that had its share of speedbumps. Everything ended up fitting together great, though, letting [Mike] get on to the software side. That’s where this project really shines — the smartphone app running the cube is really slick, and the animations are great.

There’s clearly room for new features on [Mike]’s cube, so here’s hoping he can carve out some time to make a great build even better. For inspiration he might want to check out this side-scrolling Castlevania cube, or perhaps read up on the finer points of OpenGL for LED cubes.

Continue reading “From Zero To LED Cube In Less Than Seven Months”

A Pulse Oximeter From Very Little

Against the backdrop of a global respiratory virus pandemic, it’s likely that more than a few readers have been thinking about pulse oximeters. You may even have looked at one closely and seen that it’s little more than a device which shines light through your finger, and wondered how they work. It’s something [Giulio Pons] has done, and to show us how it’s done he’s created a working pulse oximeter of his own.

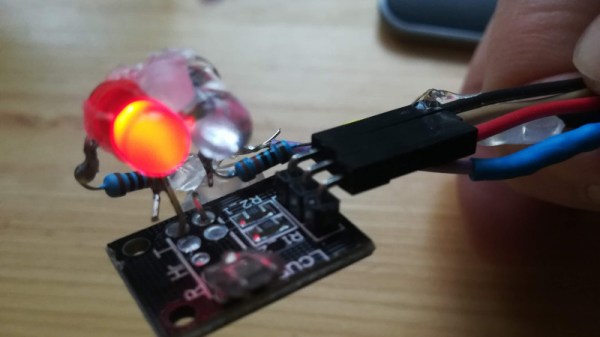
He started with an infra-red heartbeat sensor module, which is revealed as nothing more than an IR LED and a photodiode. Sampling the output from the photodiode allows measurement of heartbeat, but gives not clue as to oxygen saturation. The interesting part comes via the property of red light in that it’s transmission through flesh varies with oxygen saturation, so adding a red LED and alternately measuring from the IR and red illuminations allows a saturation figure to be derived.

Commercial pulse oximeters are pretty cheap, so many of us will no doubt simply order one from the usual sources and call it good. But it’s always interesting to know how any device works, and this project reveals something simpler than we might have expected. If pulse oximeters interest you, compare it with this one we featured a few years ago.