Over-Engineered Mailbox Flag Machined Using Under-Engineered Mini-Lathe

[Tim Nummy] used his cheap, Chinese, bench mini-lathe to make a non-terrible mailbox flag holder (YouTube video, embedded below). Tim posts videos on his channel about garage hobby projects, many of which are built using his mini-lathe, often based on suggestions from his followers. One such suggestion was to do something about his terrible mailbox flag – we’re guessing he receives a lot of old-school fan mail.

He starts off by planning the build around 1 ¼ inch aluminum bar stock, a 688 bearing, three neodymium magnets and some screws. The rest of it is a “think and plan as you go along” project, but essentially, the new holder is in three pieces. An inner piece goes inside the mail box and holds the assembly to the mail box. The middle piece holds the two magnets which act as end-stops or limits for the flags raised and lowered positions. The final, outer piece holds the flag itself, and the bearing which allows it to rotate freely.

This part also has the third magnet embedded in it to work with the other two magnets for the limits. The use of magnets is cool, but a ball catch with two detents would have worked just as well. It’s a great simple project to follow for those who want to wet their feet on lathe work. [Tim] has also posted links to all of the tools and equipment seen in the video, so check that out if anything catches your fancy.

But workshop veterans will almost certainly cringe at several places along the video. The main one that caught our eye is obviously the shaky lathe itself. It could do with a heavier workbench, proper leveling, foundation bolts or anti-vibration mounts. And from the looks of it, the tail stock isn’t any rock steady too. Although the lathe is variable speed, the chuck rpm is set too high for aluminum, and the lack of cutting fluid makes it even more troublesome. Using oil, or even some cutting fluid, while tapping would have been wise too.

We’re not sure if it’s the shaky foundation or poor feed control, but the step cut for mounting the bearing is over-sized by a whole lot more and requires a big goop of retaining compound to glue the bearing in place. But the end result works quite well, including the magnetic catches – a complex solution for a simple problem.

We’re sure our keen-eyed readers will likely spot some more issues in [Tim]’s methods, so go at it in the comments below, but please make sure to rein in the snark and keep your feedback positive.

Continue reading “Over-Engineered Mailbox Flag Machined Using Under-Engineered Mini-Lathe”

Waiting For A Letter? This IoT Mailbox Will Tell You Exactly When It Arrives.

If you’re waiting for a much sought-after letter, checking your mailbox every five minutes can be a roller-coaster of emotion — not to mention time-consuming. If you fall into this trap, Hackaday.io user [CuriosityGym] as whipped up a mailbox that will send off an email once the snail-mail arrives.

The project uses an Arduino Uno, an ESP 8266 wifi module, and an idIoTware shield board — making specific use of its RGB LED and light dependent resistor(LDR). Configuring the RGB LED on the idIoTware board to a steady white light sets the baseline for the LDR, and when a letter is dropped in the box, the change in brightness is registered by the LDR, triggering the Arduino to send off the email.

Continue reading “Waiting For A Letter? This IoT Mailbox Will Tell You Exactly When It Arrives.”

Avoiding Exercise With An ESP8266 And Blynk

[Mike Diamond] was tired of climbing down (and back up) 40 stairs to check his mailbox. He decided to create a mailbox alert using the ESP8266 to connect to his WiFi. The idea was simple: have the ESP8266 monitor when the mailbox flap opened using a magnet and a reed switch. As always, though, the devil is in the details. [Mike] got things working with a little help and shares not only the finished design but how he got there.

To handle the sending of e-mail, [Mike] used the Blynk app. You often think of Blynk as a way to build user interfaces on an Android or iOS device that can control an Arduino. In this case, though, [Mike] used the library with the ESP8266 and had it send e-mail on his behalf.

Continue reading “Avoiding Exercise With An ESP8266 And Blynk”

Building A Sturdy Remote Control Mailbox

This DIY mailbox pretty much has it all. Not only is it waterproof and secure, it’s beautifully built and unlikely to arouse the suspicion of or induce fear in the mailman.

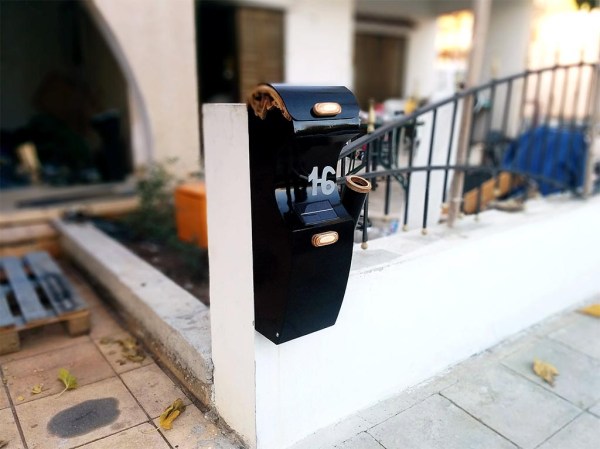
It’s made of 2mm thick sheet metal and features accents made of merri, a rather nice blood wood native to Western Australia. [George] of Make It Extreme built this mailbox primarily for remote control access, the idea being that each of his family members would have a key fob remote to open it. There’s an input panel under the lid in case someone loses or forgets their remote.

The setup is simple. That 12V solar panel under the address number is connected to a solar charge controller and charges a small battery. Pushing the A button on the key fob remote triggers the latch to slide over, unlocking the door. A push of the B button turns on an interior light for late-night mail collecting. The tube on the side is for leaflets and other postal miscellany. Now, the coolest feature: when mail passes through the slot, it lets [George] know by calling his cell phone. Check out the build/demo video after the break.

We’ve featured all kinds of mailboxen over the years. This wifi-enabled ‘box uses an Amazon Dash button and a Pi to play the AOL notification on the owner’s phone. The flag on this adorable mini mailbox goes up when there’s mail in the real one outside.

Continue reading “Building A Sturdy Remote Control Mailbox”

Mailbox Notifier Texts When The Letter Carrier Arrives

mailbox-notifier

[Felix Rusu’s] mailbox is on the other side of the street and he’s got a pretty big front yard. This means checking for mail is not just a pop your head out of the door type of activity. This becomes especially noticeable during the winter months when he has to bundle up and trudge through the snow to see if his letter carrier has been there yet. But he’s made pointless trips a thing of the past by building a notifier that monitors the mailbox for him.

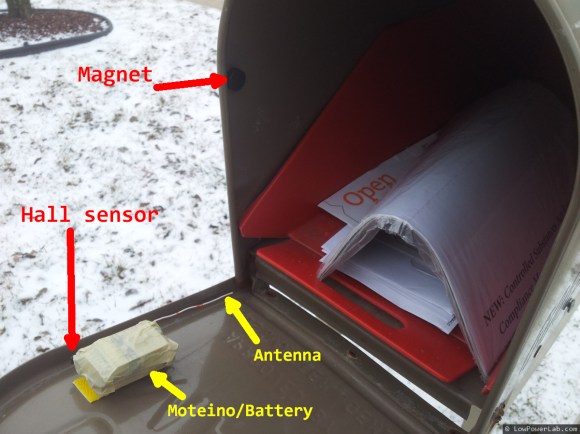
He’s using a Moteino, which is an Arduino clone of his own making. It’s tiny and features an RF module on the underside of the board which takes care of communicating with a base station inside the house. The module seen above rolls the microcontroller board up along with a 9V battery and a hall effect sensor which can tell if the mailbox door is open or closed. When the Arduino detects a change to that sensor it pushes some data back to the base station which then relays the info to a computer or Raspberry Pi in order to send him a text message. All of this is shown off in the video after the break.

Continue reading “Mailbox Notifier Texts When The Letter Carrier Arrives”

Physical Email Box — Mail Flag And All

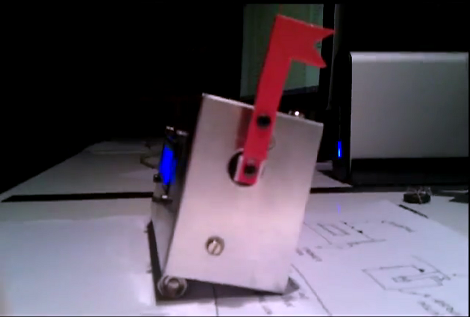
We gave you a side view because we really like the red new-mail flag. Sure it works the opposite of how USPS boxes do (where the flag tells the letter carrier there is outgoing mail to be picked up) but it’s still a fun touch. What you can’t see here is that this physical email box has a character LCD screen to read your messages and a set of buttons on the top to send back replies.

[Eraclitux’s] project puts an Arduino, LCD, a few buttons, and a servo motor inside of a metal project box. It connects to his computer and takes commands over the USB cable. The Python script is where most of the magic happens. This is a good reference project if you’re interested in using POP and SMTP packages to interface your Python scripts with an email server. You’re pretty limited on responses, with preprogrammed messages to reply “Yes”, “No”, or “Read”. But it’s journey that matters, not the destination.

Continue reading “Physical Email Box — Mail Flag And All”

Facebook Notifier Uses Some Papercraft And Simple Electronics

This weekend project will tell you when you’ve got something new to look at on your Facebook page (translated). The yellow flag on the side of the mini-mailbox automatically goes up, alerting you to your recent online popularity.

[Rocco’s] craftwork on this project is fantastic. We love the scale, the colors, and especially the artificial grass that adorns the base. Inside the mailbox an Arduino controls a small servo motor attached to the new mail flag. As with other Arduino-based notifiers (be it the Internet Furby, or our own troll sniffing rat) the USB connection makes it incredibly easy to convert online information to real-world signals. The client side of this is a Python script. It uses a package that we were previously unfamiliar with called mechanize. We’ve just made a cursory examination of how that package is used, but we’re going to keep it in mind as an alternative to our usual go-to package, BeautifulSoup, which tends to be a bit hairy when you’re just looking for some basic data.