Put The Perfect Point On Your Tungstens With This Die Grinder Attachment

Aspiring TIG welders very quickly learn the importance of good tungsten electrode grinding skills. All it takes is a moment’s distraction or a tiny tremor in the torch hand to plunge the electrode into the weld pool, causing it to ball up and stop performing its vital function. Add to that the fussy nature of the job — tungstens must only be ground parallel to the long axis, never perpendicular, and at a consistent angle — and electrode maintenance can become a significant barrier to the TIG beginner.

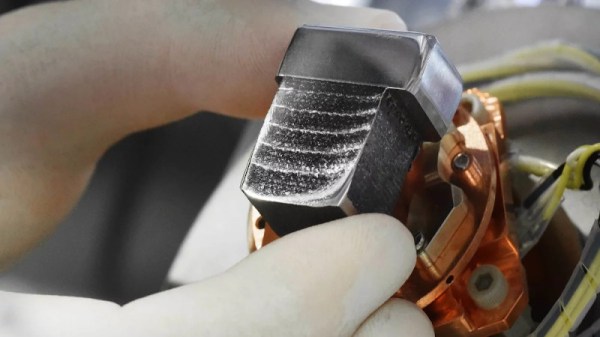
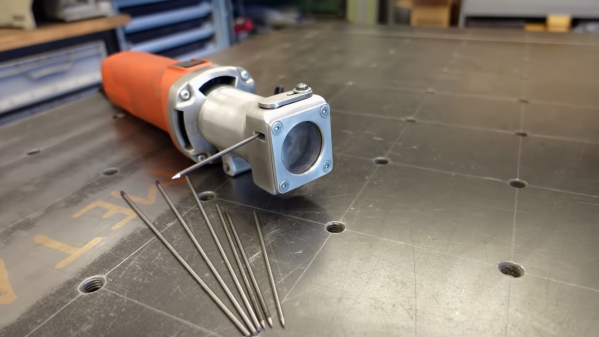
A custom tungsten grinder like this one might be just the thing to flatten that learning curve. It comes to us by way of [The Metalist], who turned an electric die grinder into a pencil sharpener for tungsten electrodes. What we find fascinating about this build is the fabrication methods used, as well as the simplicity of the toolkit needed to accomplish it. The housing of the attachment is built up from scraps of aluminum tubing and sheet stock, welded together and then shaped into a smooth, unibody form that almost looks like a casting. Highlights include the mechanism for adjusting the angle of the grind as well as the clever way to slit the body of the attachment so it can be clamped to the nosepiece of the die grinder. We also thought the inclusion of a filter to capture tungsten dust was a nice touch; most TIG electrodes contain a small amount of lanthanum or thorium, so their slight radioactivity is probably best not inhaled.

We love builds like this that make a tedious but necessary job a little quicker and easier to bear, and anything that stands to make us a better welder — from simple purpose-built fixtures to large-scale rotary tables — is OK in our book.

Continue reading “Put The Perfect Point On Your Tungstens With This Die Grinder Attachment”
For Your Holiday Relaxation: The Clickspring Sundial Build Megacut

The fortunate among us may very well have a bit of time off from work coming up, and while most of that time will likely be filled with family obligations and festivities, there’s probably going to be some downtime. And if you should happen to find yourself with a half hour free, you might want to check out the Clickspring Byzantine Calendar-Sundial mega edit. And we’ll gladly accept your gratitude in advance.

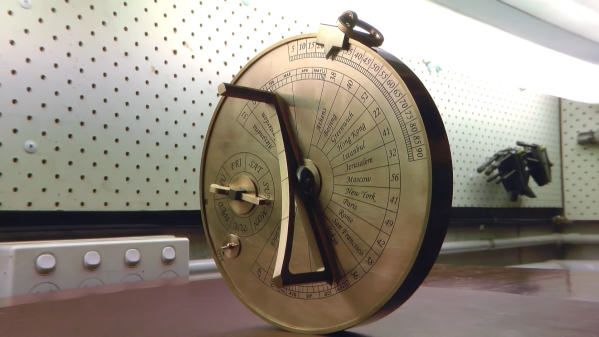
Fans of machining videos will no doubt already be familiar with Clickspring, aka [Chris], the amateur horologist who, through a combination of amazing craftsmanship and top-notch production values, managed to make clockmaking a spectator sport. We first caught the Clickspring bug with his open-frame clock build, which ended up as a legitimate work of art. [Chris] then undertook two builds at once: a reproduction of the famous Antikythera mechanism, and the calendar-sundial seen in the video below.

The cut condenses 1,000 hours of machining, turning, casting, heat-treating, and even hand-engraving of brass and steel into an incredibly relaxing video. There’s no narration, no exposition — nothing but the sounds of metal being shaped into dozens of parts that eventually fit perfectly together into an instrument worthy of a prince of Byzantium. This video really whets our appetite for more Antikythera build details, but we understand that [Chris] has been busy lately, so we’ll be patient.

Continue reading “For Your Holiday Relaxation: The Clickspring Sundial Build Megacut”

Railroad Rail Transformed Into Blacksmith’s Anvil With The Simplest Of Tools

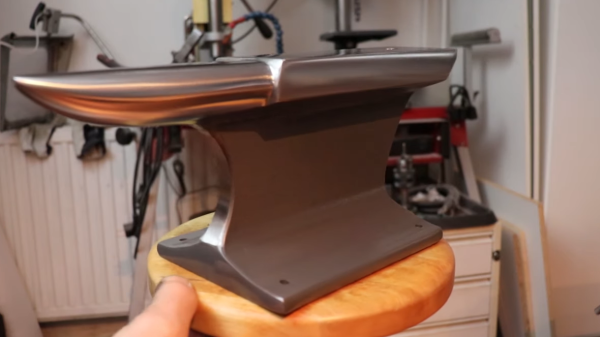
One of the biggest challenges facing the aspiring blacksmith is procuring the tools of the trade. And that means tackling the unenviable task of finding a decent anvil. Sure, one can buy an ASO — anvil-shaped object — at Harbor Freight, but a real anvil is much harder to come by. So perhaps the beginner smith’s first build should be this railroad rail to anvil conversion.

Repurposing sections of rail into anvils is hardly a new game, but [The Other Finnish Guy]’s build shows us just how little is needed in terms of specialized tooling to pull this off. Other than a file, the bulk of the work is done by angle grinders, which are used to cut off the curved crown of the rail section, cut the shape of the heel, and rough out the horn. Removing that much metal will not be a walk in the park, so patience — and a steady supply of cutting wheels and sanding discs — is surely required. But with time and skill, the anvil hidden inside the rail can be revealed and put to use.

We have questions about the final result, like its lack of a hardy hole and the fact that the face isn’t hardened. We wonder if some kind of induction heating could be used to solve the latter problem, or if perhaps a hardened plate could be welded into the top to make a composite anvil. Still, any anvil is better than no anvil. More on the anatomy and physiology of these tools can be had in [Jenny List]’s article on anvils, and her whole excellent series on blacksmithing is highly recommended. [Jenny]’s not the only smith we have on staff, though — [Bil Herd] has been known to smite a bit too.

Continue reading “Railroad Rail Transformed Into Blacksmith’s Anvil With The Simplest Of Tools”

Making A Modern Version Of A Steam Engine From Antiquity

Imagine traveling back in time about 2,200 years, to when nothing moves faster than the speed at which muscle or wind can move it. Think about how mind-shattering it would have been to see something like Hero’s Engine, the first known example of a steam turbine. To see a sphere whizzing about trailing plumes of steam while flames licked around it would likely have been a nearly mystical experience.

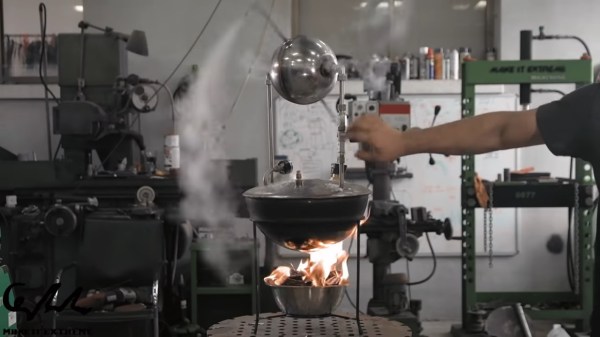
Of course we can’t go back in time like that, but seeing a modern replica of Hero’s Engine built and tested probably isn’t too far from such an experience. The engine, also known as an aeolopile, was made by the crew over at [Make It Extreme], whose metalworking videos are always a treat to watch. The rotor of the engine, which is fabricated from a pair of hemispherical bowls welded together, is supported by pipes penetrating the lid of a large kettle. [Make It Extreme] took great pains to make the engine safe, with relief valves and a pressure gauge that the original couldn’t have included. The aeolopile has a great look and bears a strong resemblance to descriptions of the device that may or may not have actually been invented by Greek mathemetician [Heron of Alexandria], and as the video below shows, when it spins up it puts on a great show.

One can’t help but wonder how something like this was invented without someone — anyone — taking the next logical step. That it was treated only as a curiosity and didn’t kick off the industrial revolution two millennia early boggles the mind. And while we’ve seen far, far simpler versions of Hero’s Engine before, this one really takes the cake on metalworking prowess.

Continue reading “Making A Modern Version Of A Steam Engine From Antiquity”

Retrotechtacular: Forging In Closed Dies

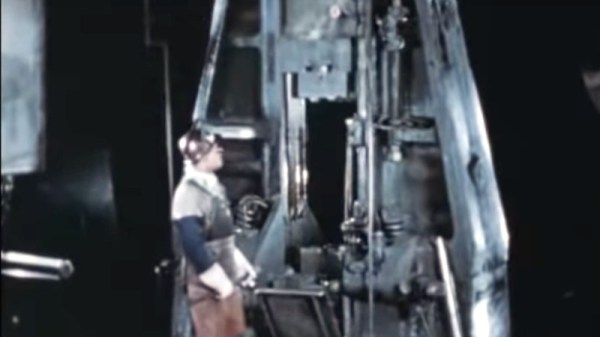
It is the norm for our Retrotechtacular series to concentrate on a technology that has passed out of use but is still of interest to Hackaday readers, so it is perhaps unusual now to feature one that is very much still with us. Drop forging is a technique for forming hot metal in dies under huge force, and while it is still a current technique the 1950s educational film we are featuring is definitely retro.

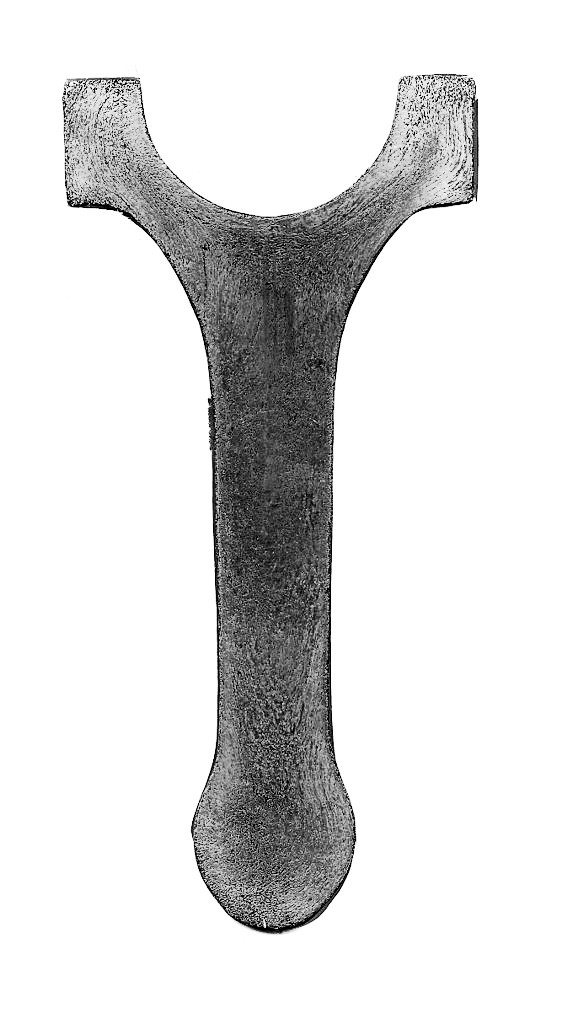
An automotive connecting rod, sectioned and acid treated to show the grain structure. (CC BY-SA 2.5)

If you have followed our occasional series on blacksmithing, you’ll be familiar with the process of forming metal by heating it to a temperature at which it becomes malleable enough to deform under pressure, and using a hammer to shape it against an anvil. This process not only shapes the metal, but also forms its inner grain crystal structure such that with careful management the forging process can impart significant resistance to fatigue in the finished item. Think of drop forging as automation of the manual blacksmithing process, with the same metallurgical benefits but in which the finished product is shaped in a series of dies rather than by the blacksmith’s hammer. It loses the craft of the smith over the process, but delivers an extremely consistent result along with a high production turnover.

The film that we’ve placed below the break is an in-depth introduction to the industry in a very period style and with components for the automotive, aerospace, and defense industries of the day. It takes the viewer through the different types of press and examines the design of dies to produce in stages the required grain structure and shapes.

Of particular interest is the section on upset forging, a technique in which a piece of steel stock is forged end-on rather from above. The components themselves make the video worth watching, as we see everything from jet turbine blades to medical forceps in production, along with many parts from internal combustion engines. The smallest piece shown is a tiny carburetor part, while the largest is a huge aircraft carrier catapult part that requires a special vehicle to load it into the press.

Drop forging is generally the preserve of a large metalworking factory due to the size of the presses involved. But it’s not entirely beyond the capabilities of our community given the resources of a well-equipped hackerspace or blacksmith’s shop. My father made simple forging dies by assembling a basic shape in weld and pieces of steel stock before grinding it to his requirements and heat treating. Mounted in a large rotary fly press for repetitive small scale shaping and forming tasks in ornamental ironwork, I remember bumping them out from red hot steel bar in my early teens.

This is one of those techniques that’s useful to know about in our community, because while the need to manufacture significant quantities of ornamental ironwork may not come your way too often, it’s still worth having the capability should you need it. Meanwhile the video below the break should serve to provide you with enough heavy machinery enjoyment to brighten your day.

Continue reading “Retrotechtacular: Forging In Closed Dies”

3D Printing Damascus-like Steel

Recreating Damascus steel remains a holy grail of materials science. The exact process and alloys used are long ago lost to time. At best, modern steelworking methods are able to produce a rough visual simulacra of sorts that many still consider to be pretty cool looking. Taking a more serious bent at materials science than your average knifemaker, a group of scientists at the Max Planck institute have been working to create a material with similar properties through 3D printing.

The technology used is based on the laser sintering of metal powders. In this case, the powder consists of a mixture of iron, nickel and titanium. The team found that by varying the exact settings of the laser sintering process on a layer-by-layer basis, they could create different microstructures throughout a single part. This allows the creation of parts that are ductile, while remaining hard enough to be sharpened – a property which is useful in edged weapons like swords.

While the process is nothing like that used by smiths in Damascus working with Wootz steel, the general idea of a metal material with varying properties throughout remains the same. For those eager to get into old-school metalwork, consider our articles on blacksmithing. For those interested in materials research, head to a good university. Or, better yet – do both!

[Thanks to Itay for the tip, via New Atlas]

Building A Scooter Exhaust From Scrap Metal

When a part on a vehicle fails, oftentimes the response is to fit a new one fresh out the box. However, sometimes, whether by necessity or simply for the love of it, it’s possible to handcraft a solution instead. [Samodel] does just that when whipping up a new exhaust for his scooter out of scrap metal.

It’s a great example of classic backyard metalworking techniques. The flange is recreated using a cardboard template rubbed on the exhaust port, with the residual oil leaving a clear impression. Hard work with a grinder and drill get things started, with an insane amount of filing to finish the piece off nicely. A properly tuned pipe is then sketched out on the computer, and a paper template created. These templates are cut out of an old fridge to create the main muffler section.

There’s plenty of other hacks, too – from quick and dirty pipe bends to handy sheet forming techniques. It’s not the first time we’ve seen great metalworking with scrap material, either. Video after the break.

[Thanks to BrendaEM for the tip]

Continue reading “Building A Scooter Exhaust From Scrap Metal”